Noktic runs on your own computer, so getting started is entering a license key and telling it about the work you do. About ten minutes from install to an exported PDF.
Set Up
- Activate. Enter your license key, accept the Terms, and click Activate License.
- Fill in your profile. Go to Settings, then User Profile. Your name, organization, address, contact details, logo, and a drawn signature. Each one becomes a variable that goes into every document and form you write, so it is worth doing once, up front.
- Optional: Templates in the sidebar holds ready-made documents. Open one to see variables placed in a page before you write your own.
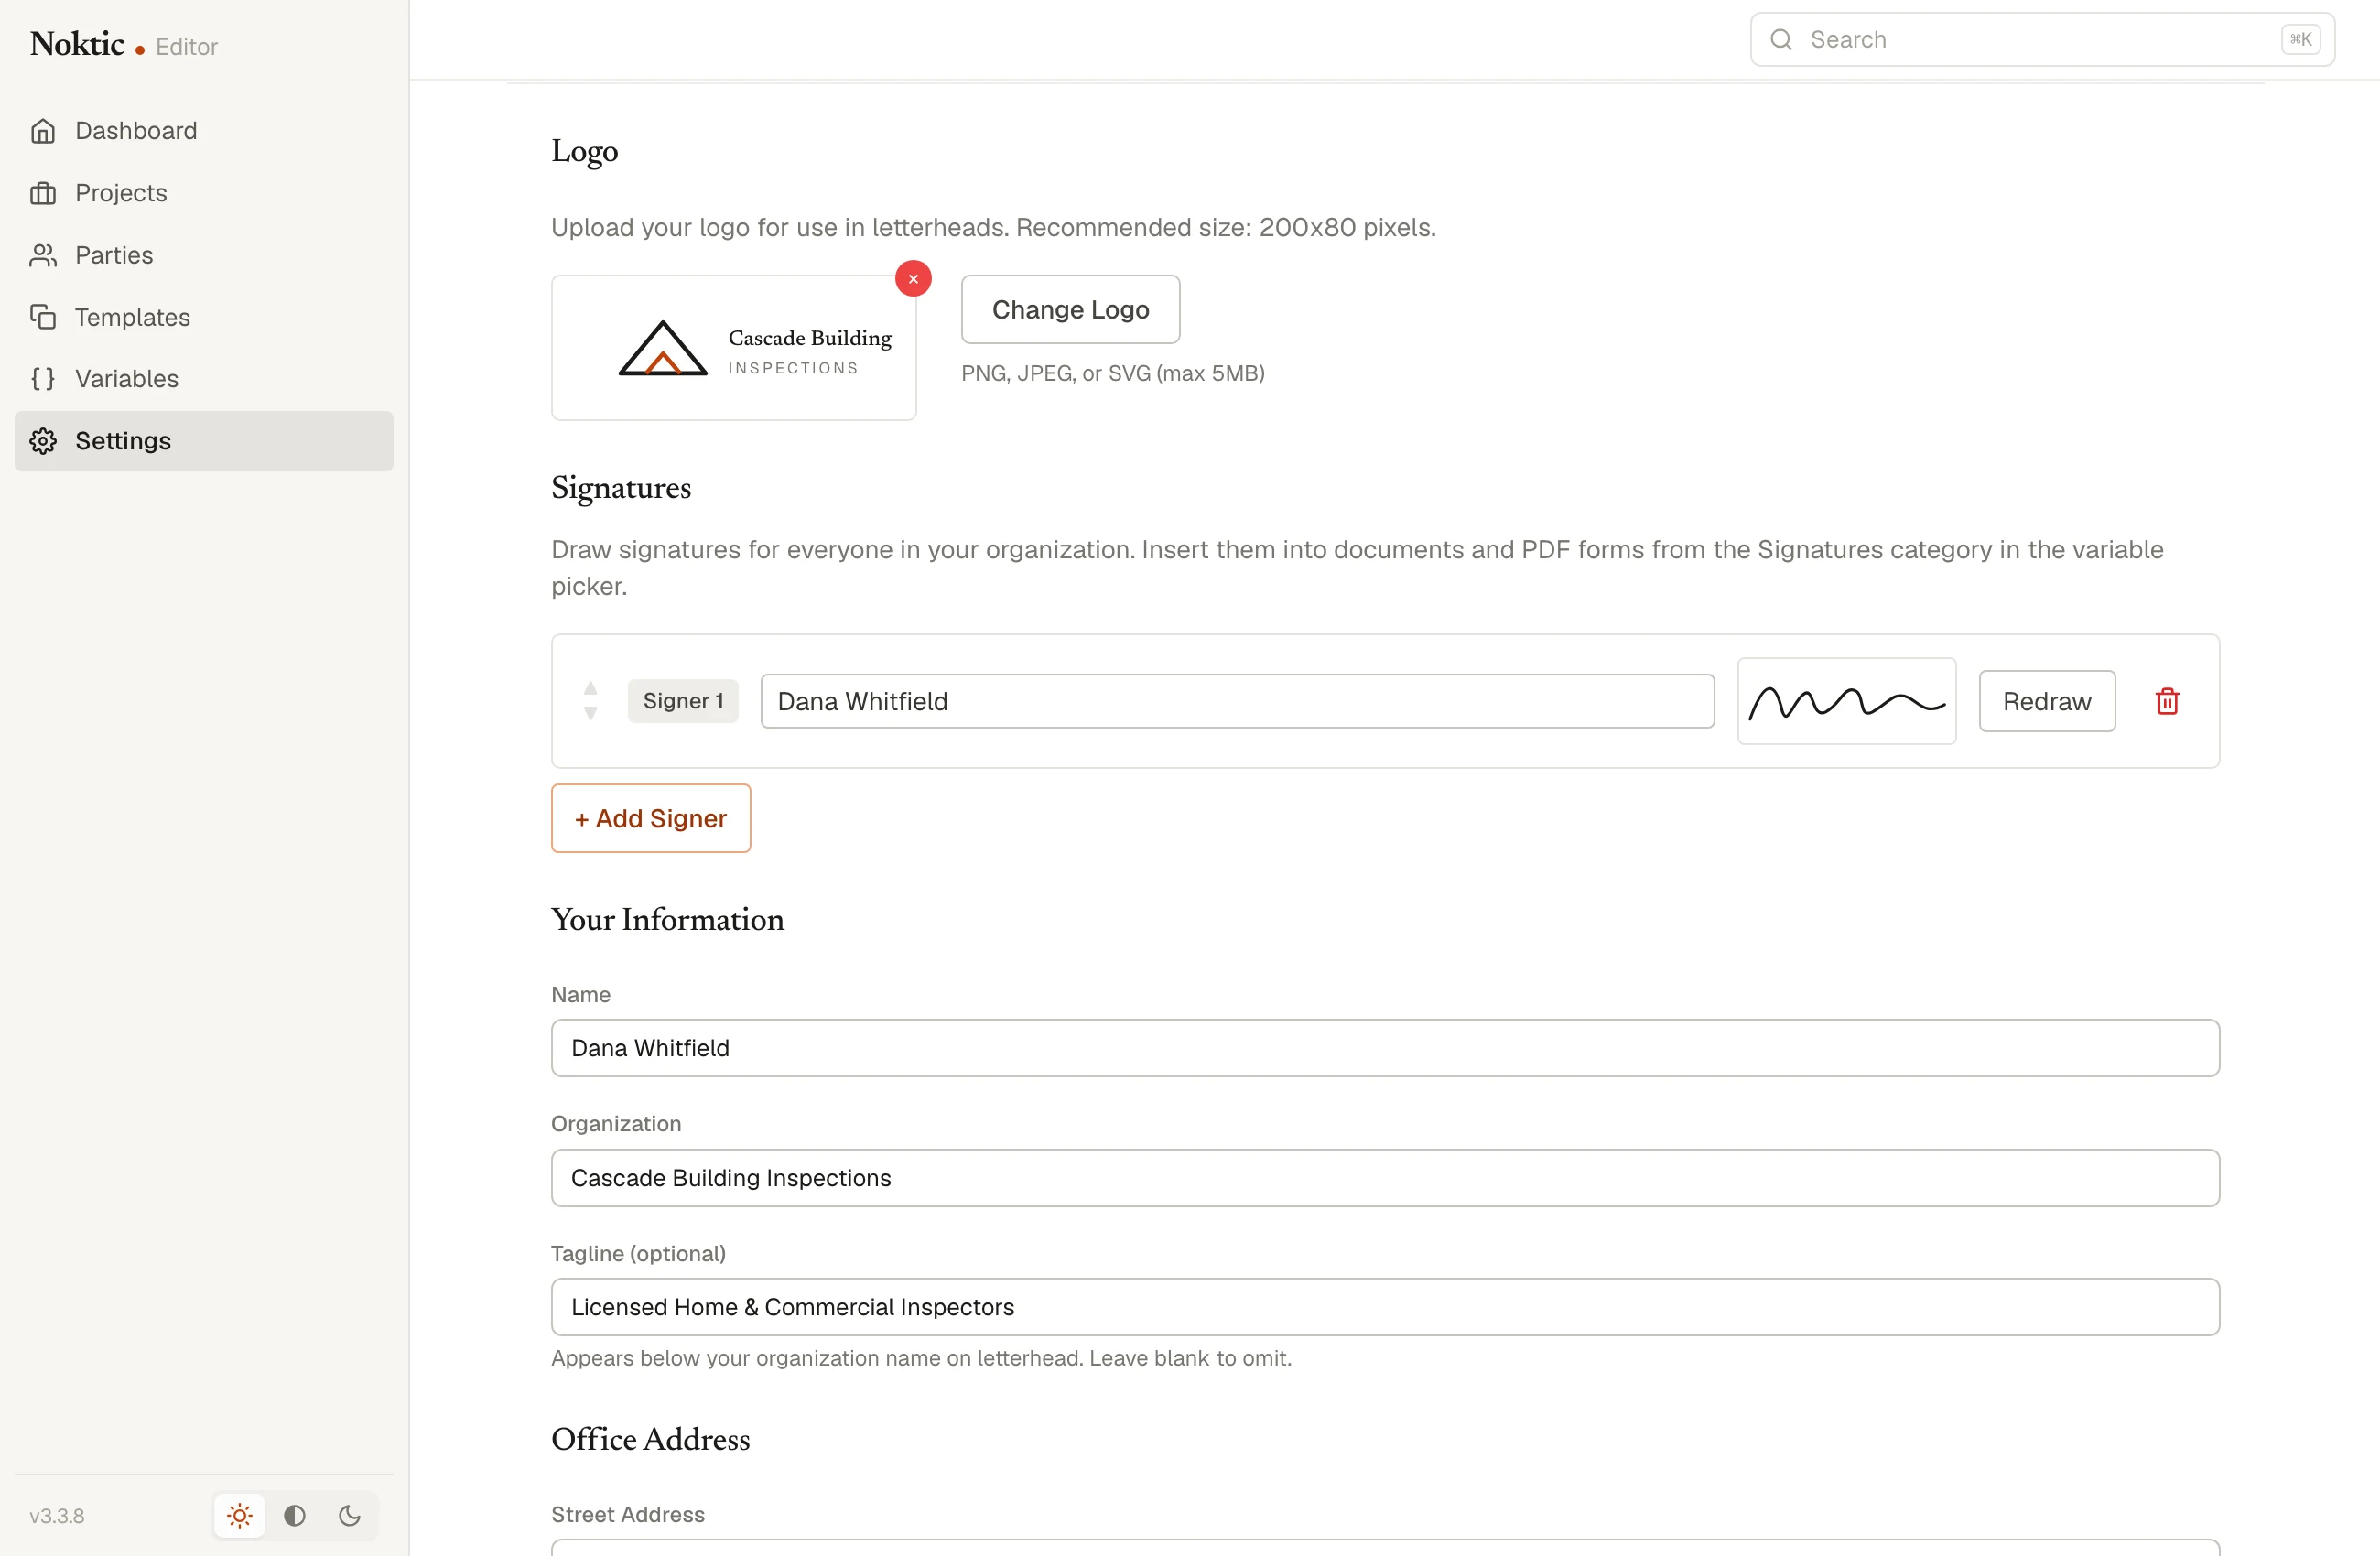
Settings → User Profile: your details, logo, and signature, entered once. - Create a project. Go to Projects, then New Project. Pick the kind of work it is, give it a title, and the project’s form opens. Your field probably calls this a matter, a claim, an engagement, or a job. In Noktic it is a project: one piece of work with its own people, files, and documents.
- The form is yours to shape. Add field puts a new detail on it, named however your work names it. Job No., Claim No., Site Address, Date of Loss. Add section groups fields under a heading, and sections drag into whatever order you want.
- Every field is a variable. Whatever you type into it is ready to drop into any document or form in the project.
- Add the parties. In the project’s Parties section, click Add party for anyone who appears in your documents: the owner, the claimant, the agency, the contact at the other company. Give each a role in your own words, and open Details… for the rest of their information. Their details are variables too, and a party you add once is there for the next project.
- Add your files. Open the project’s Evidence Locker. Click Add Evidence or drag PDFs and images straight in. Make, rename, and nest folders however you like. Anything in the locker is citable from any document in the project.
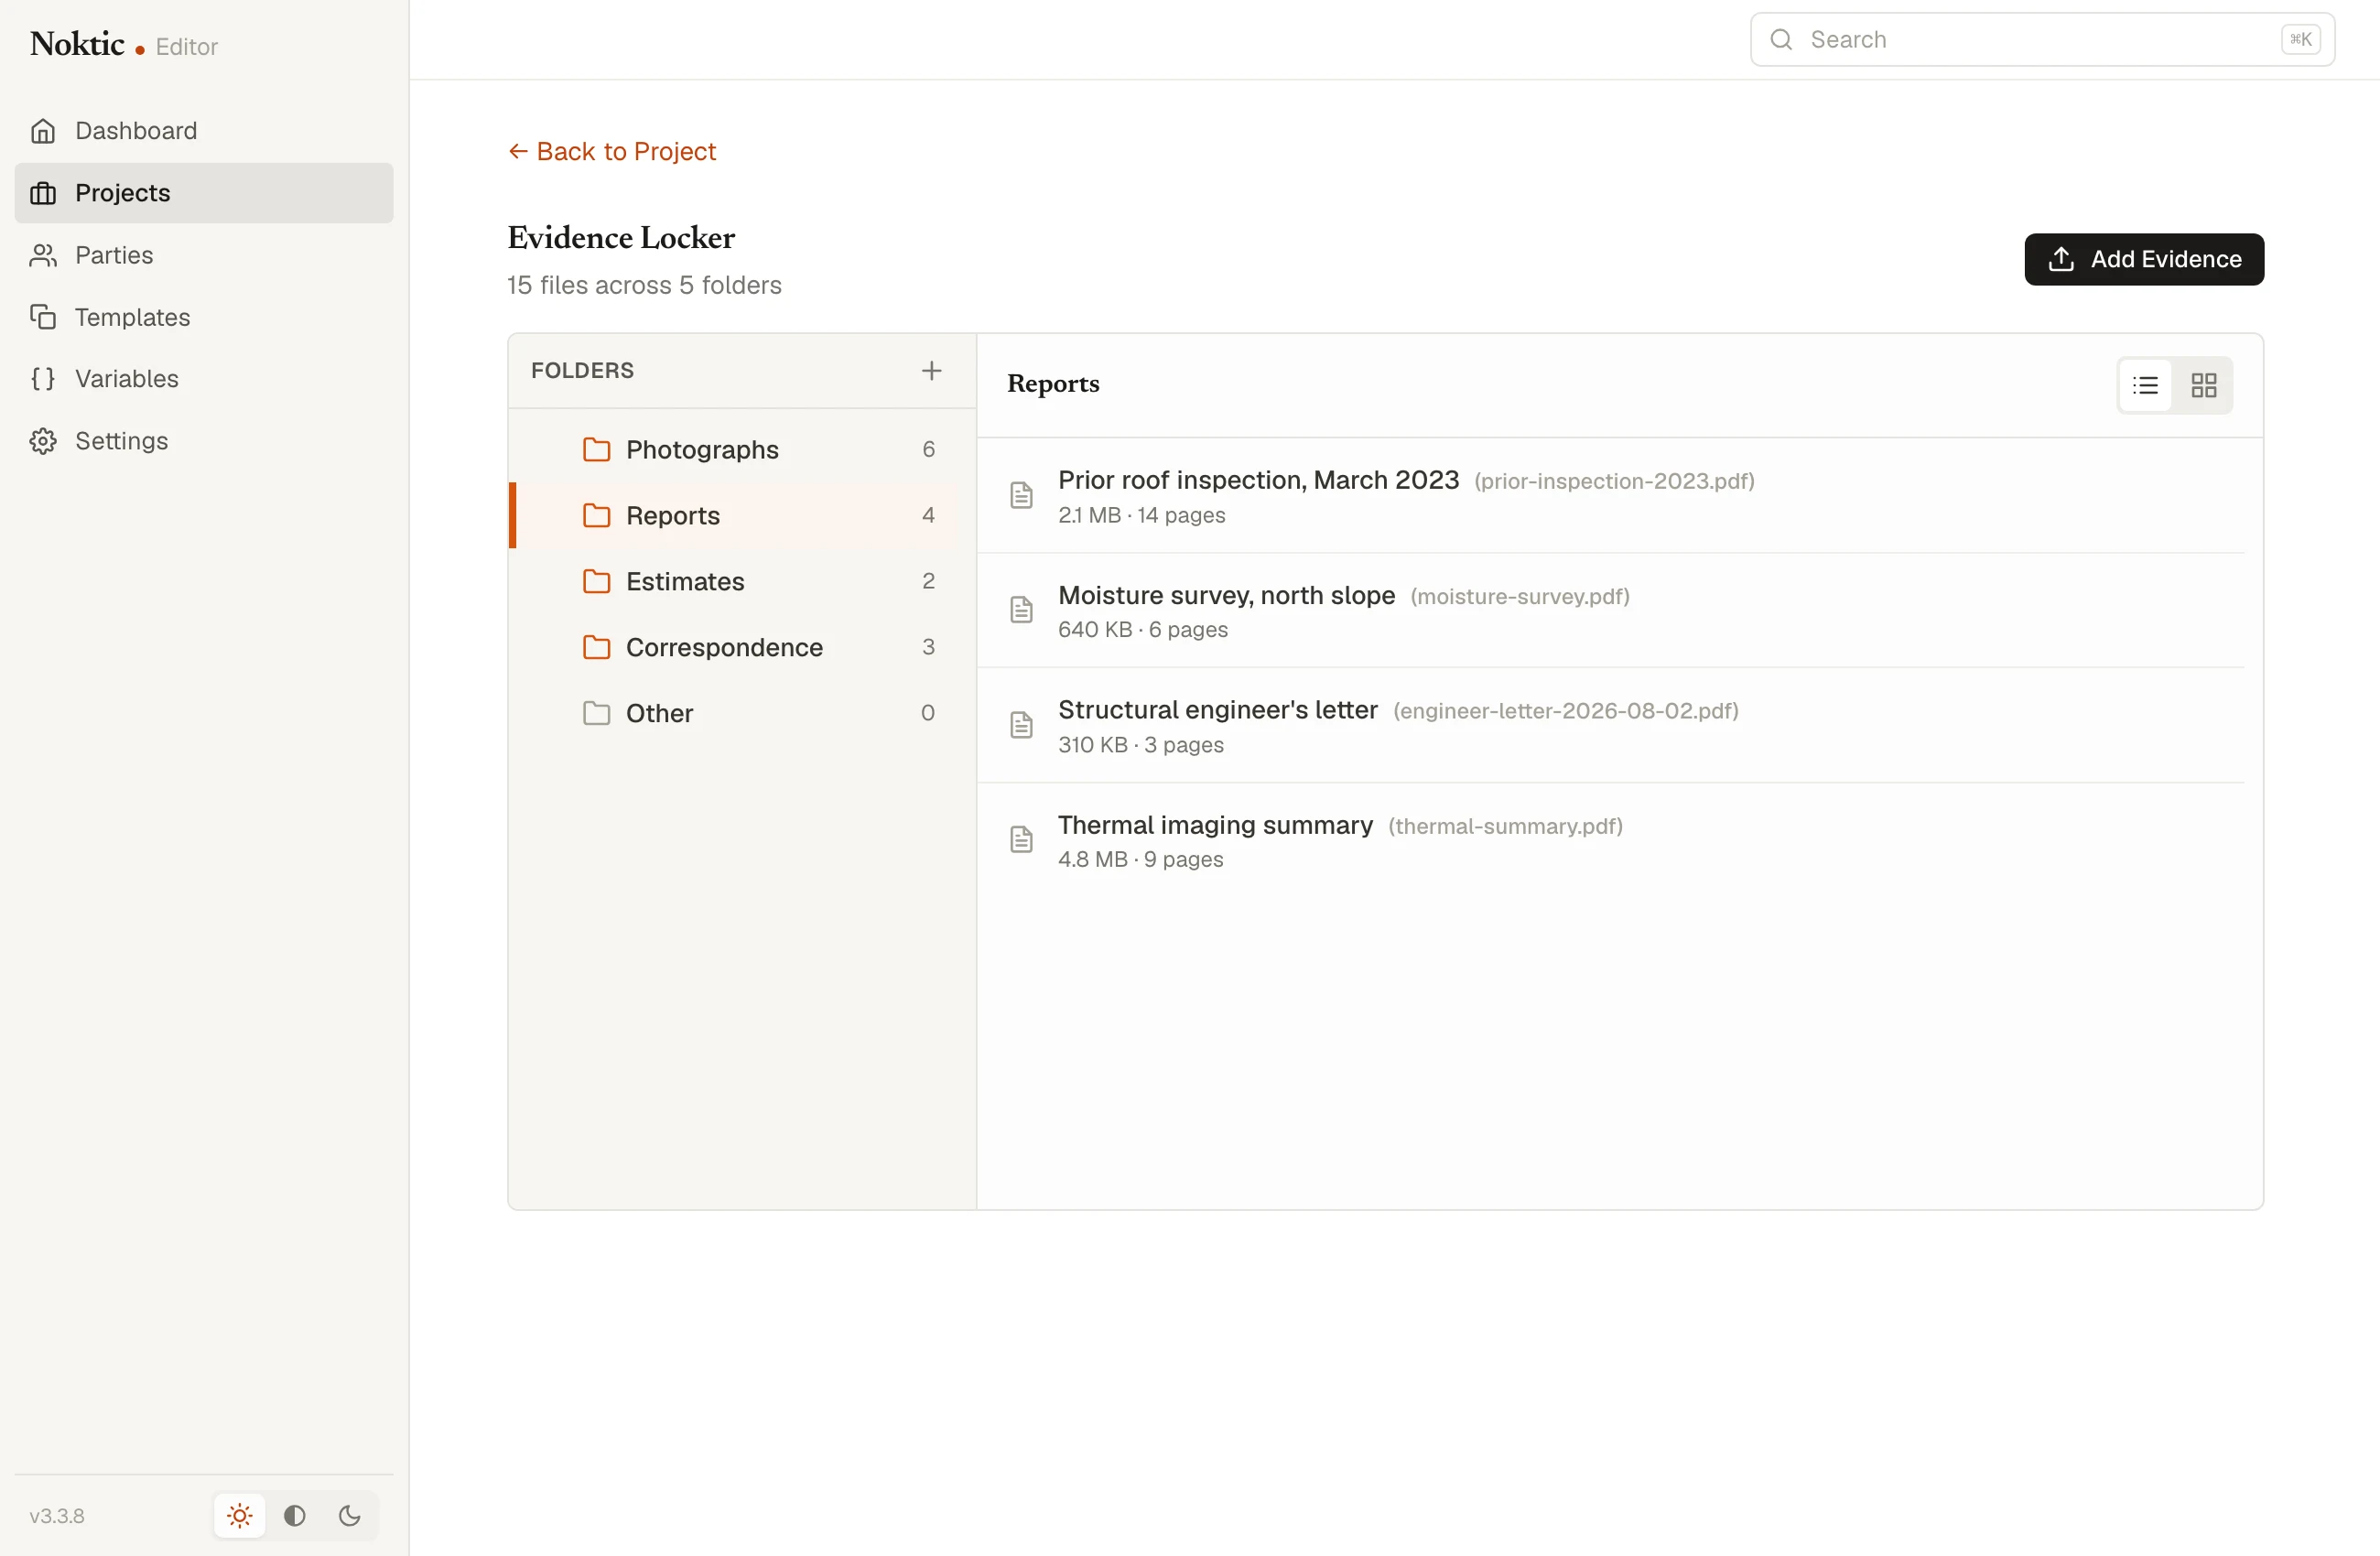
The Evidence Locker: drag files into folders, then cite them from any document.
Documents
Draft a Document
- From the project, click Create Document and choose a layout: Document for reports and anything long, Letter for correspondence on your letterhead, or 28-Line for numbered-line paper. The document opens with its title in the bar above the toolbar. Click the title to change it, then start writing, or pick a template from the toolbar and start from that.
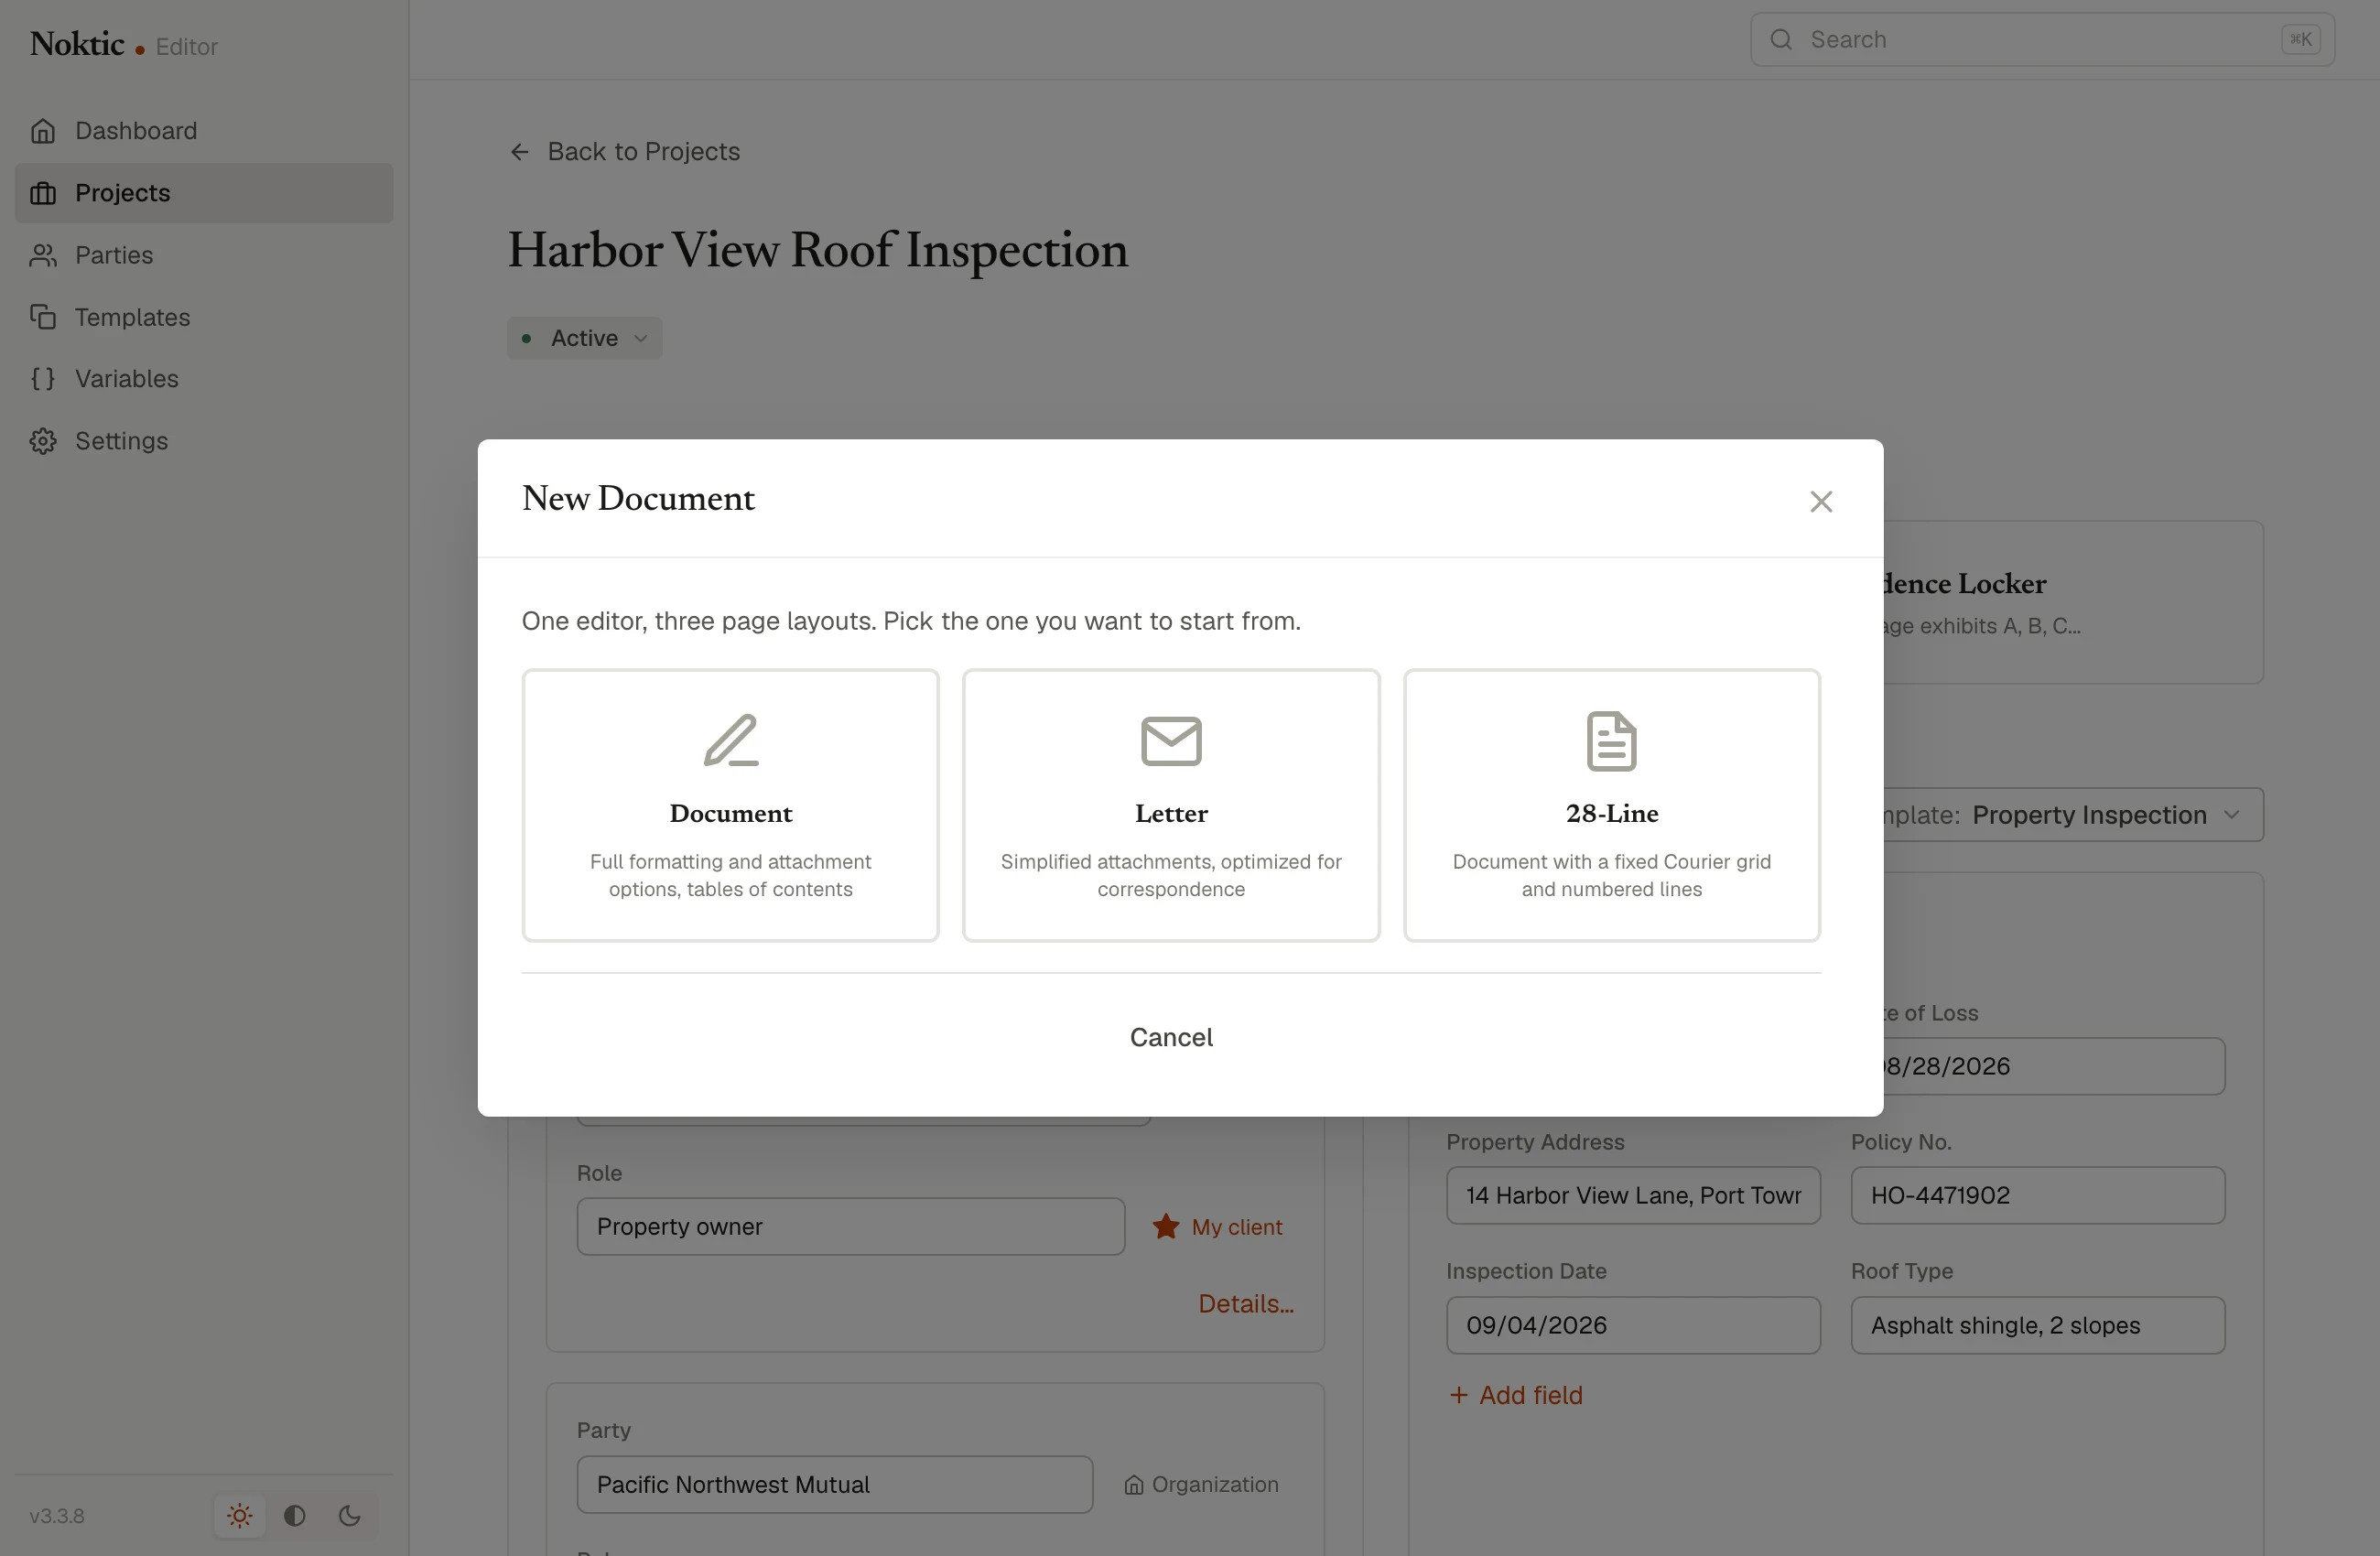
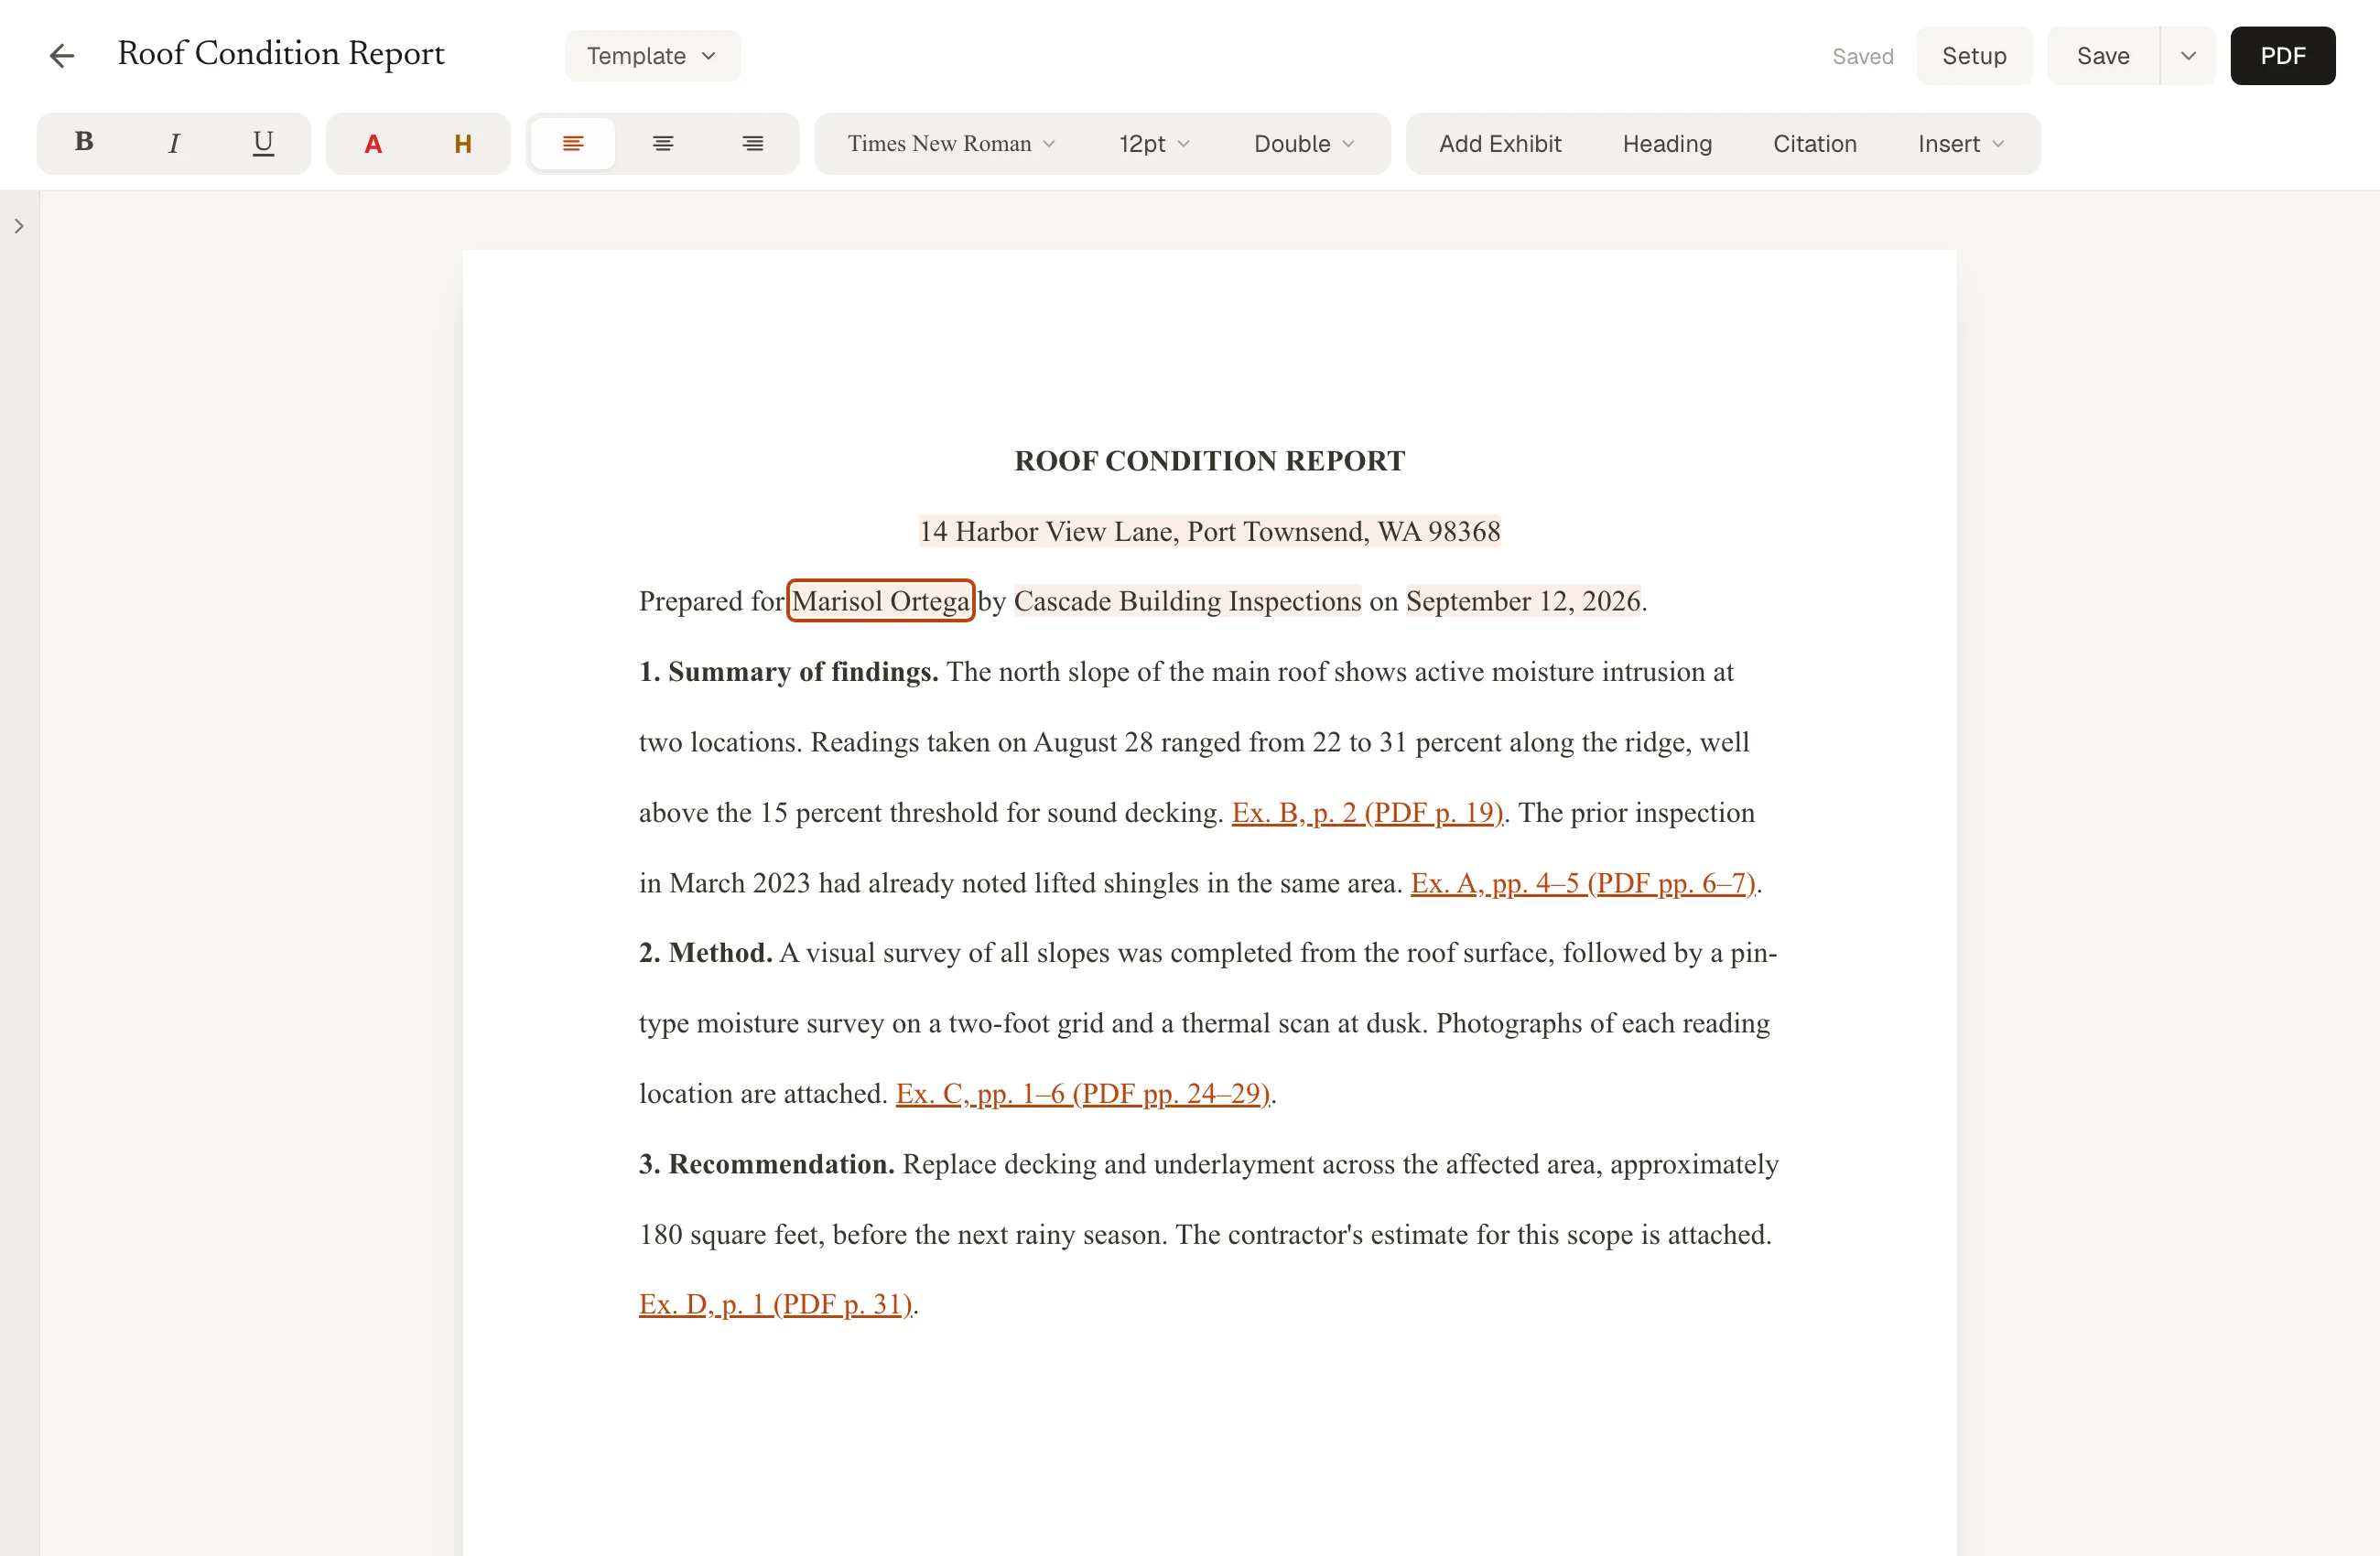
New Document: Document, Letter, or 28-Line. - Insert a variable. Press Cmd+Shift+V (Ctrl+Shift+V on Windows), or use Insert → Variable…, and pick from the list. The pill fills in from the project. Click any pill to set its casing (ABC or Abc), choose a format where one applies (dates offer several), or Lock it so the value stays as it is now, even if the project changes later.
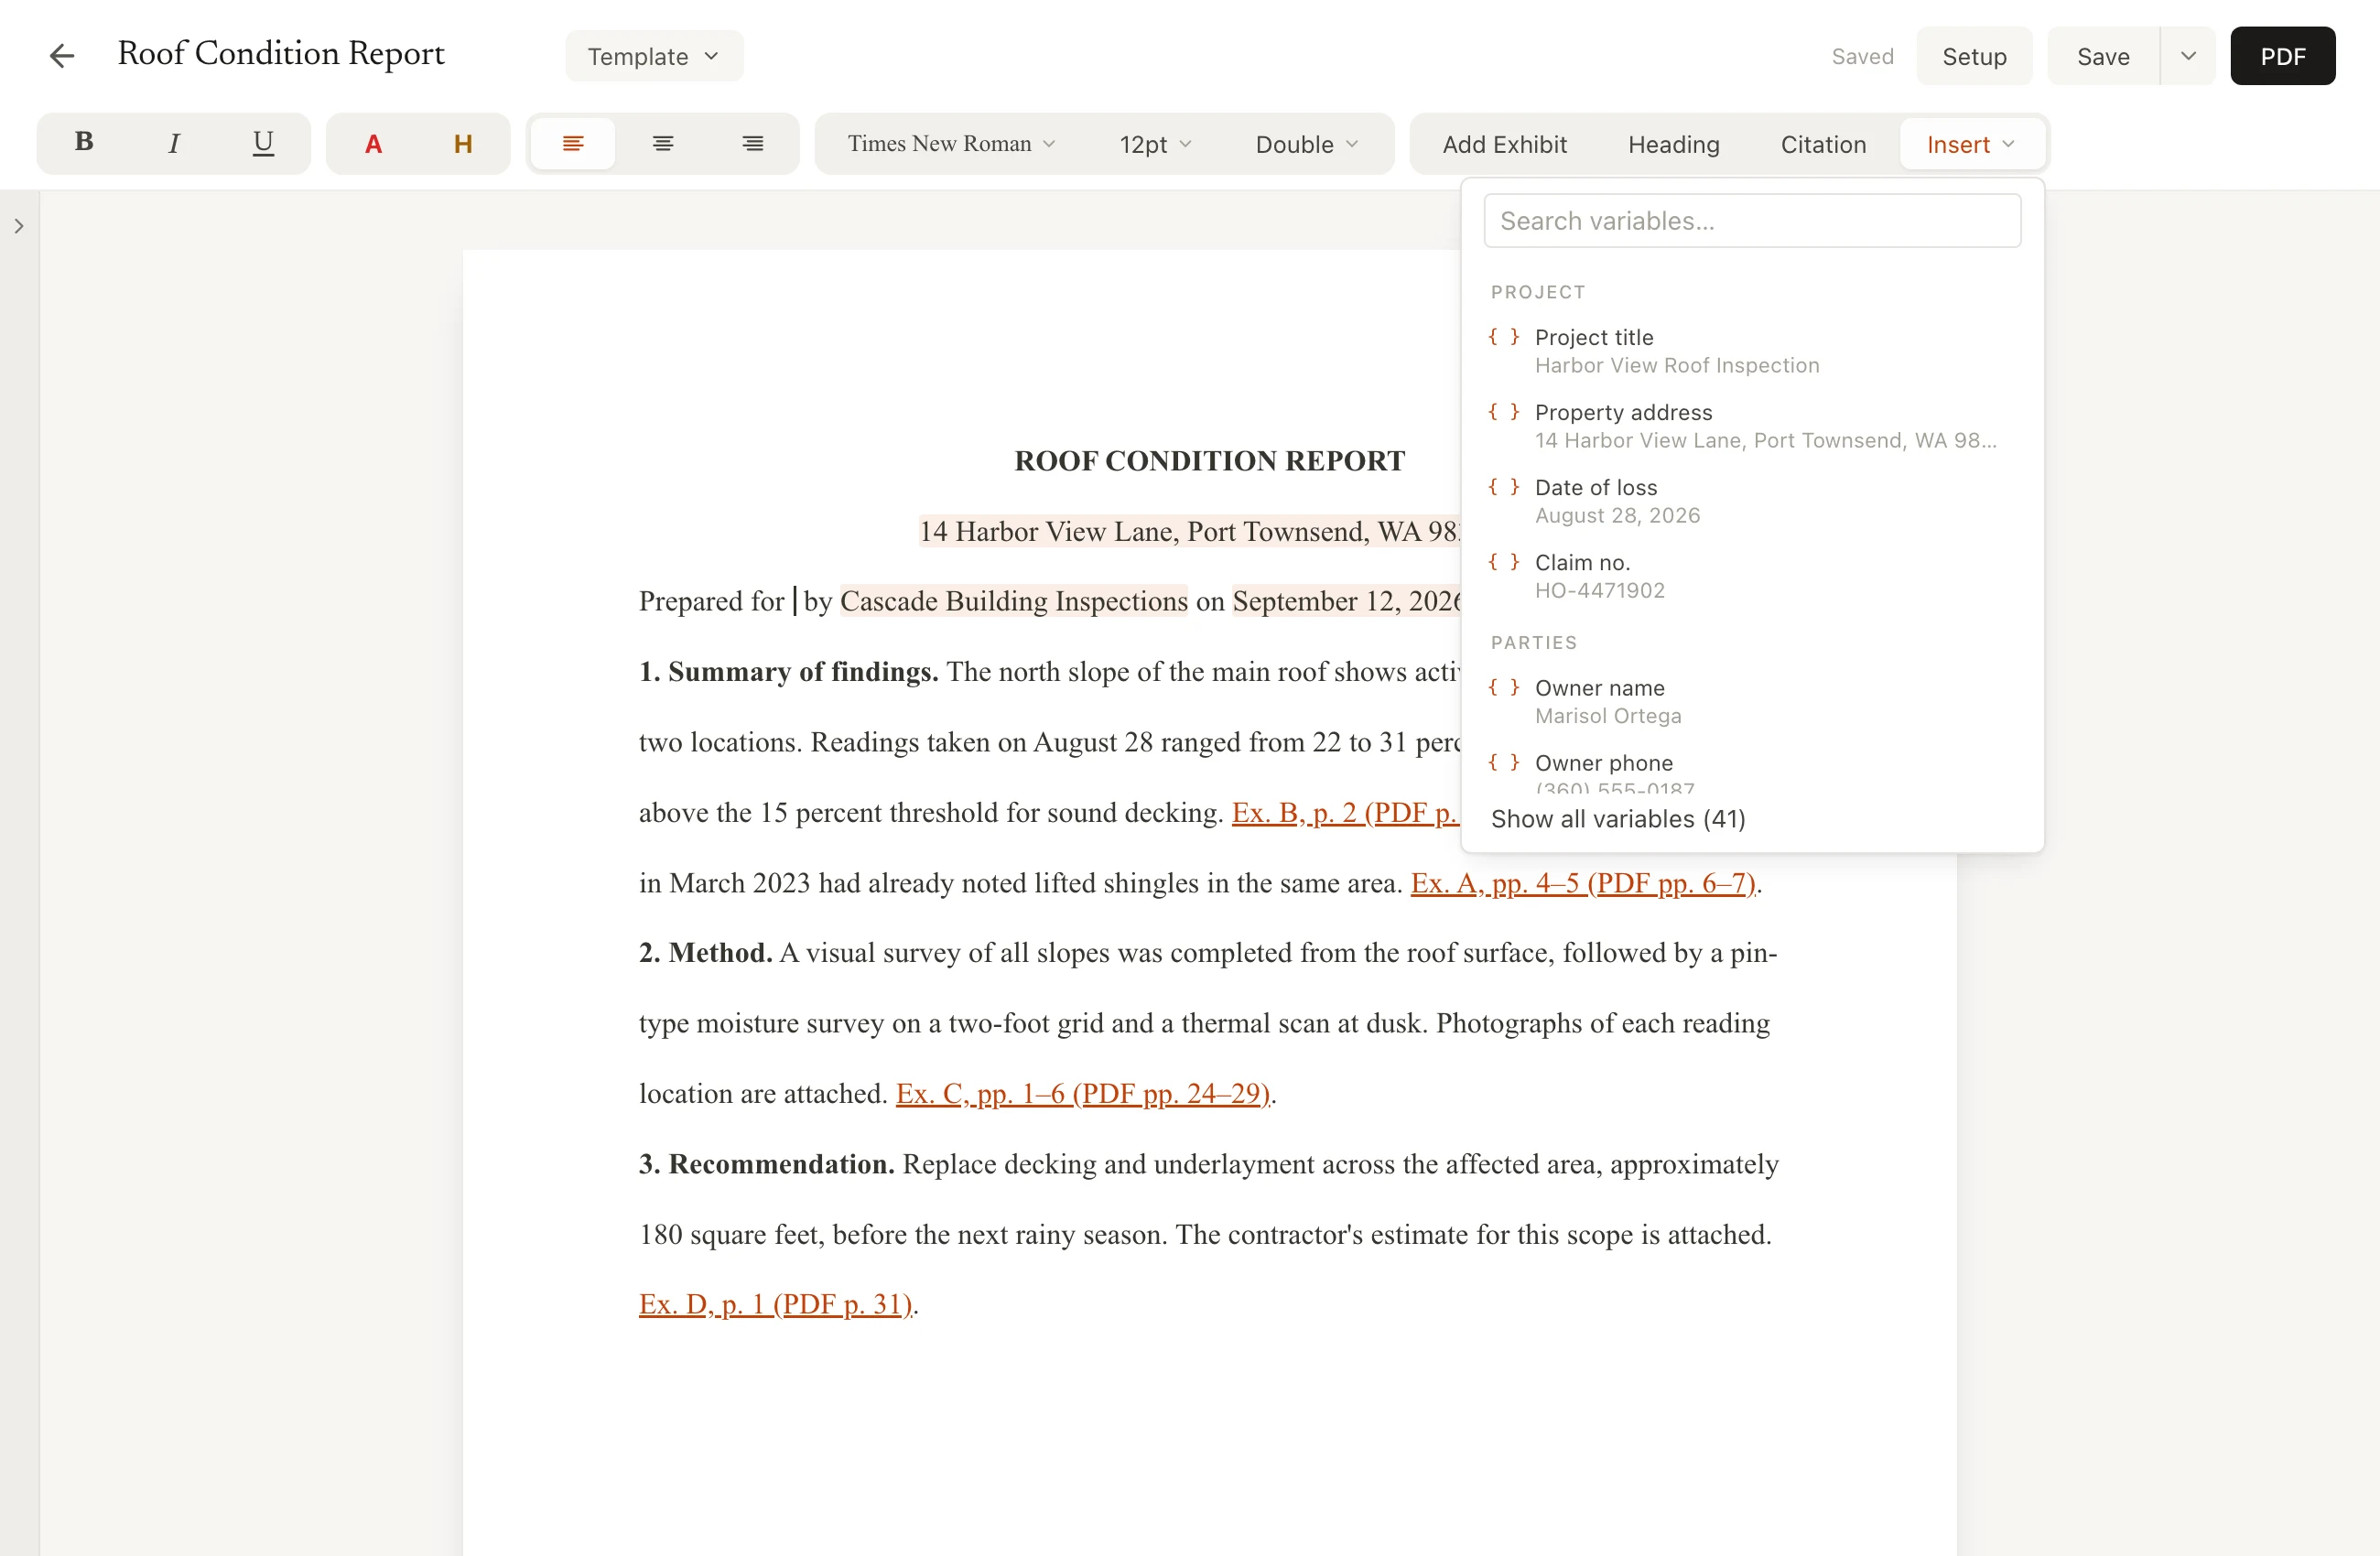
1. Pick a variable from the list
2. It fills in from the project
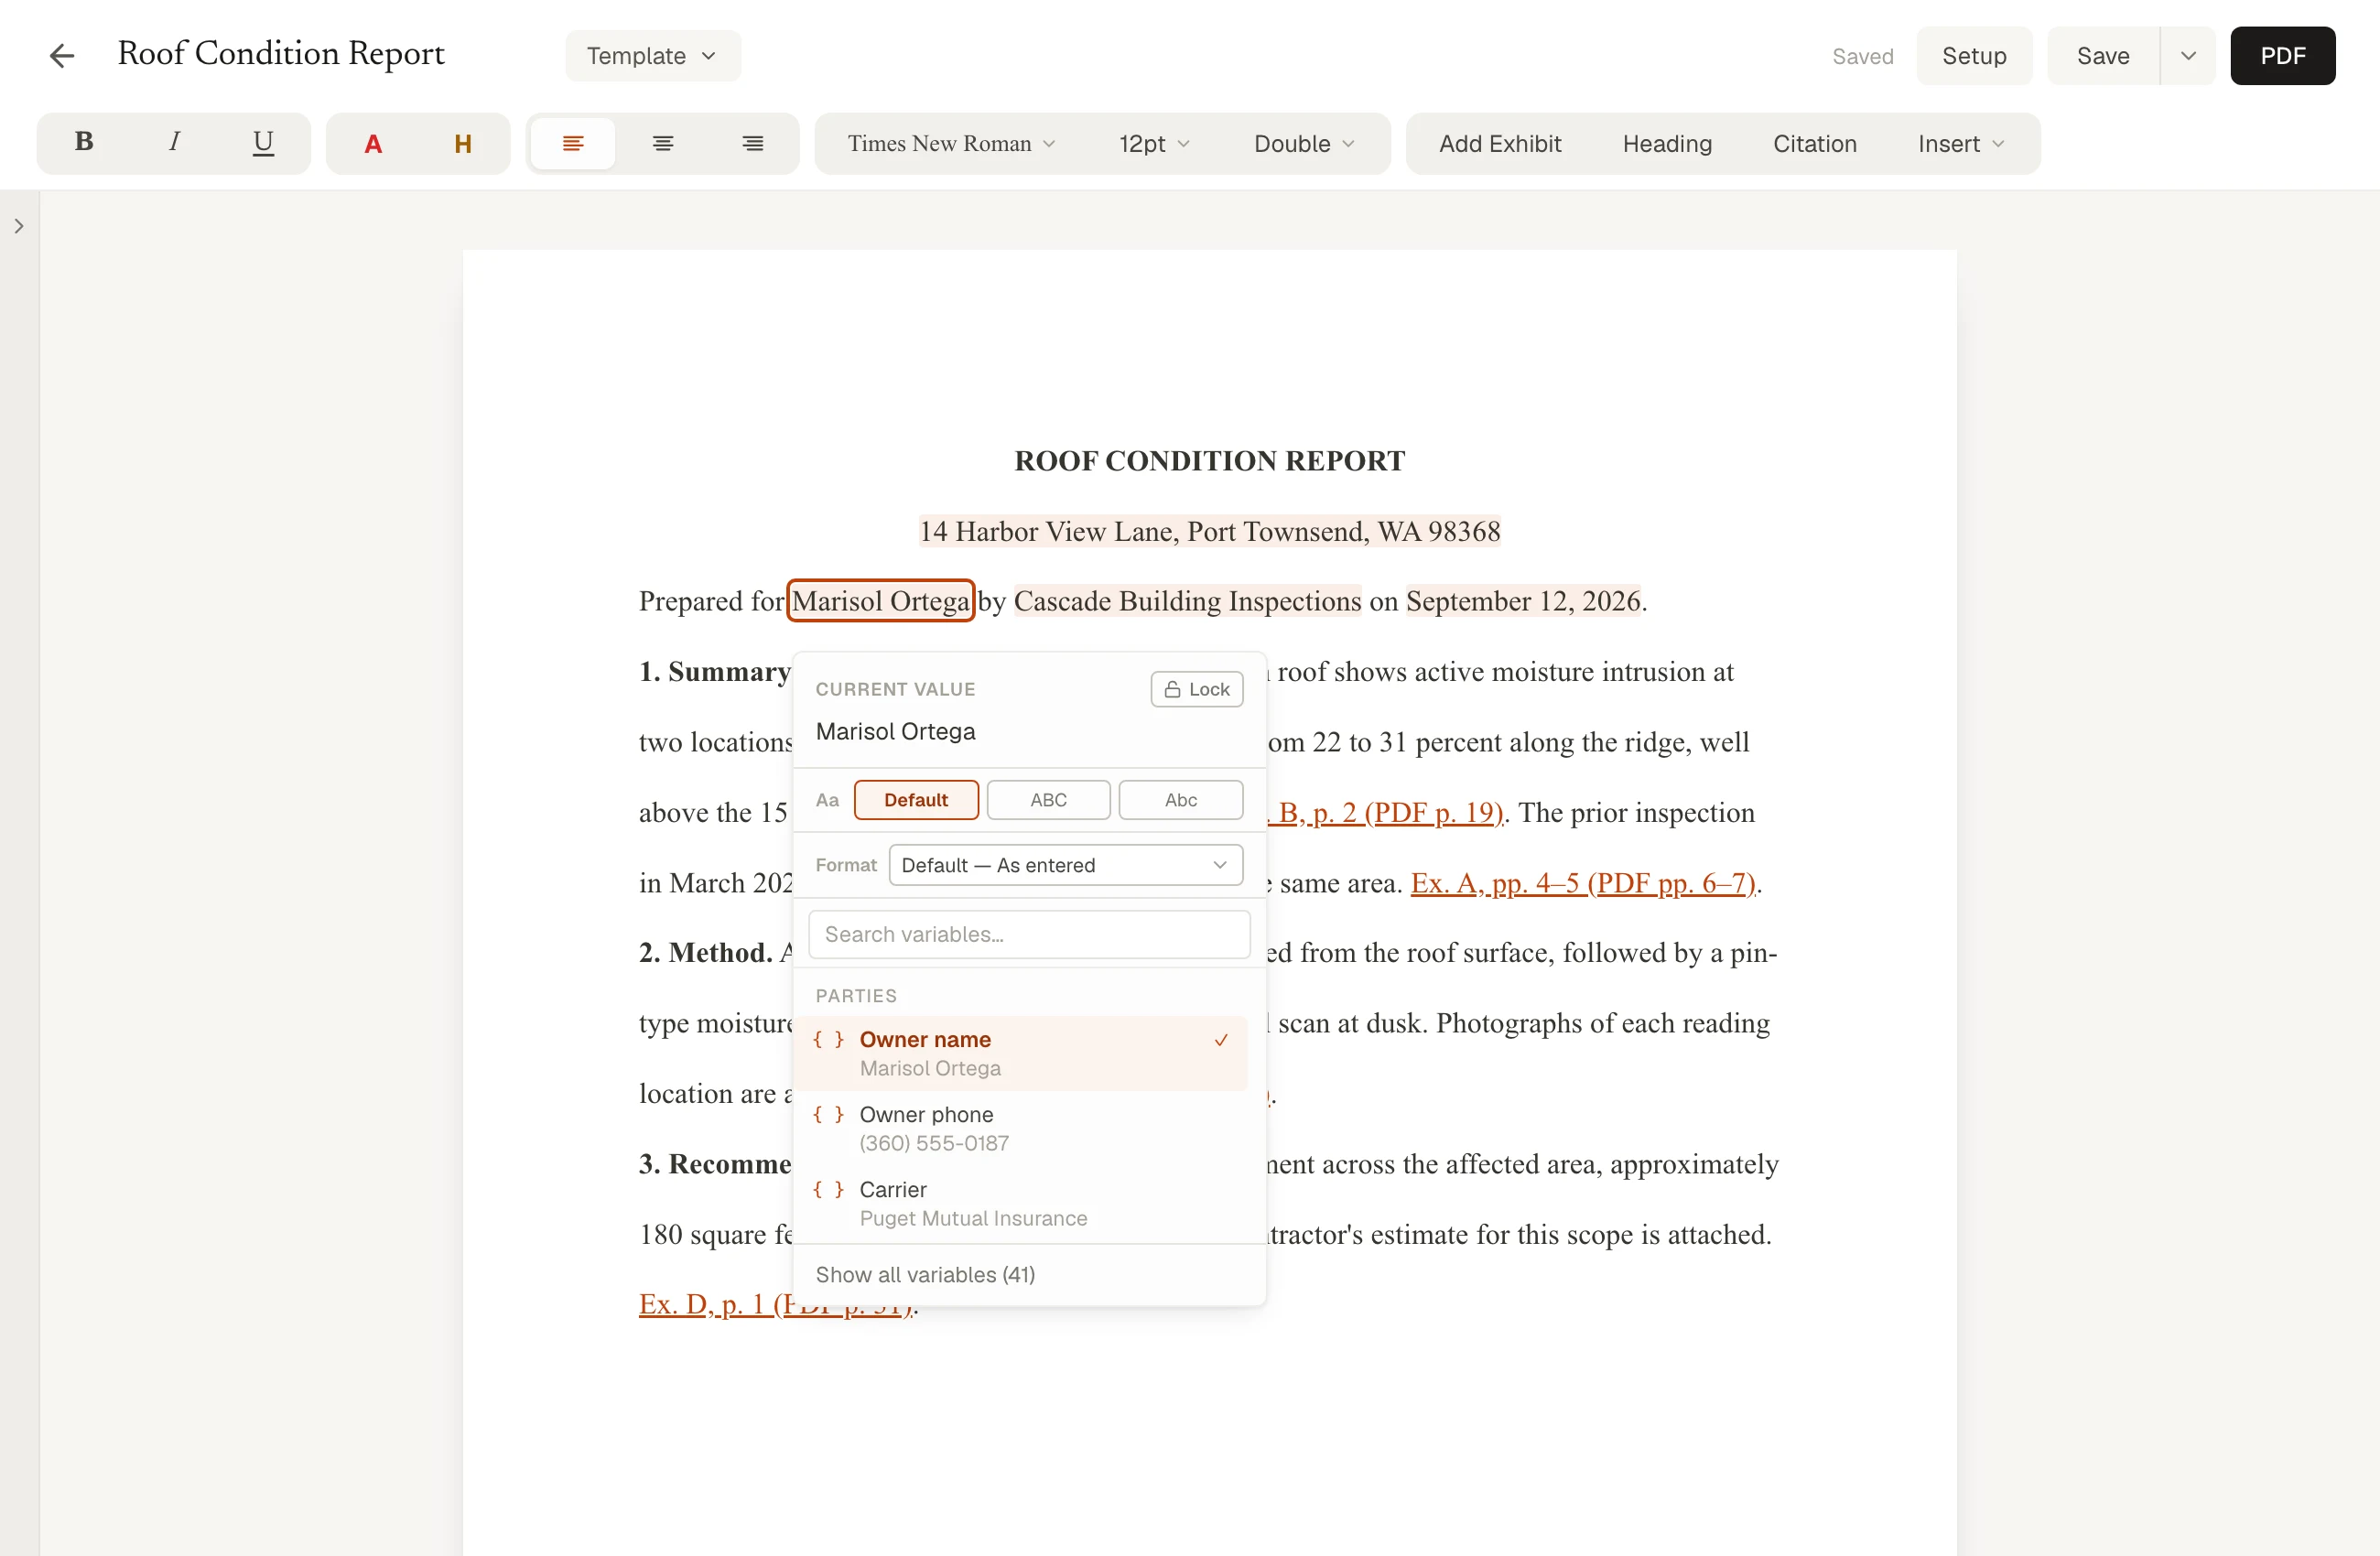
3. Click it to set casing, format, or lock
Insert a variable, it fills in from the project, and a click sets casing, format, or lock. - Cite a file. Put the cursor where the reference goes and press Cmd+Shift+X (Ctrl+Shift+X on Windows), or use Insert → Exhibit…. Pick the file and the page, or a page range. Noktic assigns the letter and inserts the reference, Ex. A, p. 3 (PDF p. 63) by default. Add, remove, or reorder files later and every reference in the document updates itself.
- The word is yours. Page Setup sets what the document calls them, exhibits, appendices, attachments, or addenda, and how a reference reads. The cover sheets and the index follow.
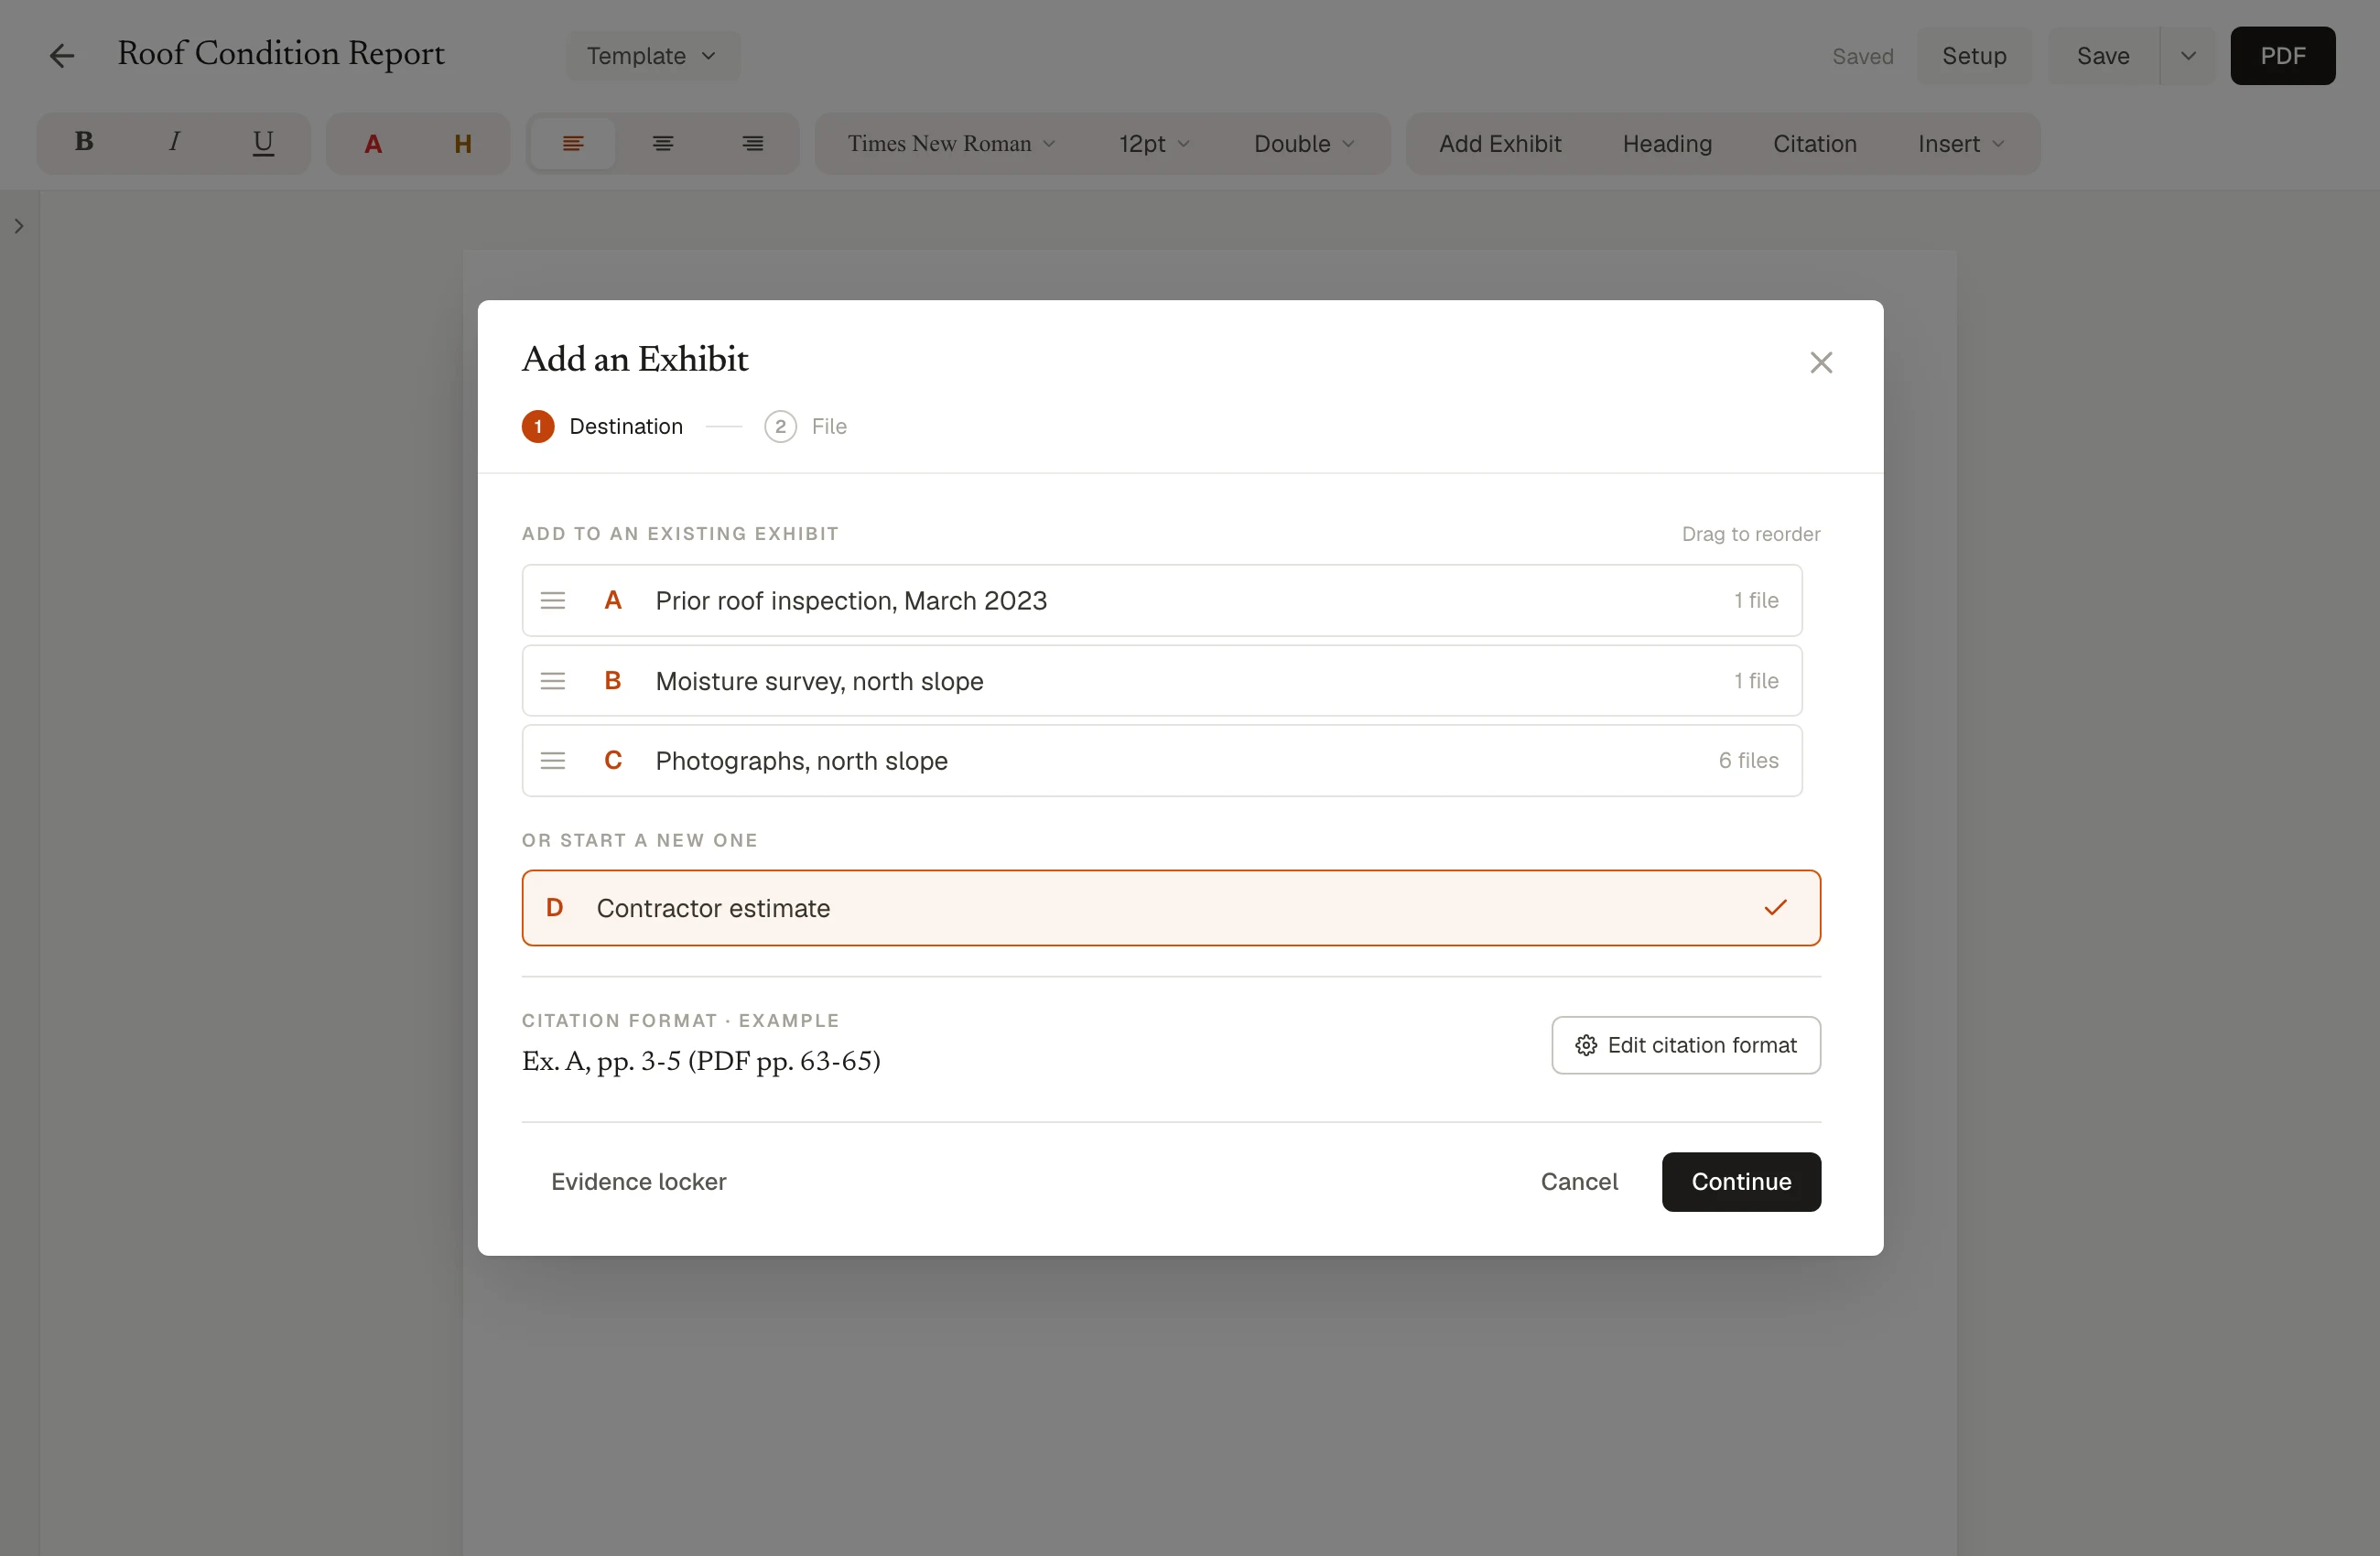
1. Name the exhibit
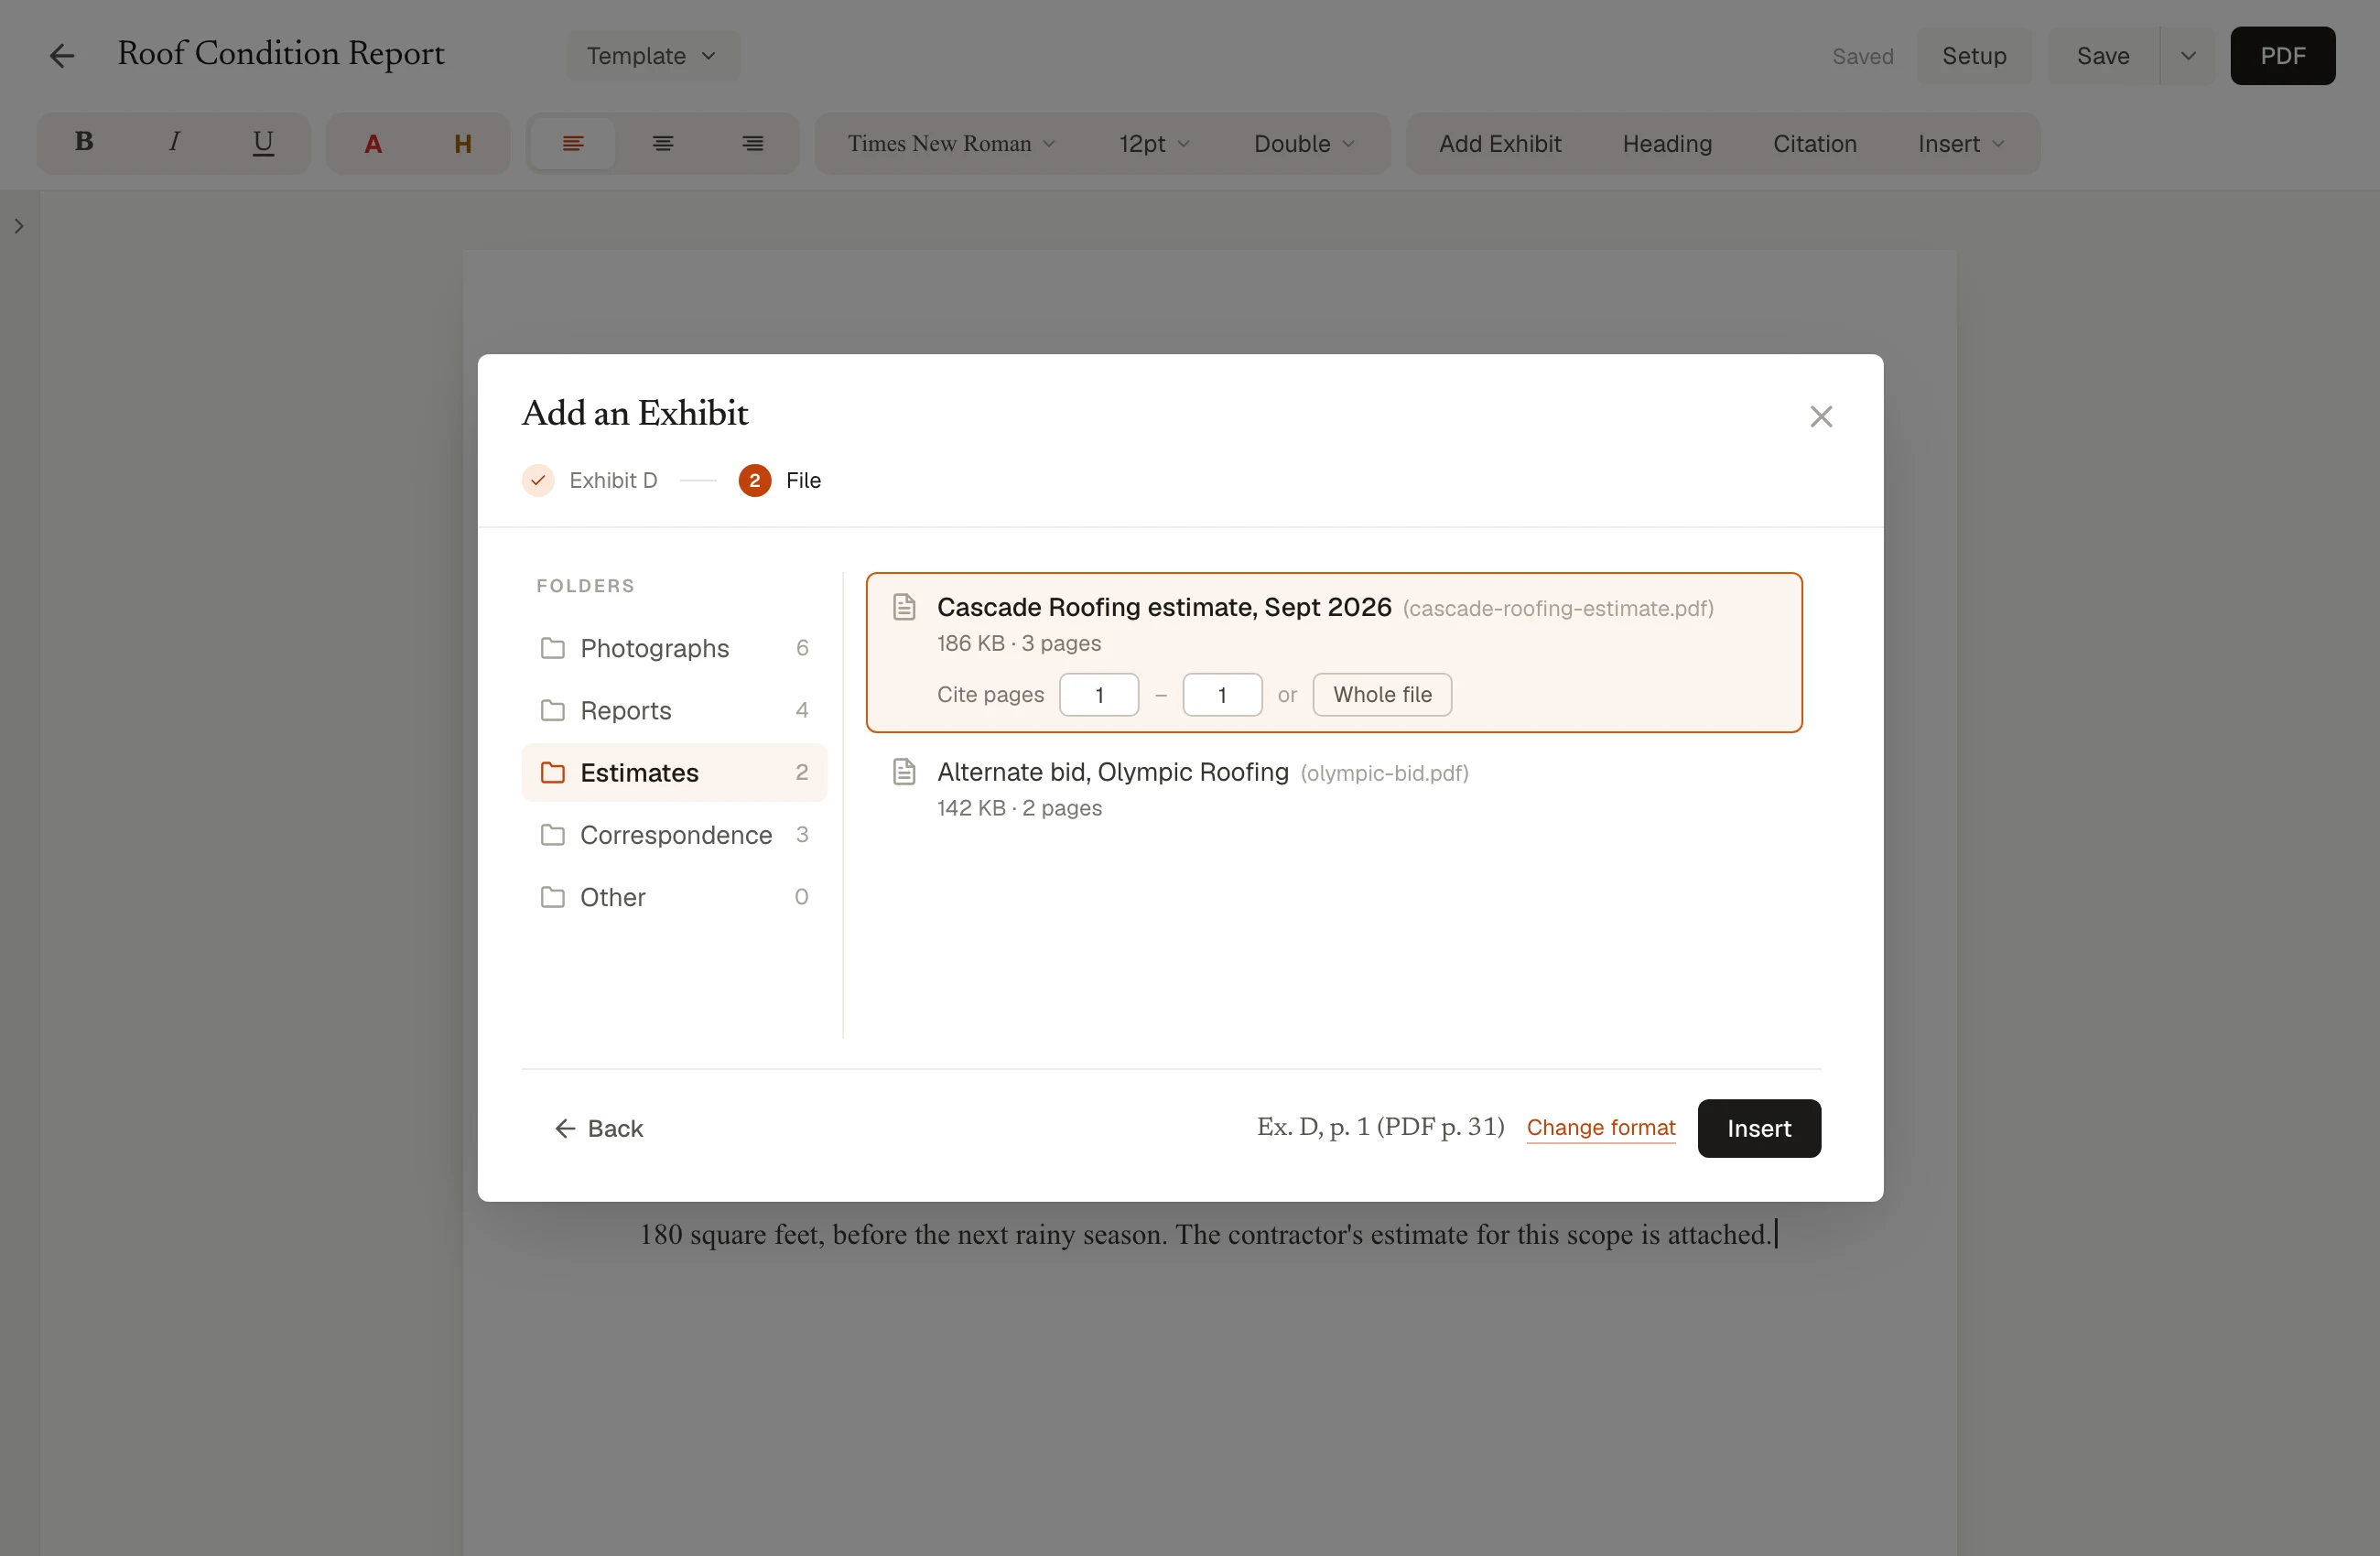
2. Pick the file and the page

3. The reference, now a live link
Citing a file: name it, pick the file and page, and the reference drops in as a live link. - Insert a snippet. Use Insert → Snippets… to drop in a paragraph you have saved. To save one, select the text and choose Save Snippet. A snippet keeps any variables inside it, so it arrives already filled in for the project you drop it into.
- Add a table of contents (optional). Select a heading and press Cmd+Shift+H (Ctrl+Shift+H on Windows), then pick its level. Type the heading’s own label, A, II, 3, whatever the document uses, and the table shows it as written. Place the table with Insert → Insert TOC. It builds as you write, and the page numbers update as the document changes.
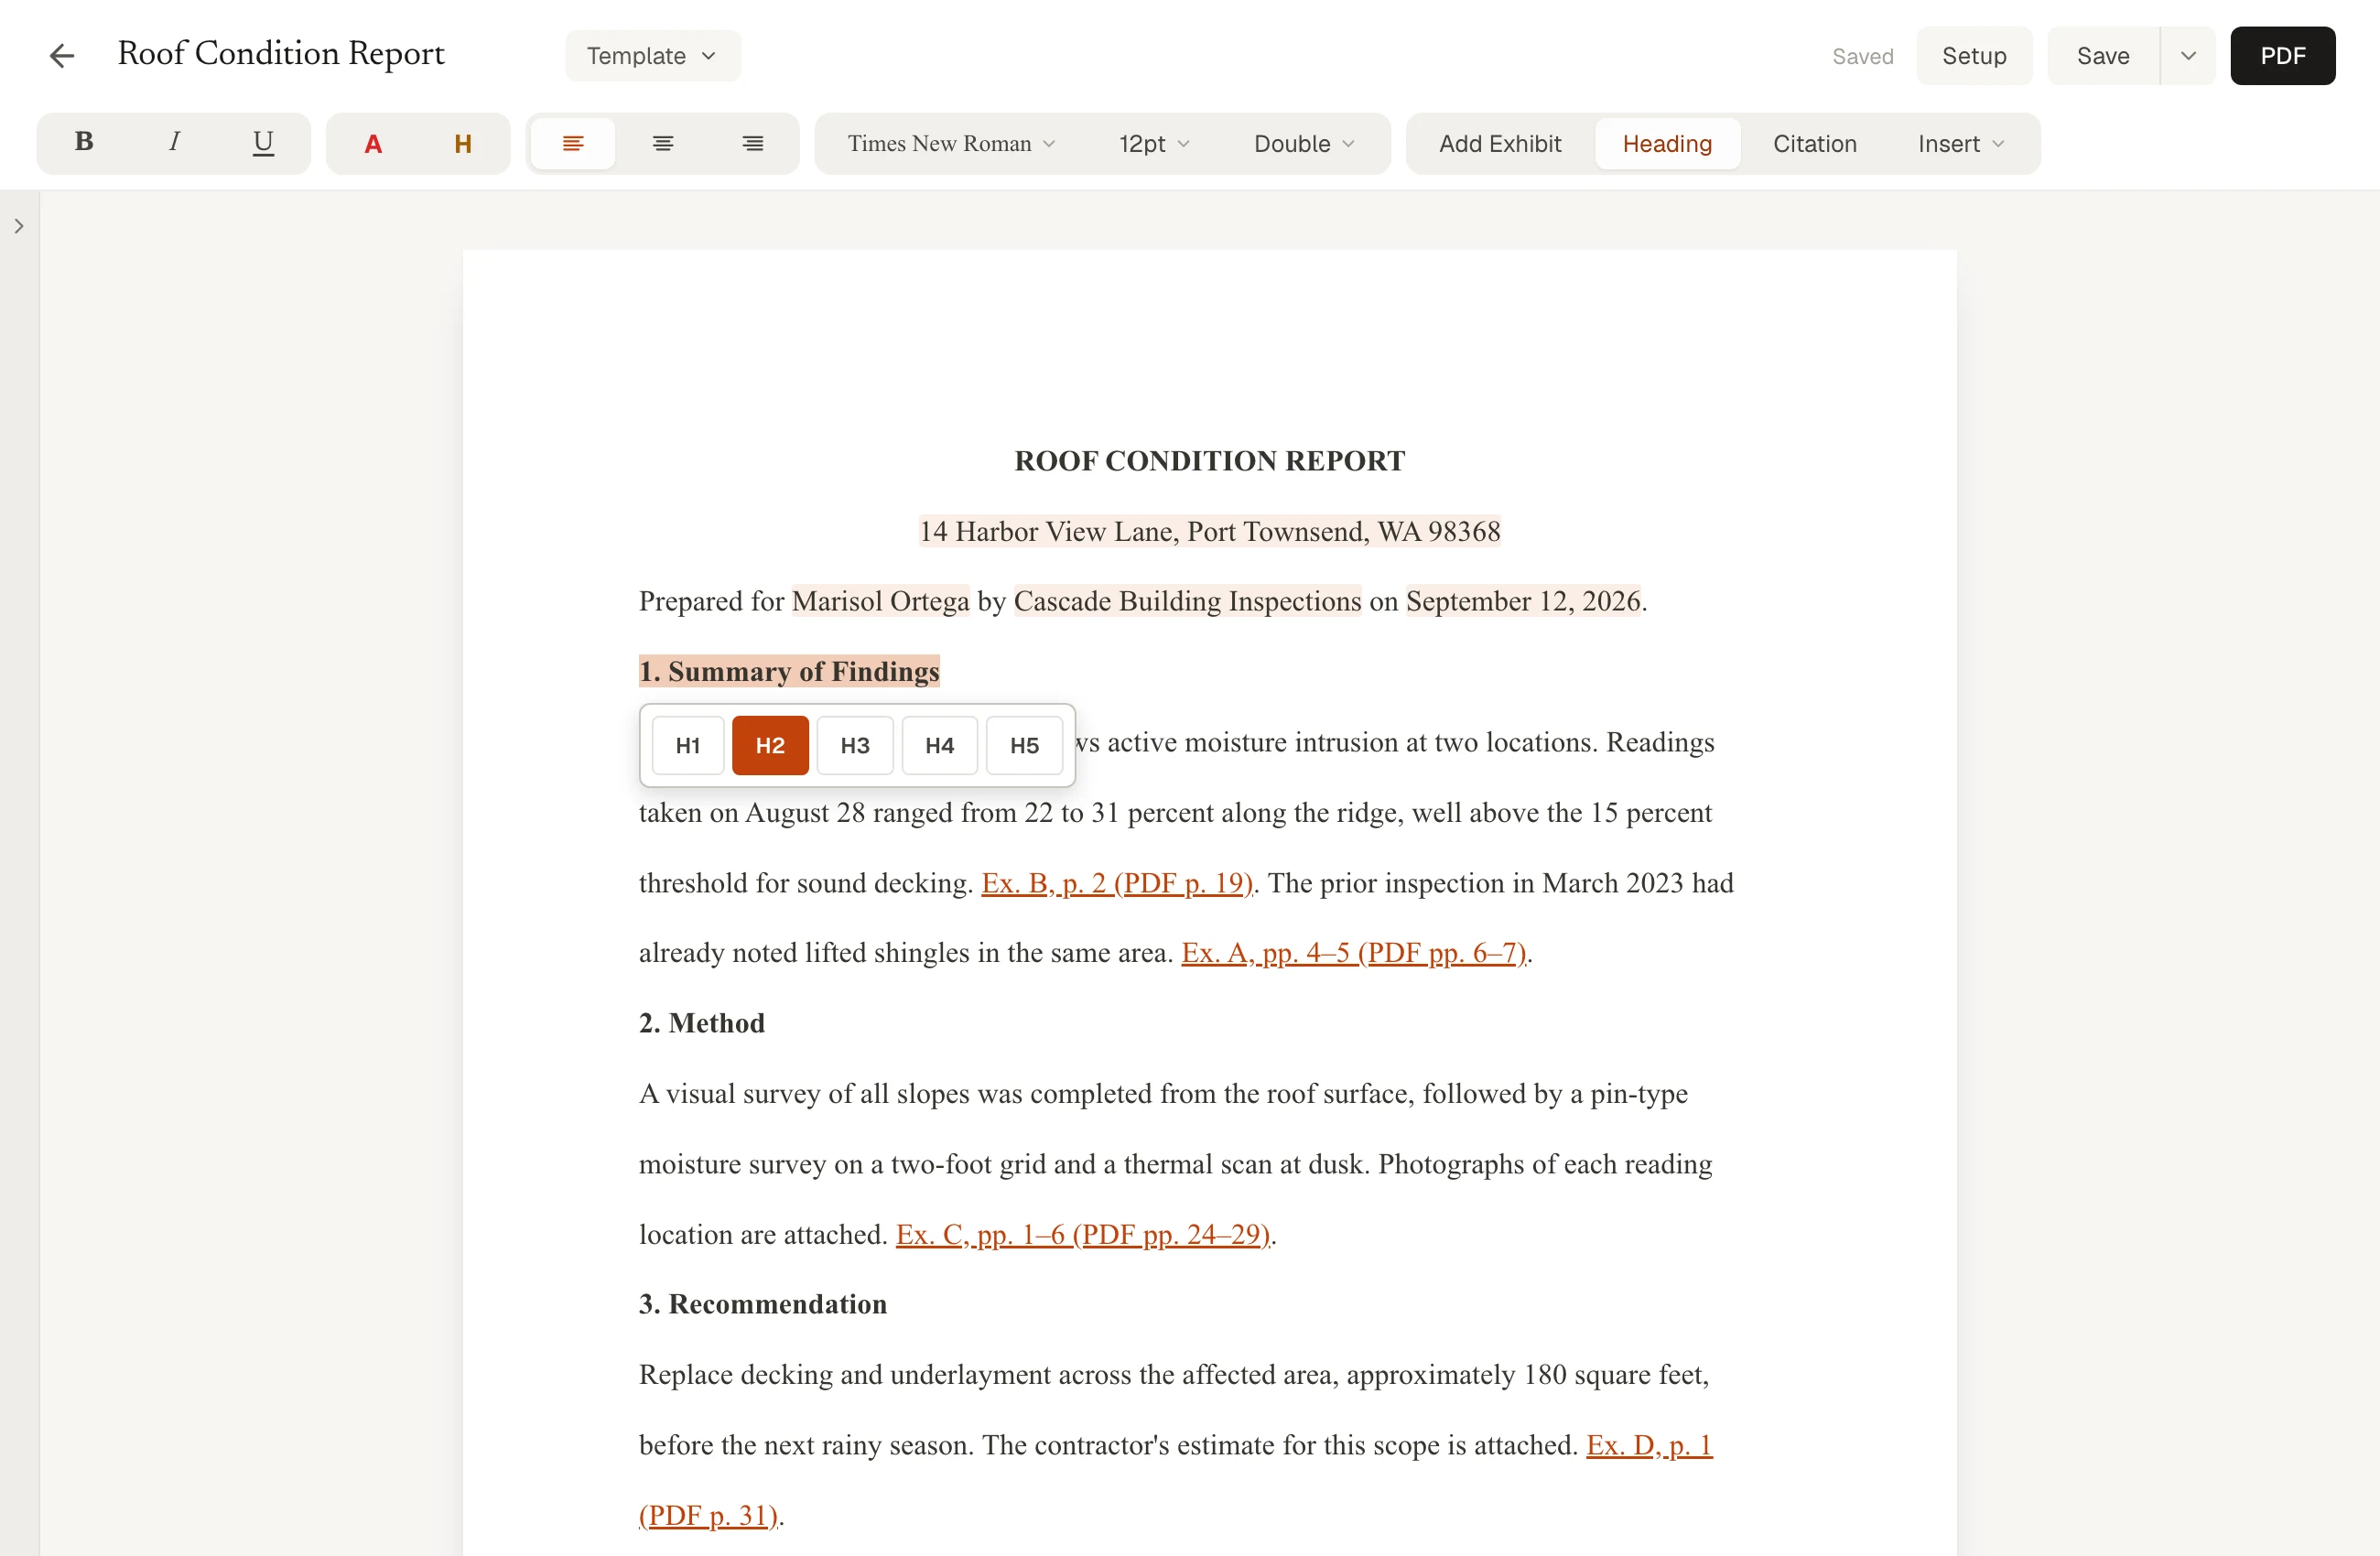
1. Mark the heading and pick its level
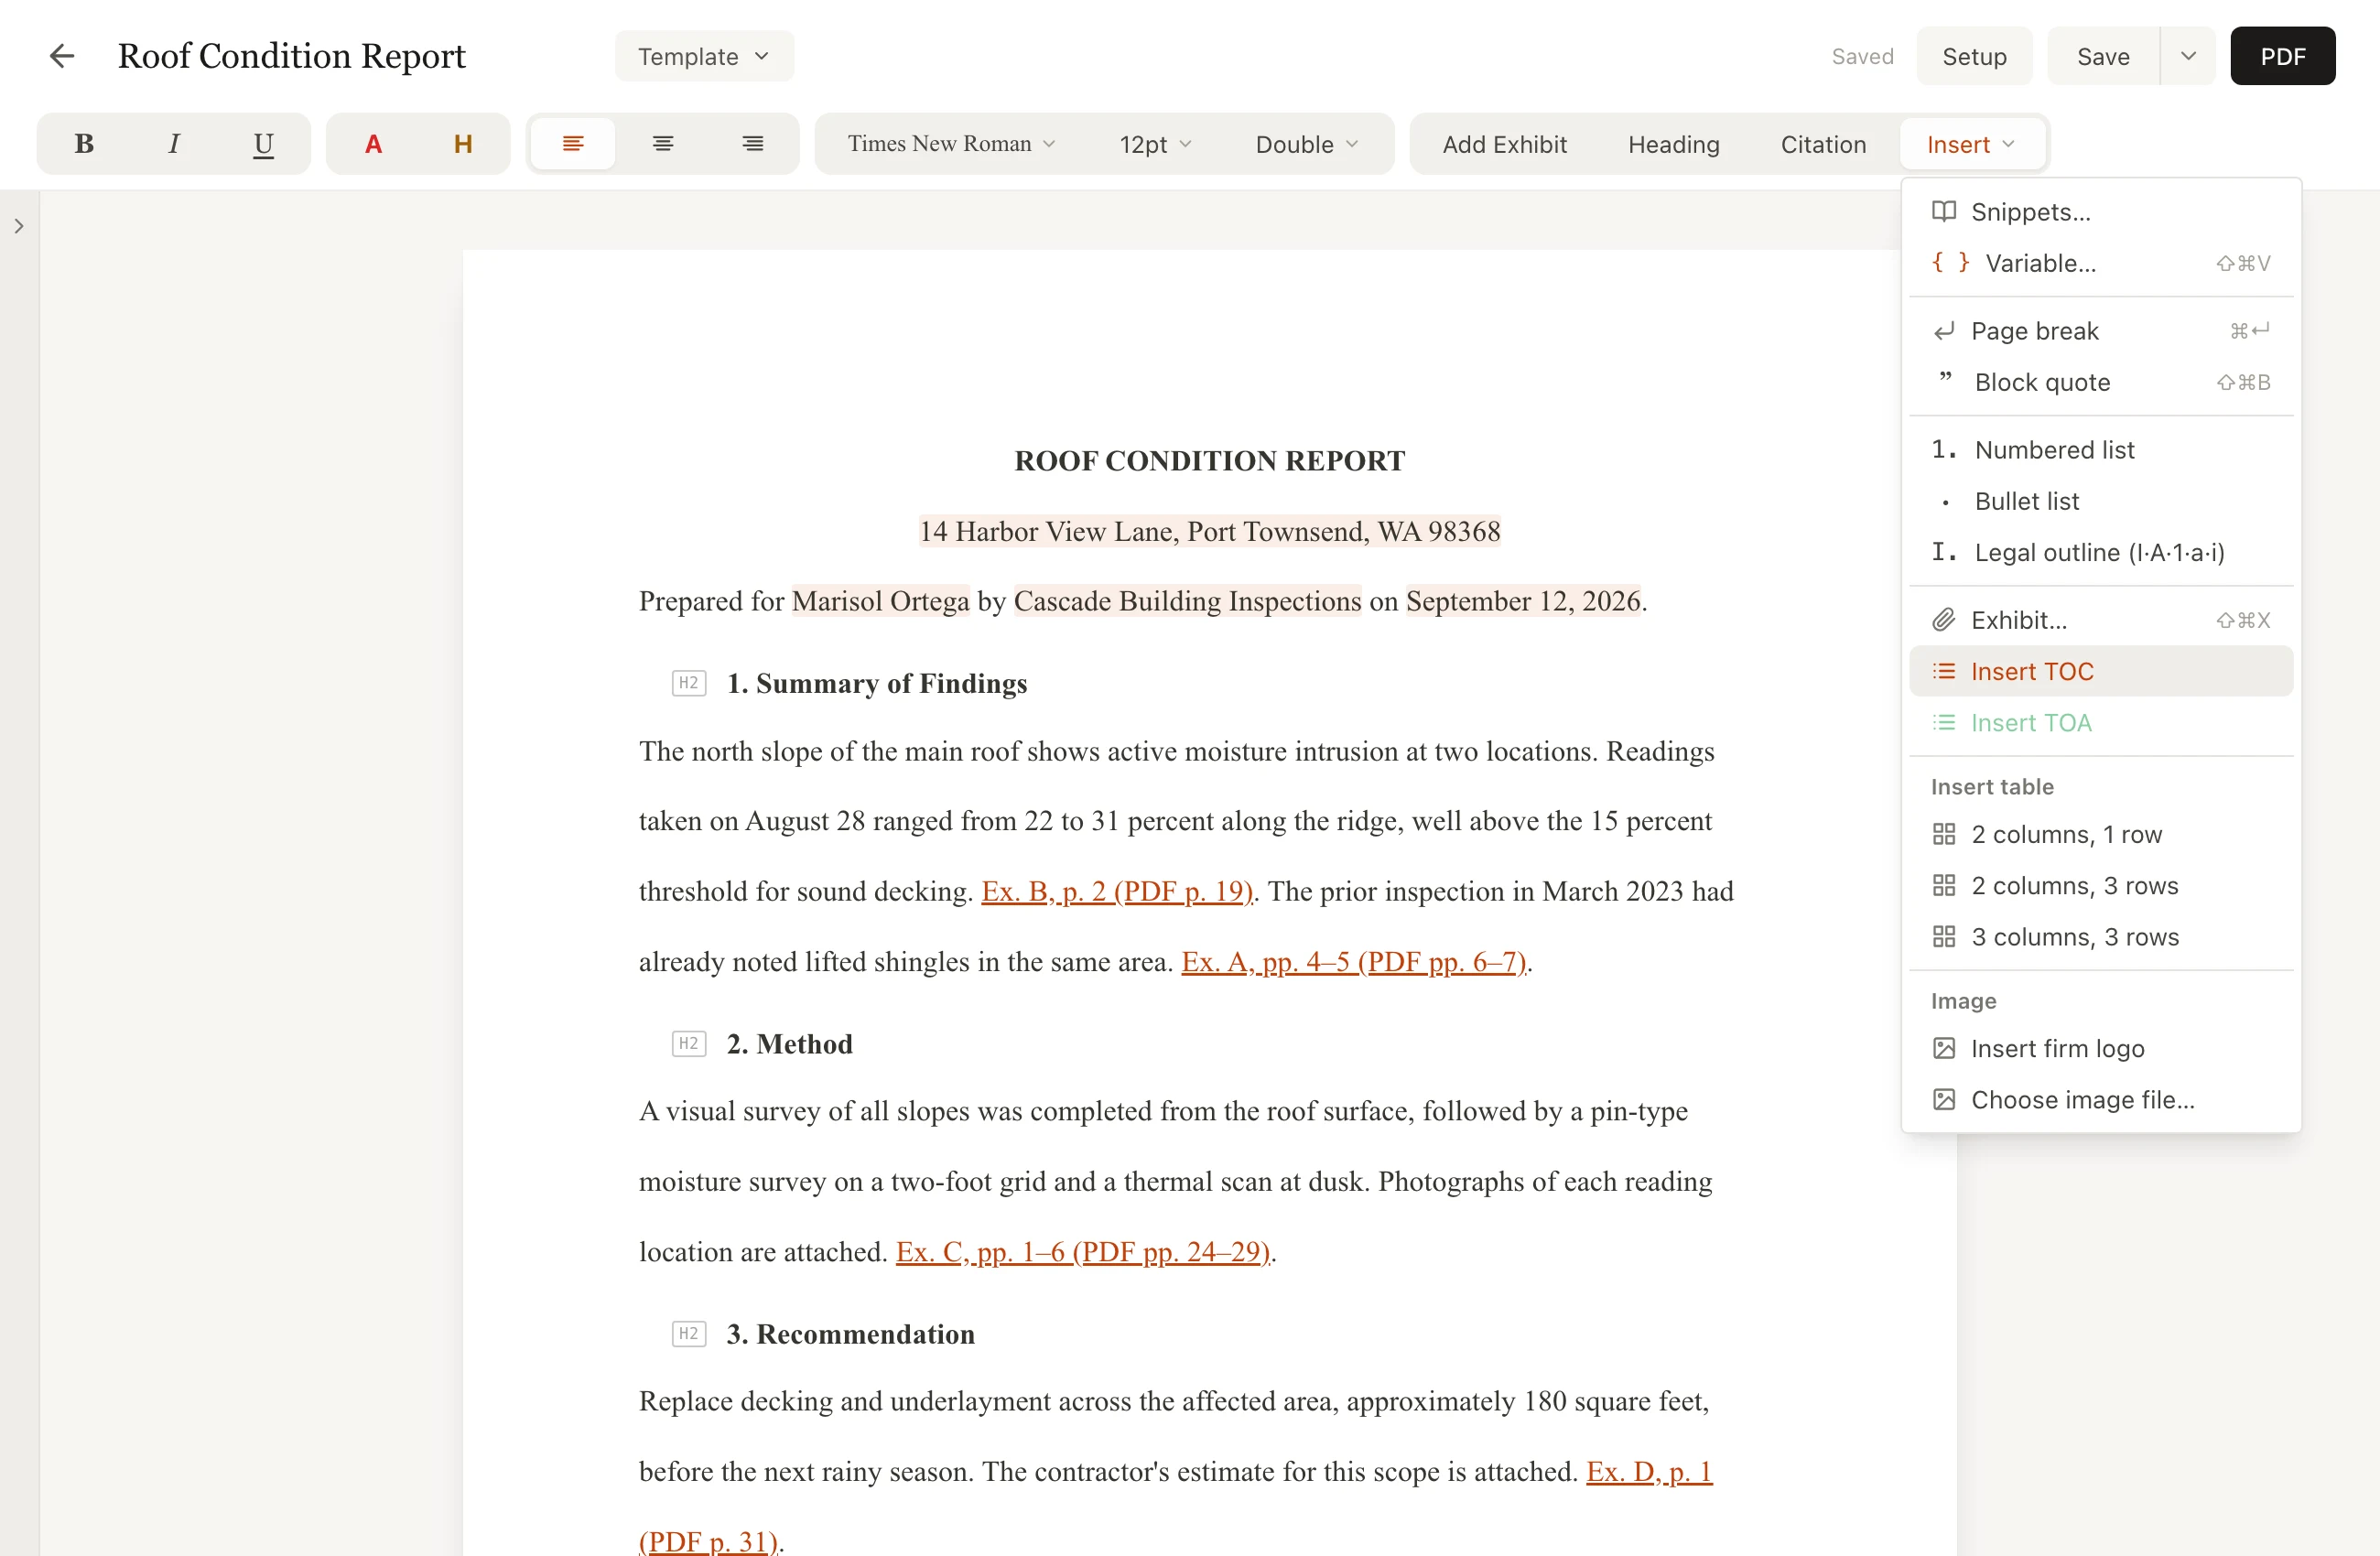
2. Insert → Insert TOC
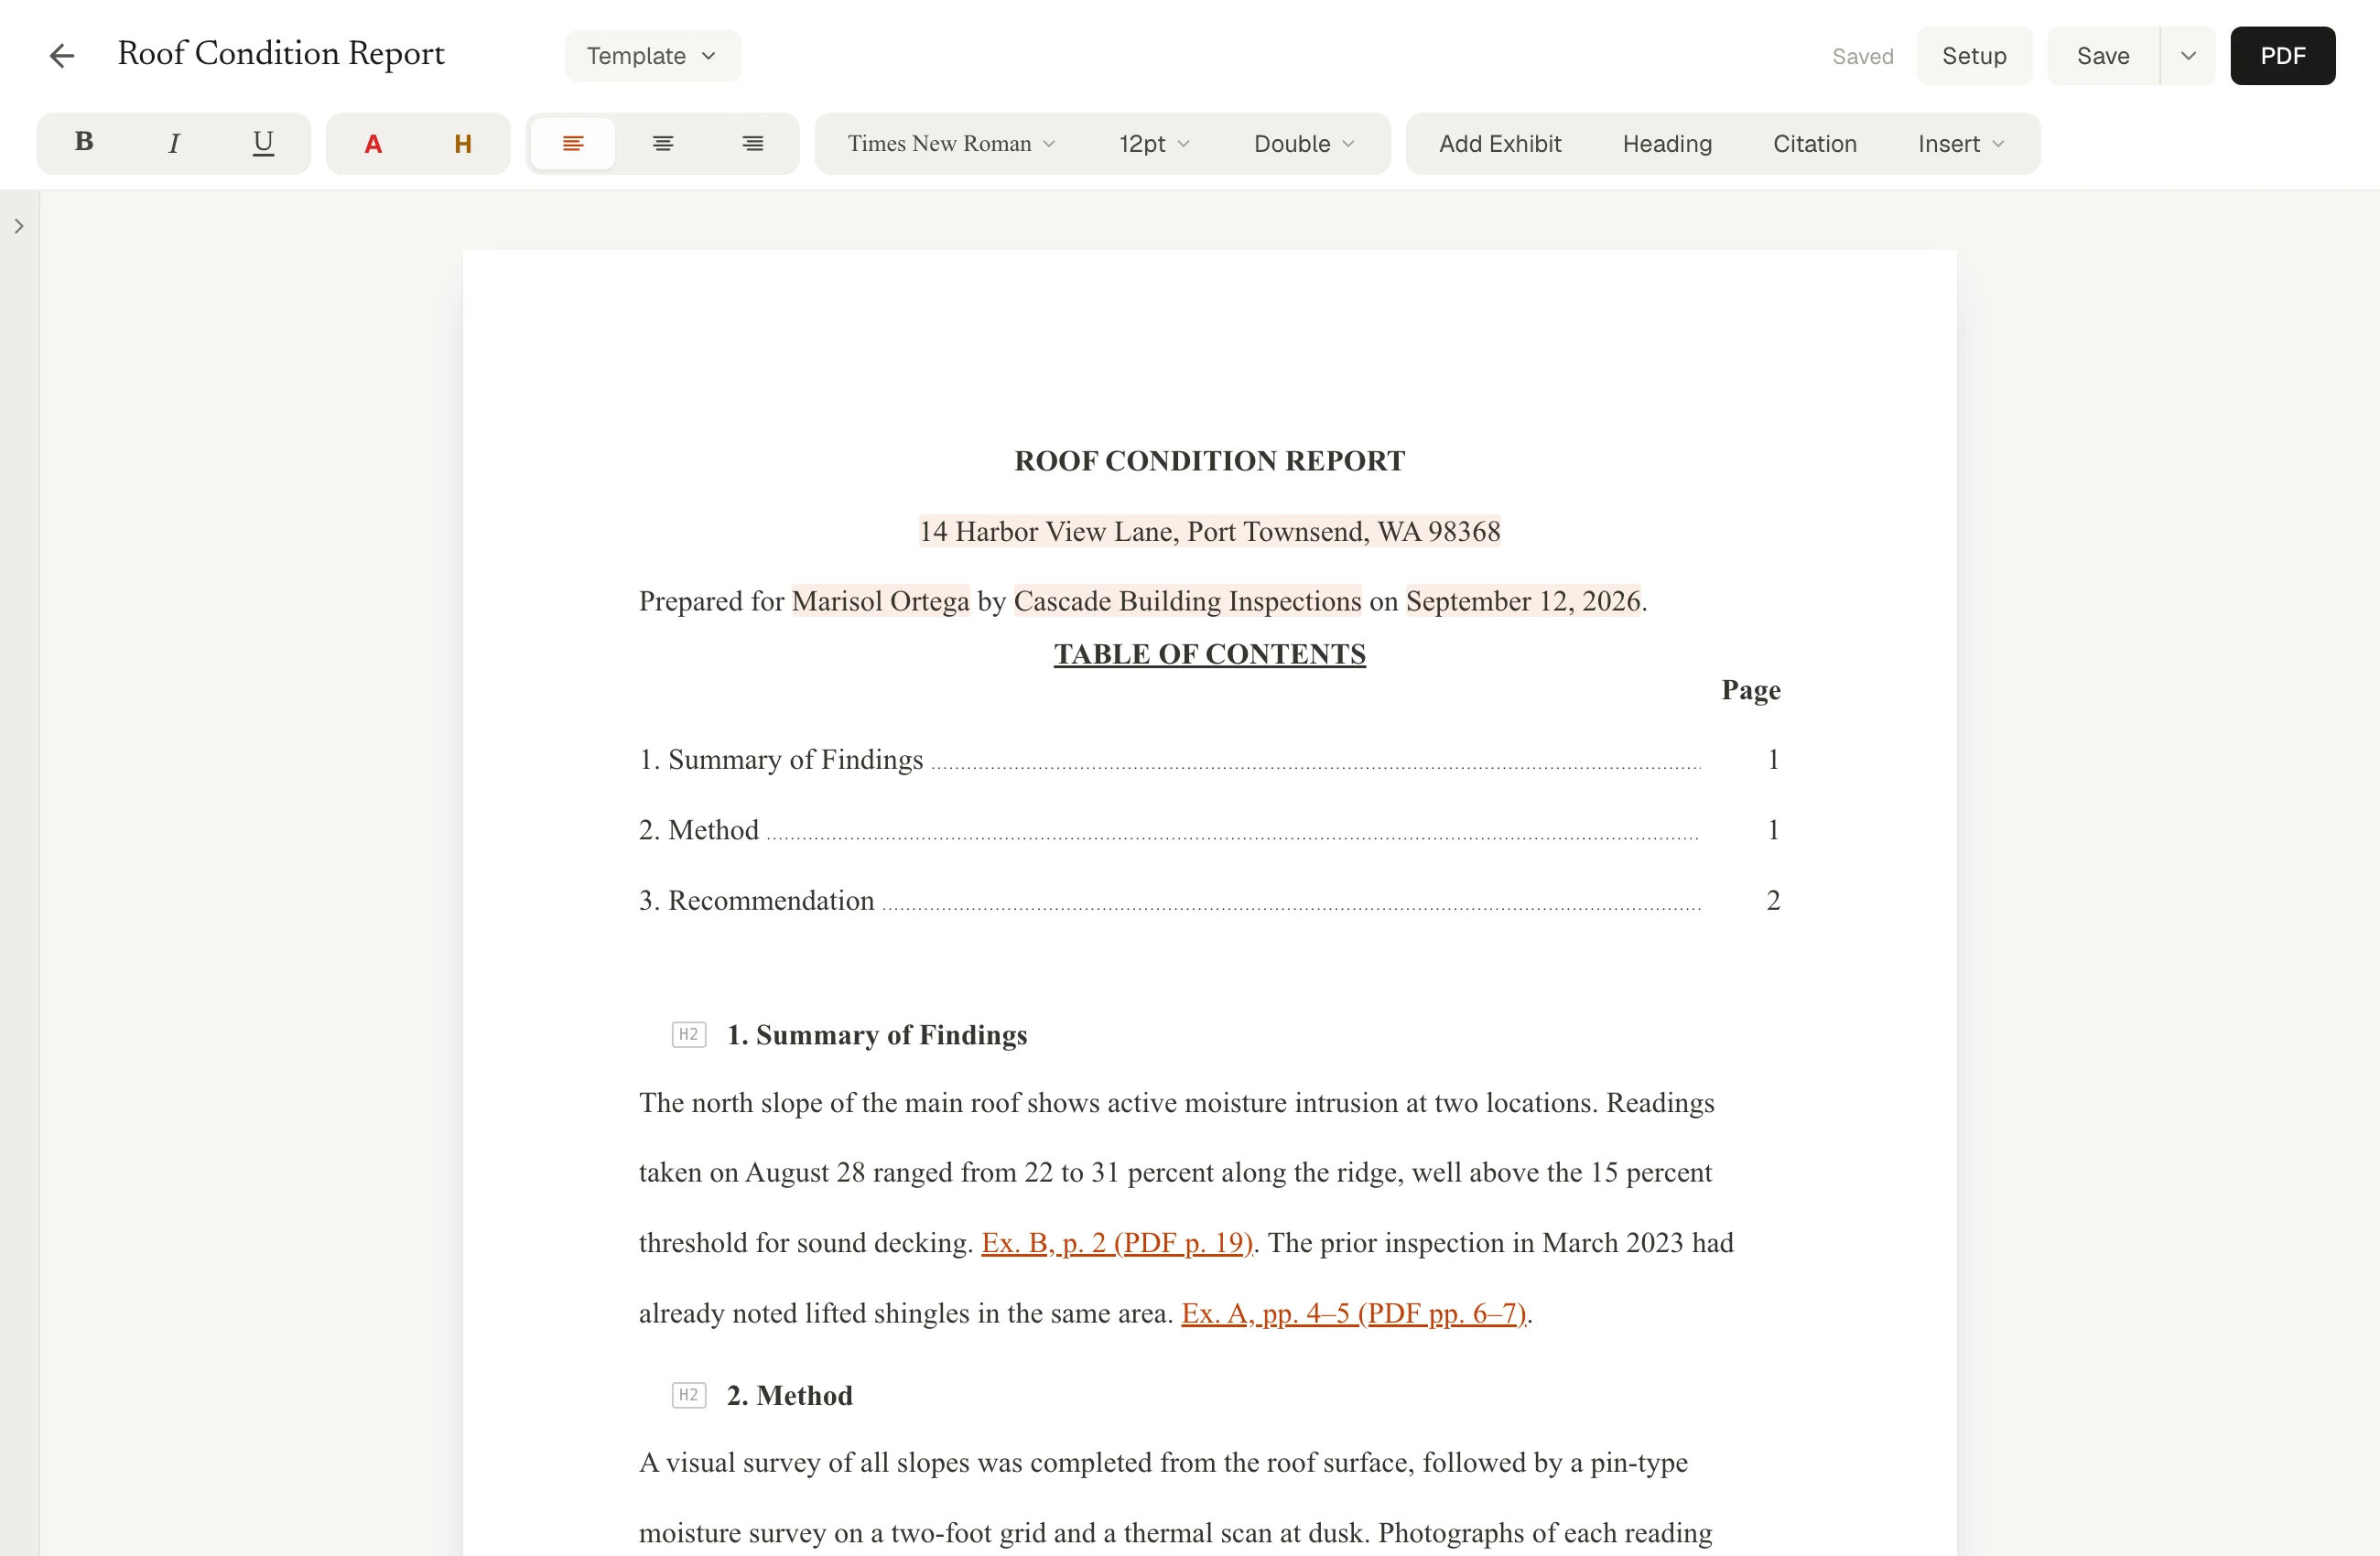
3. The table fills itself in
Mark a heading, insert the table, and it fills in with page numbers that stay current. - Add a table of authorities (optional). Where a document needs one, select the citation and press Cmd+Shift+C (Ctrl+Shift+C on Windows). A list opens with every source already cited, so a repeat is one click. Place the table with Insert → Insert TOA. It categorizes itself and updates as you edit.
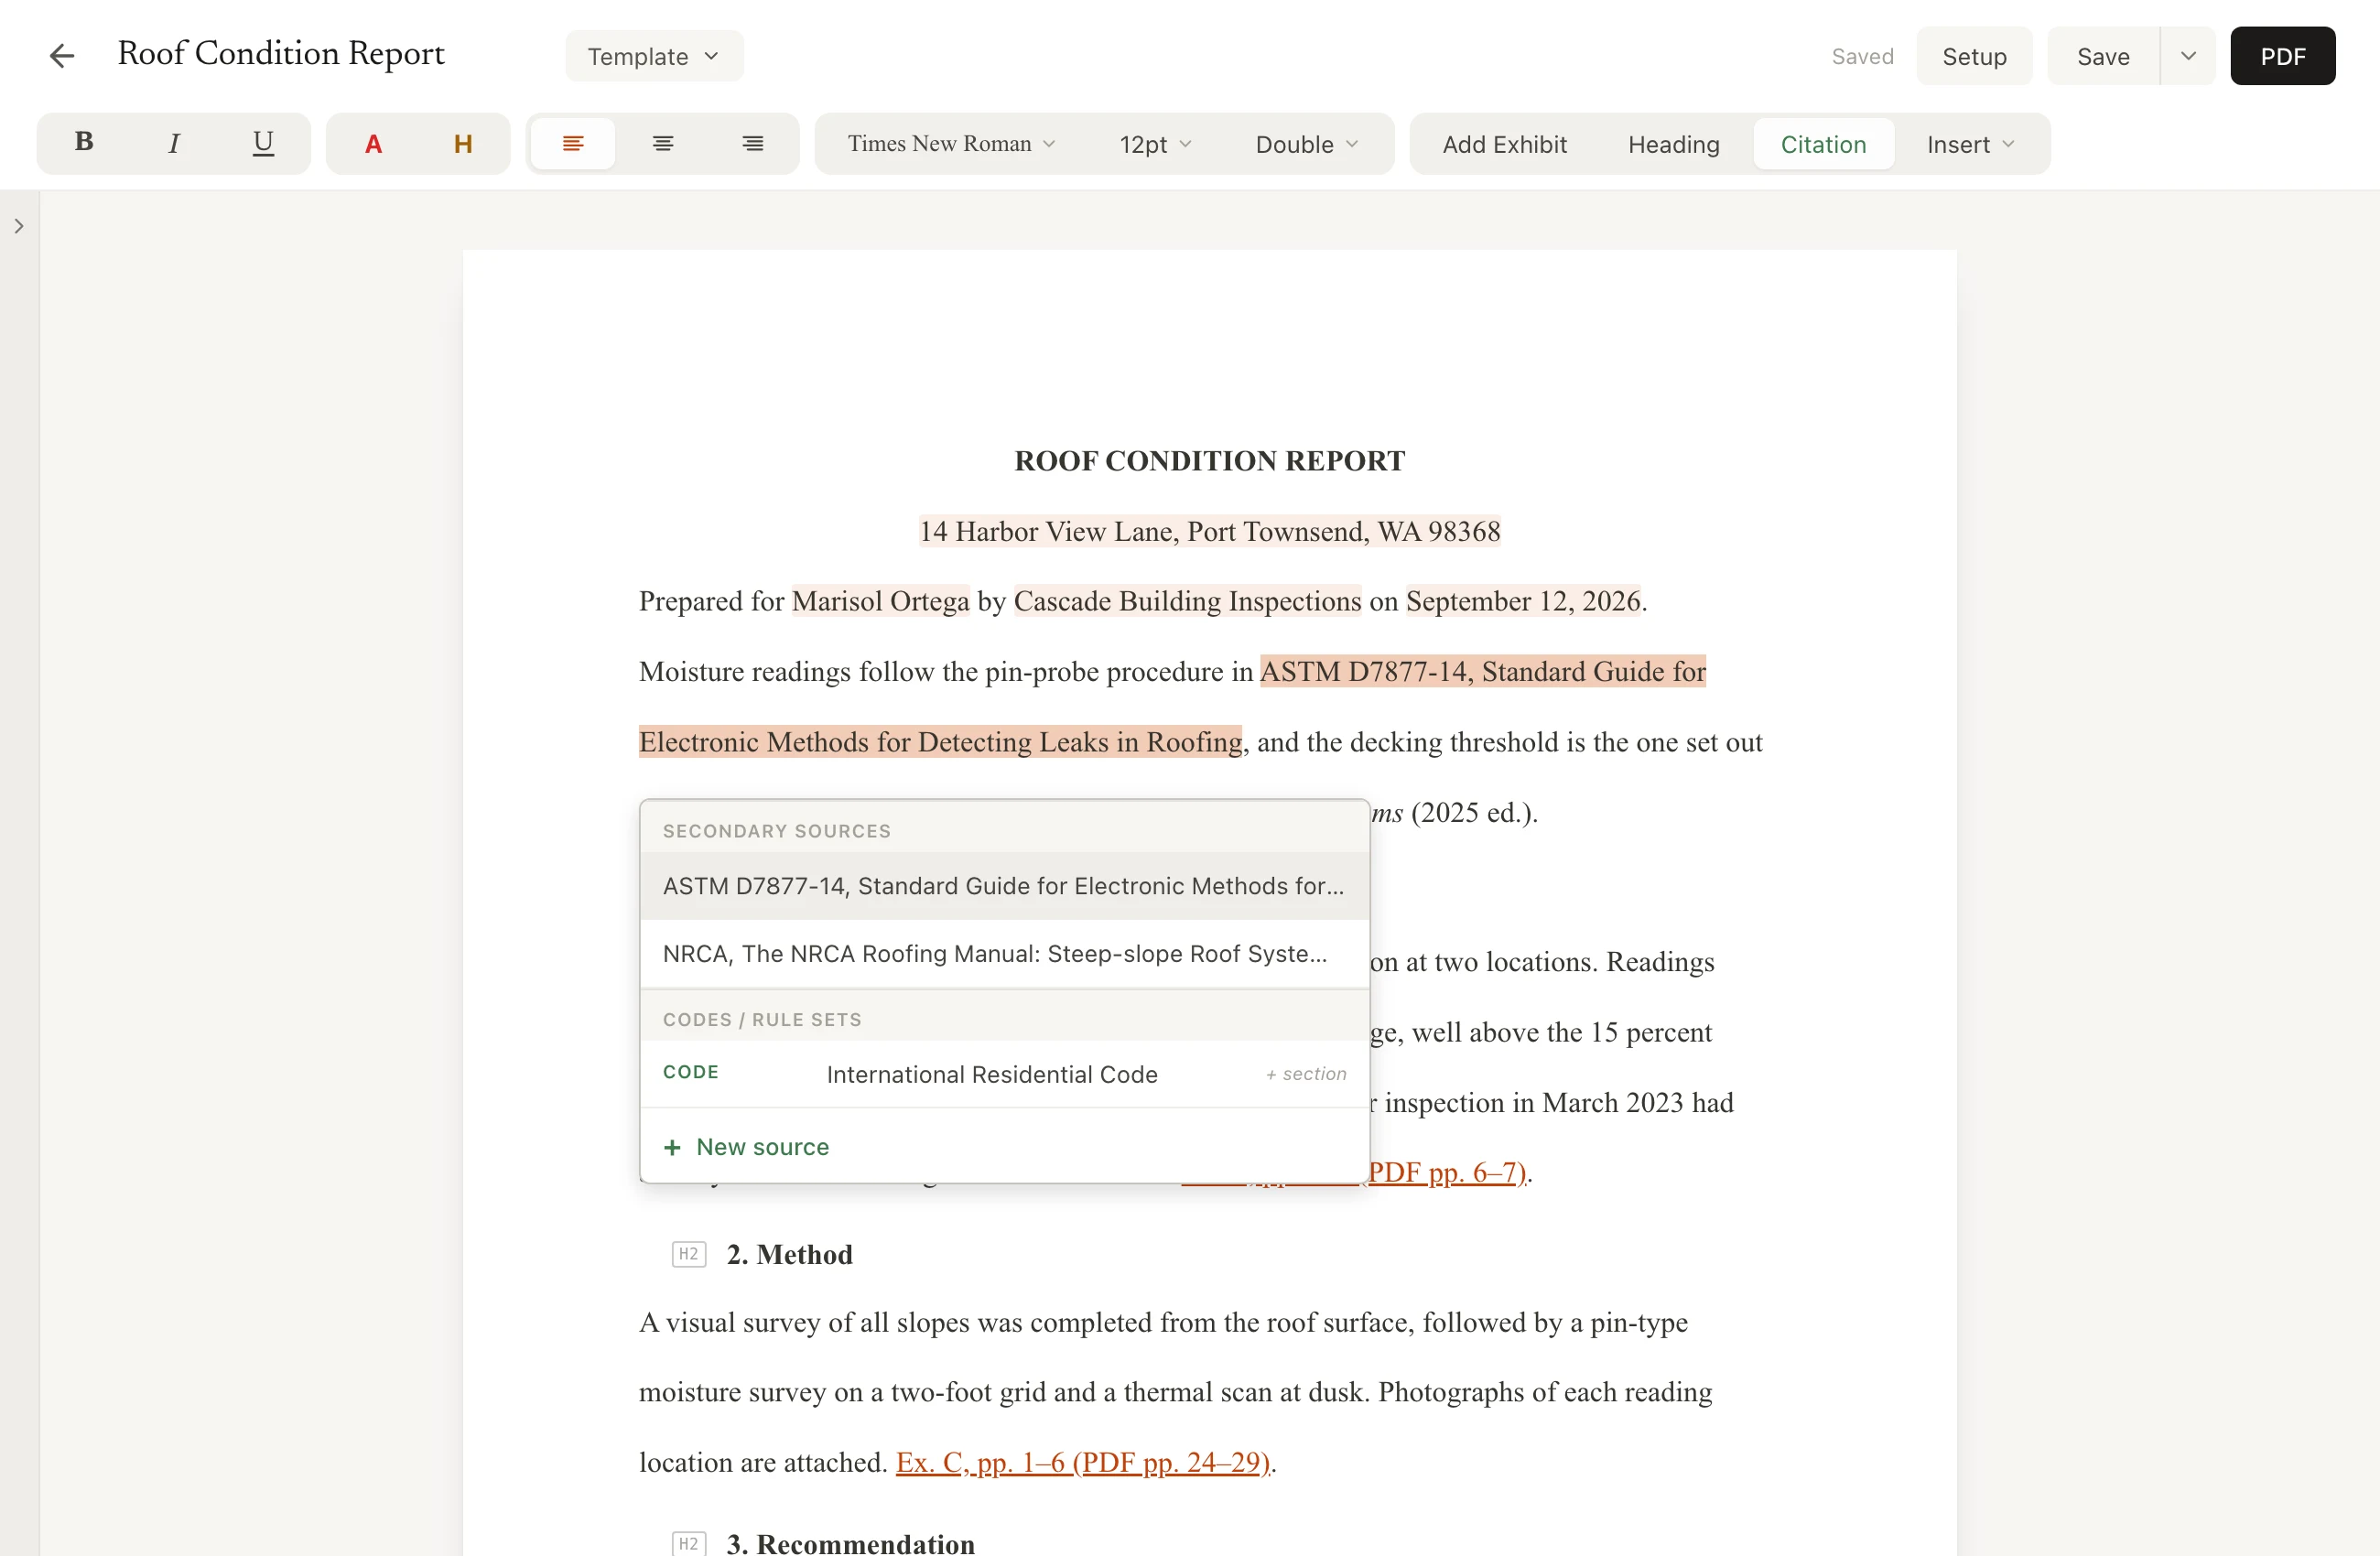
1. Tag the citation
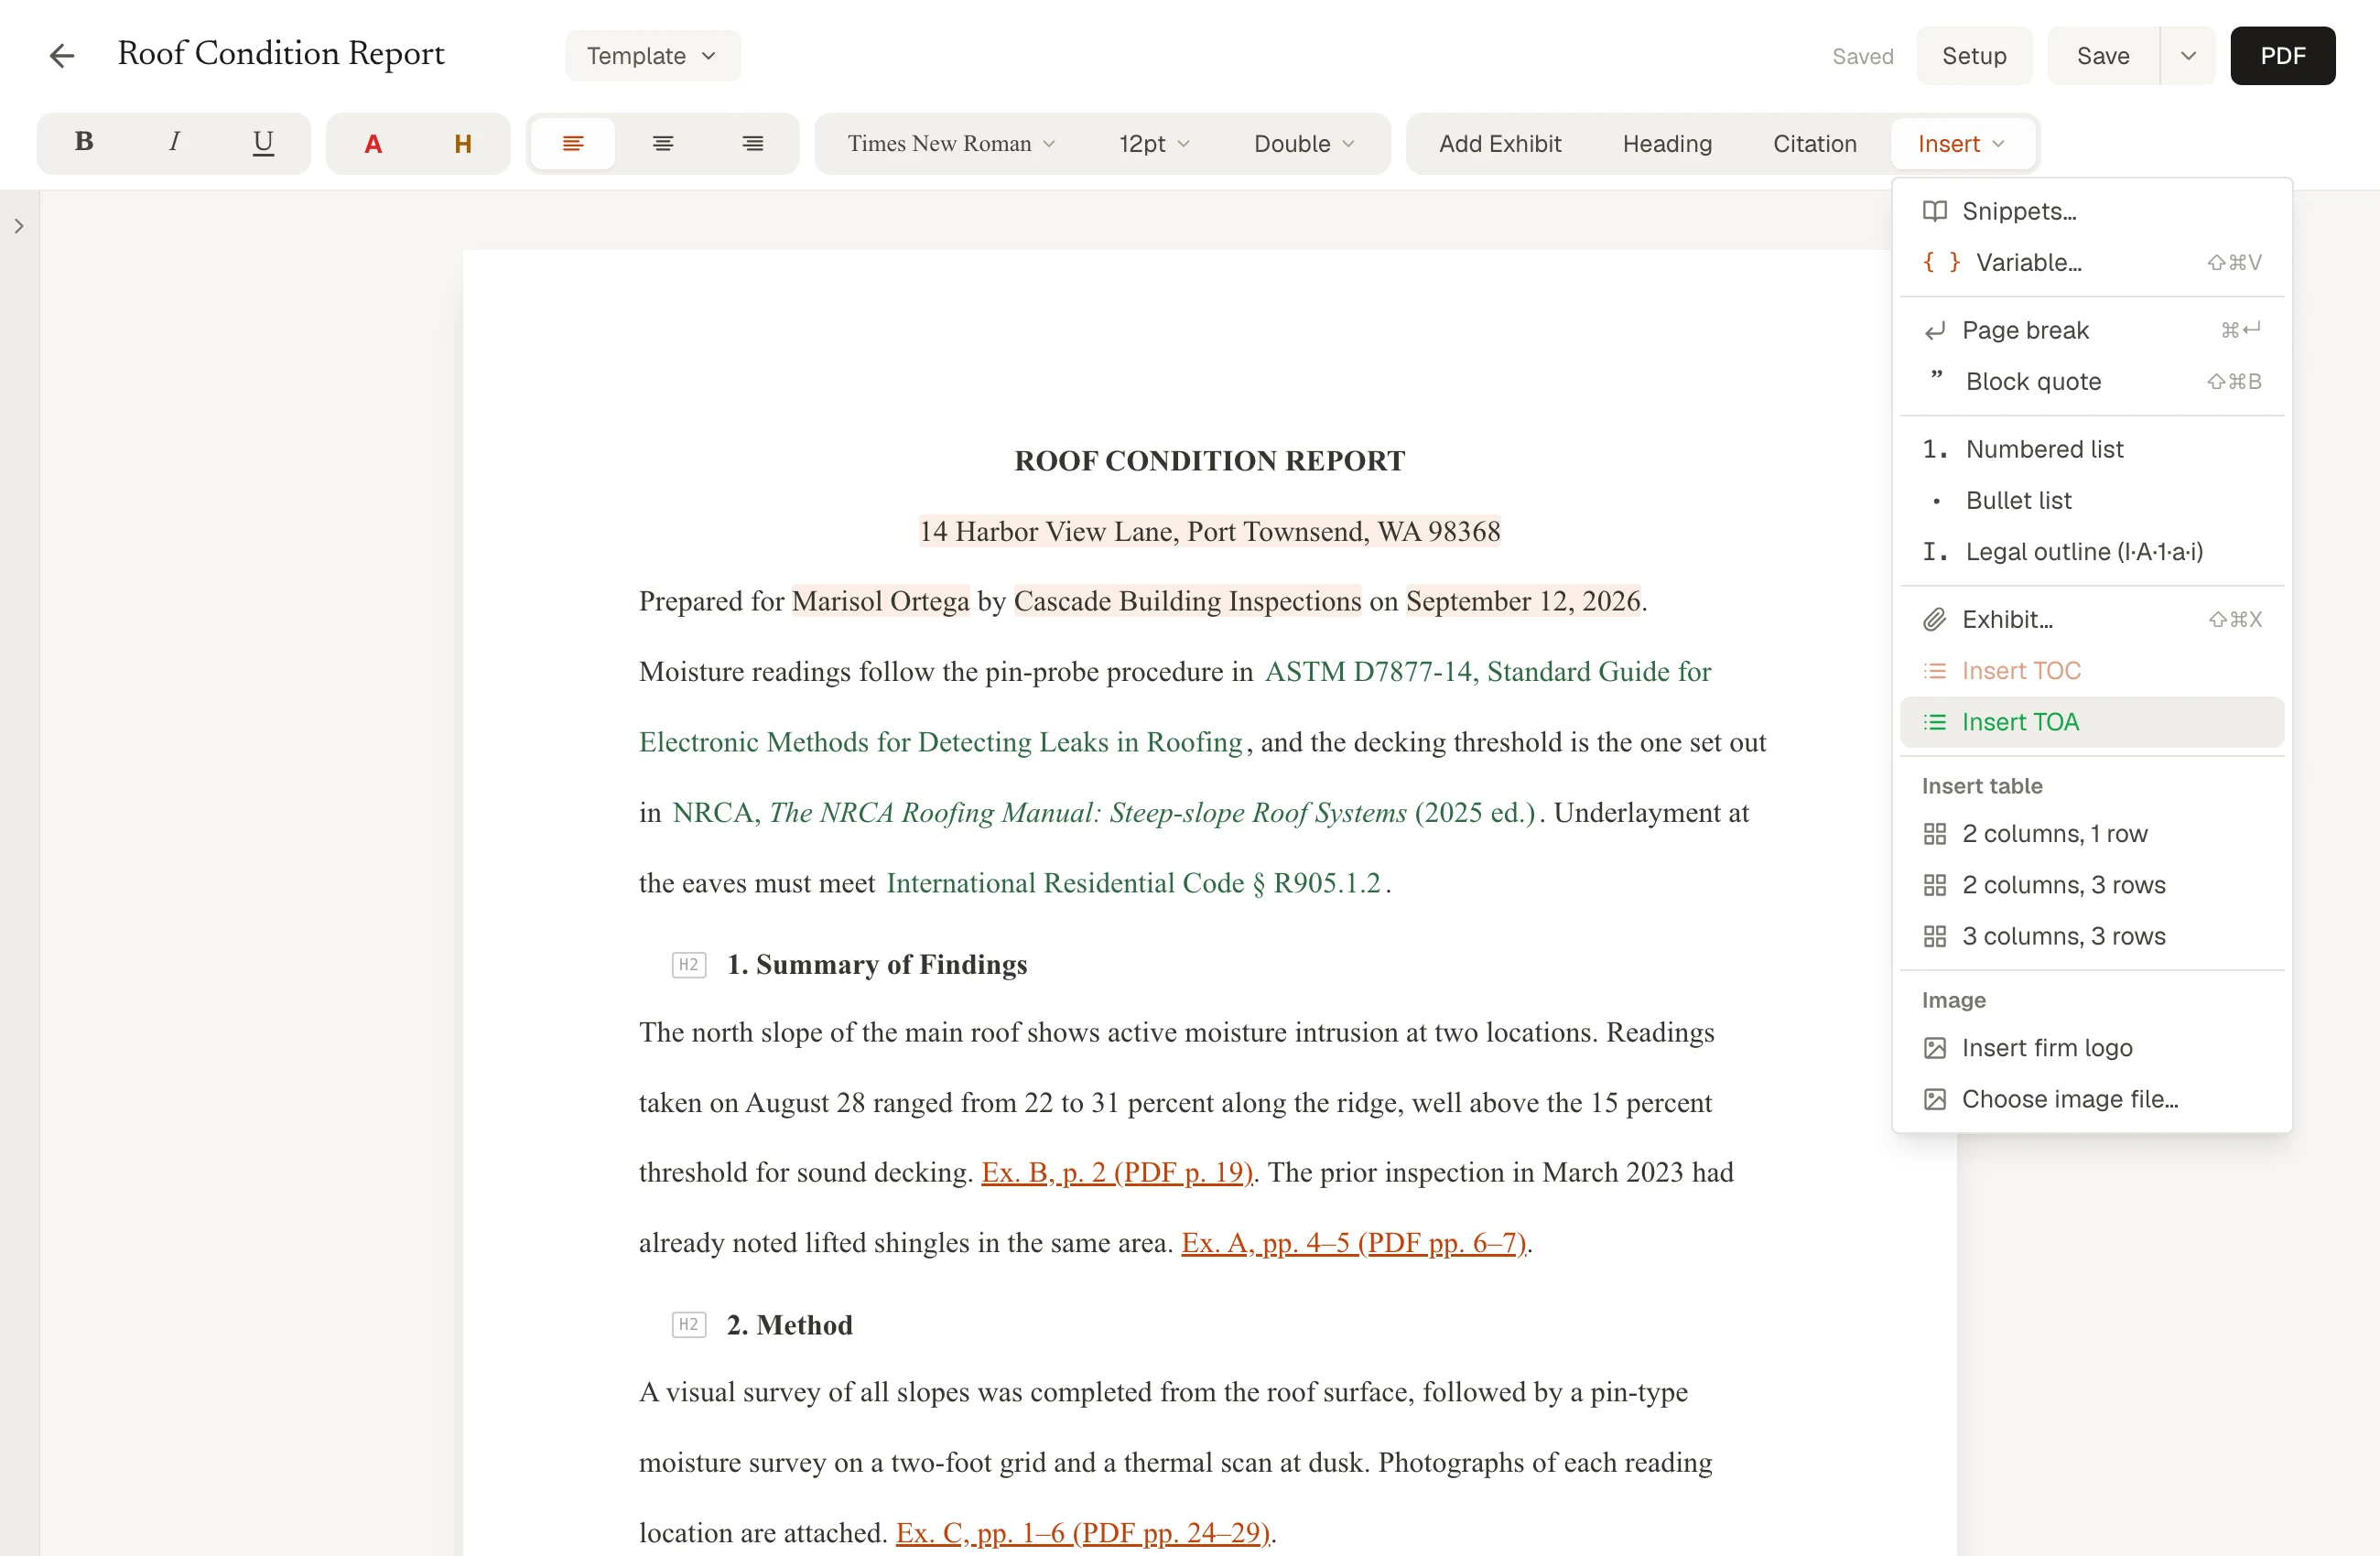
2. Insert → Insert TOA
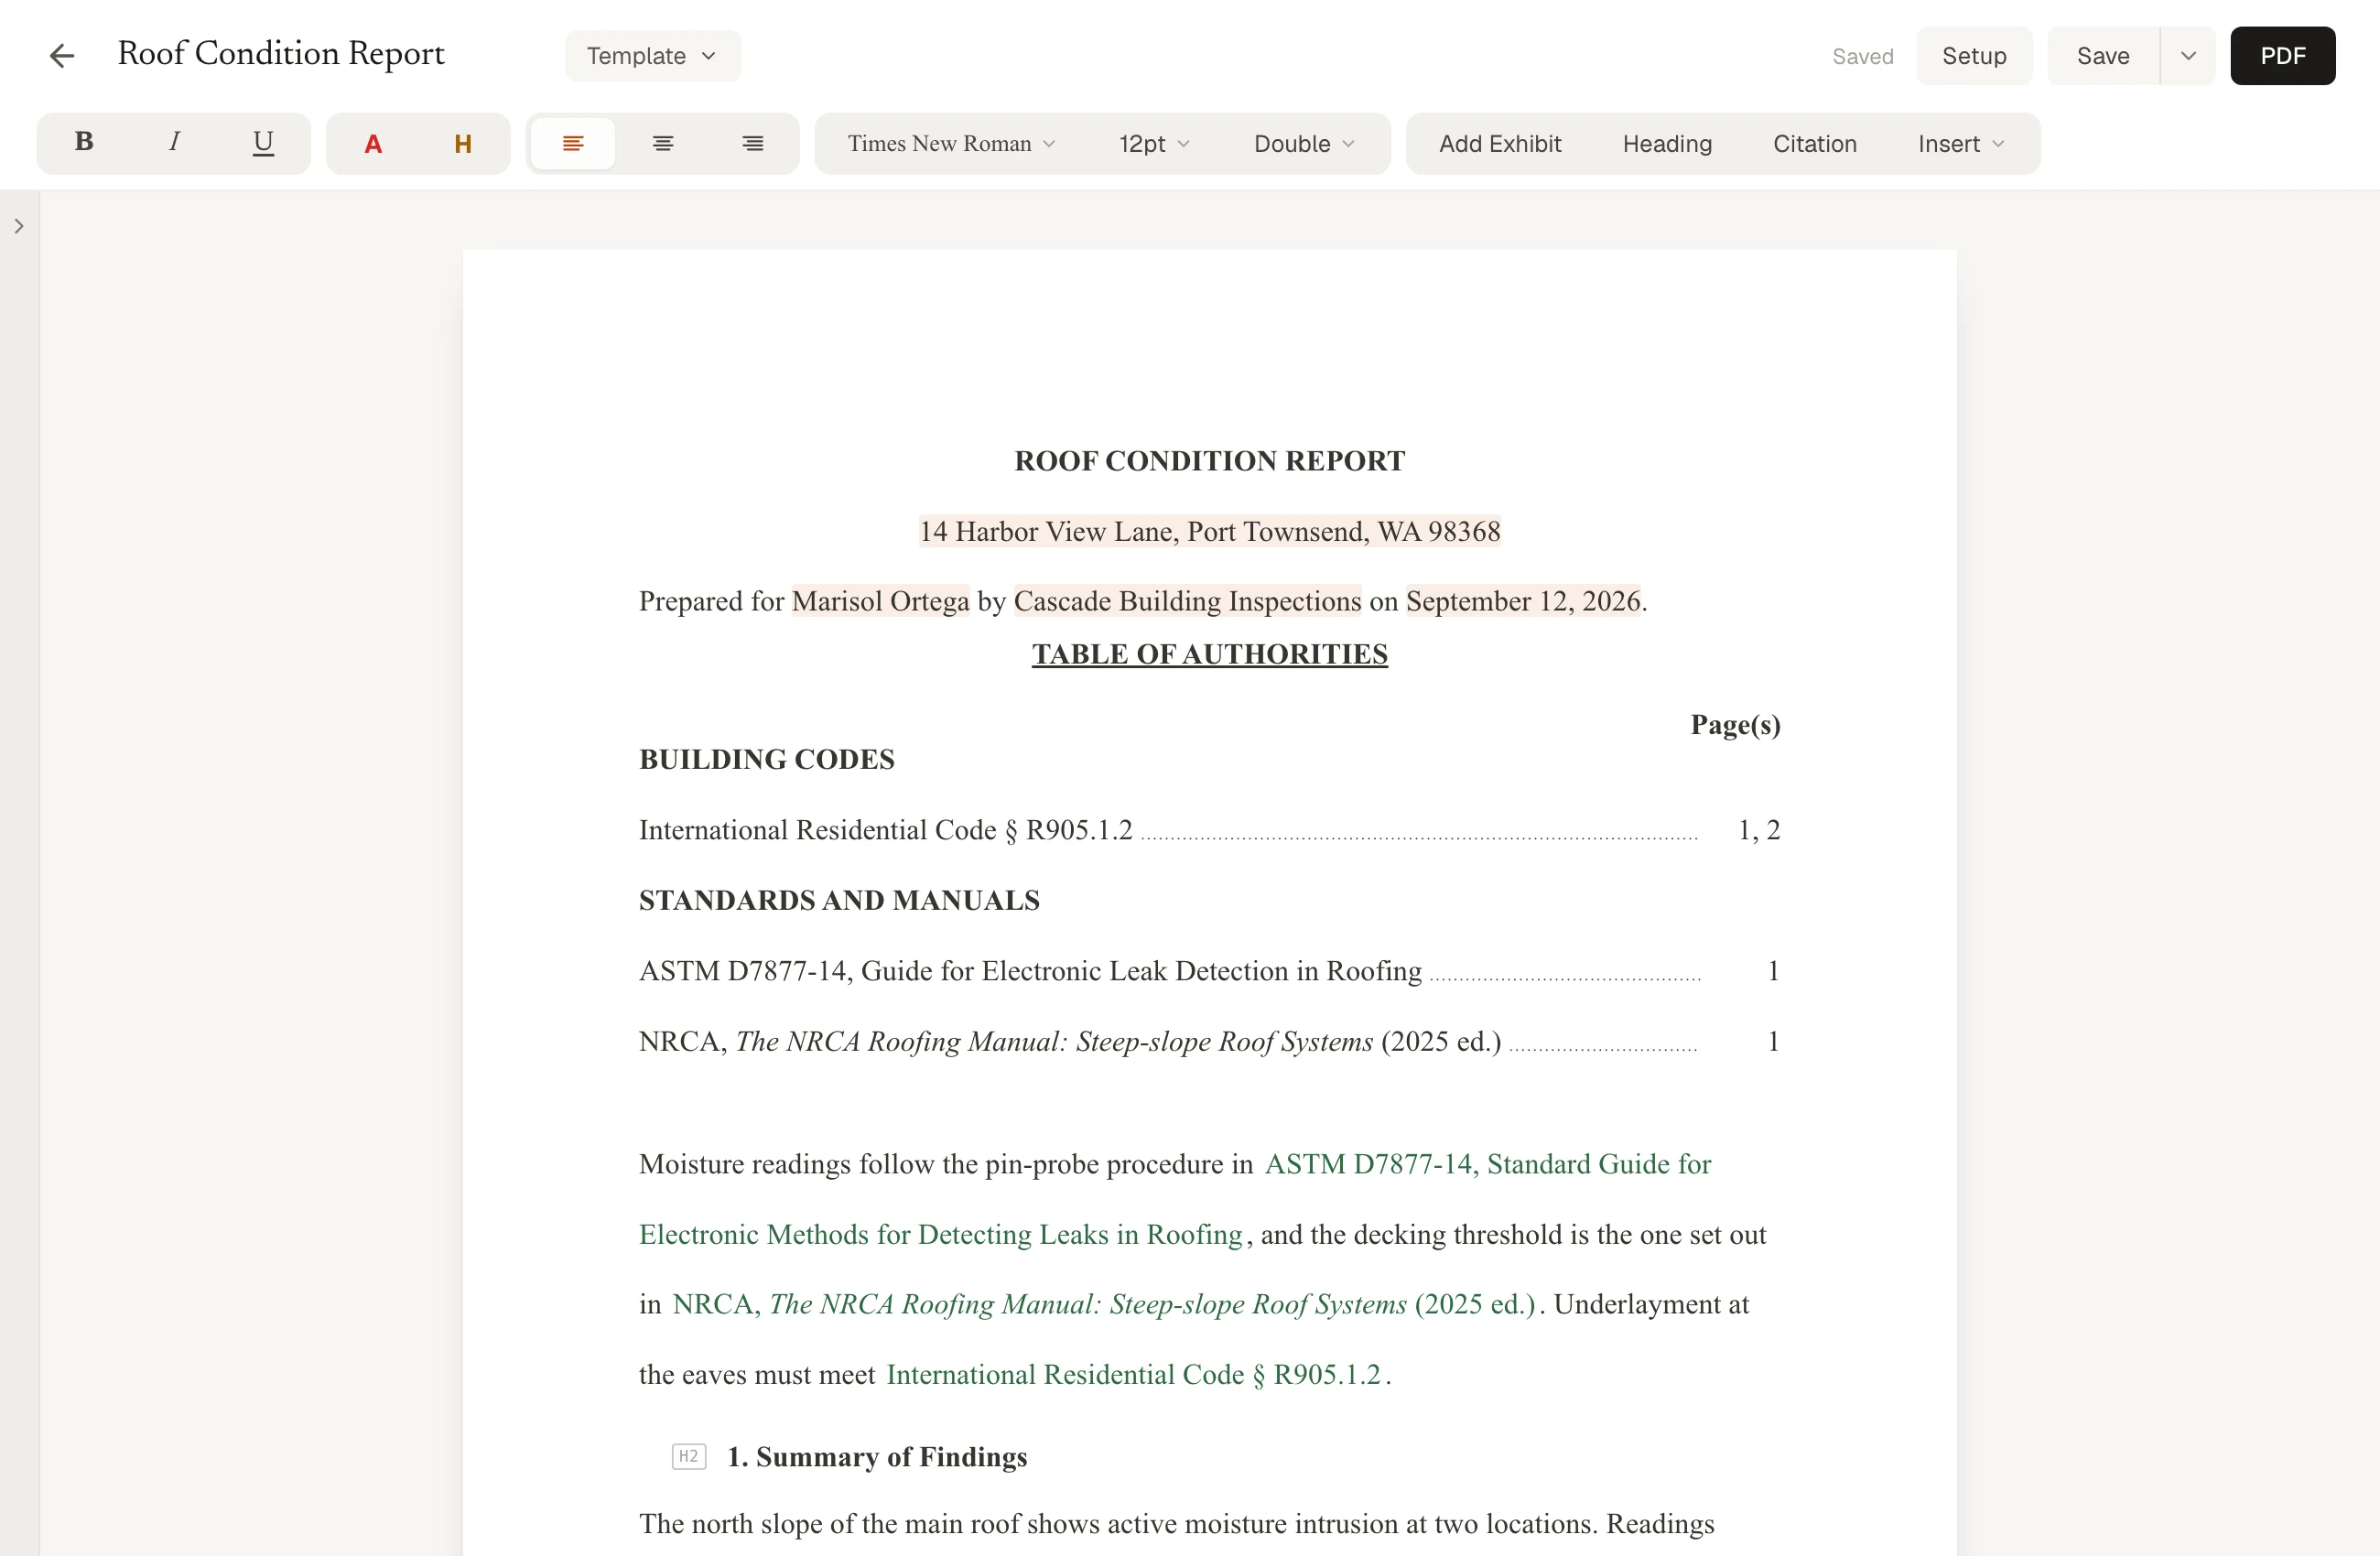
3. The table fills itself in
Tag a citation, insert the table, and it fills in with page numbers.
Export
- Click PDF at the top right to open the preview.
- Open PDF settings and choose what to export: the document and its exhibits in one PDF, the document only, the exhibits only, or the document and each exhibit as separate PDFs. In one PDF, the index and a cover page for each exhibit are included and either one switches off.
- Click Export PDF. Every reference in the file is a working link to the page it cites, with bookmarks down the side. It opens that way in any PDF reader.
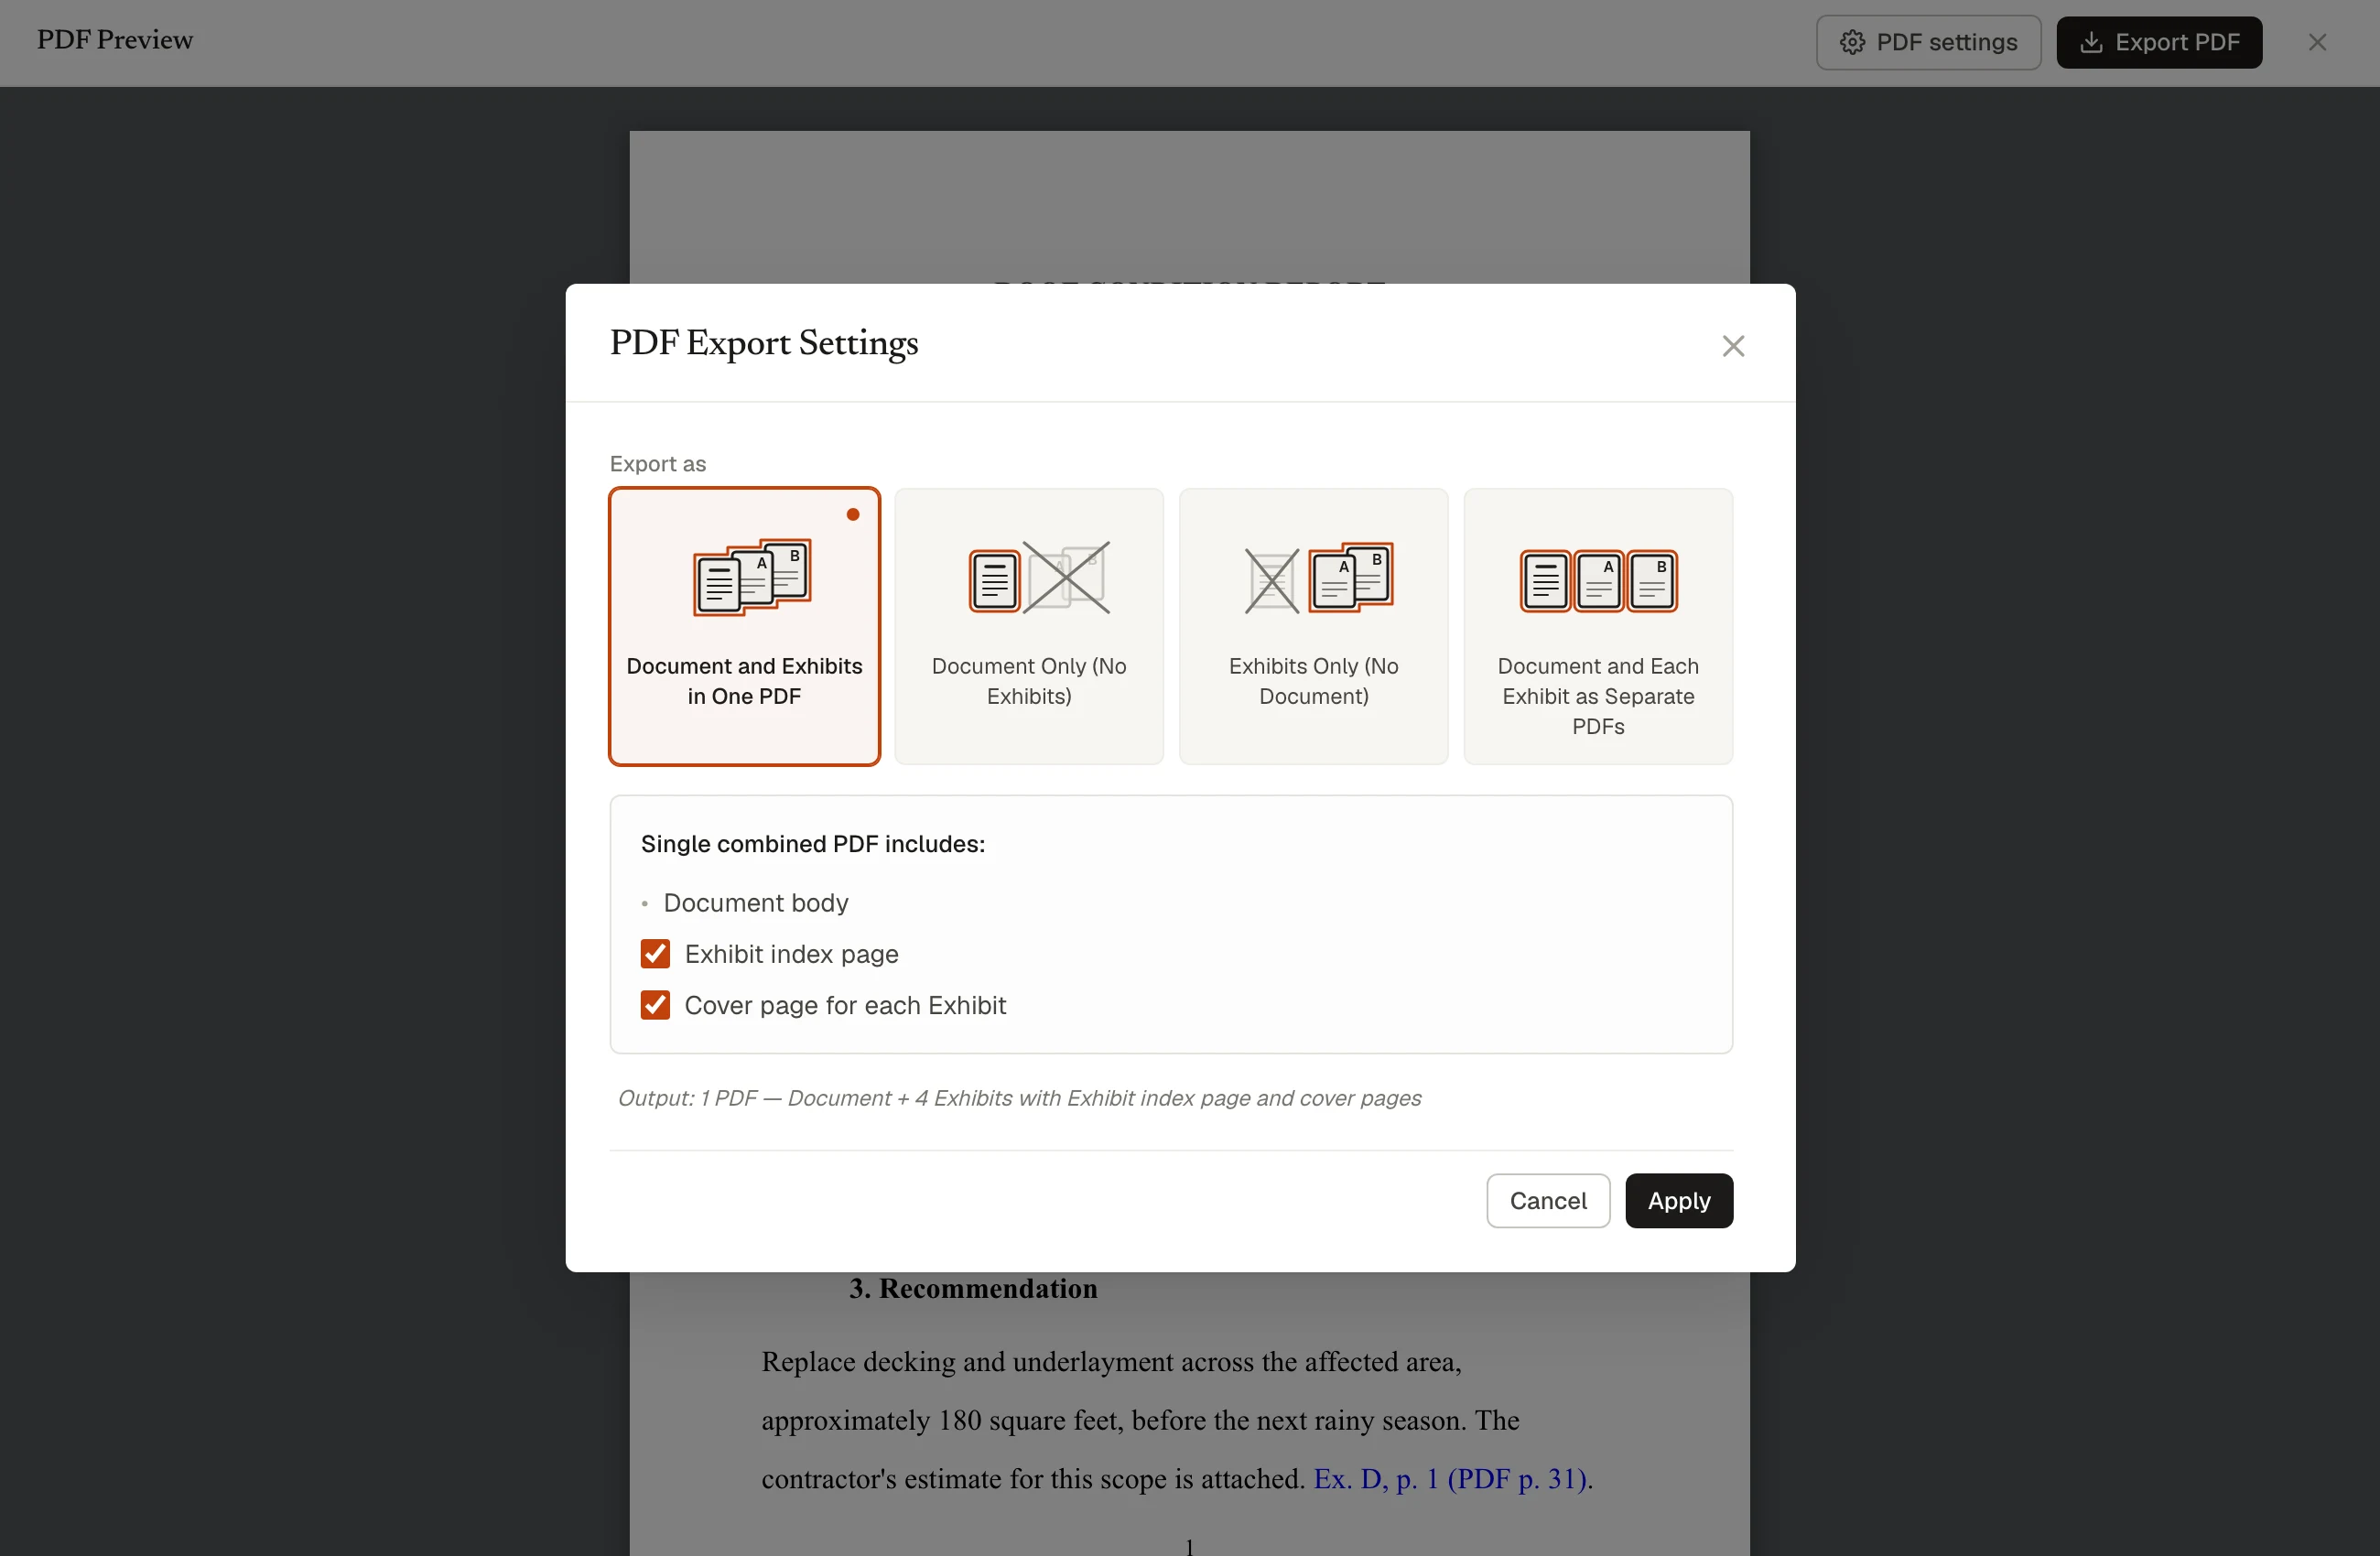
1. Choose what to include in PDF settings
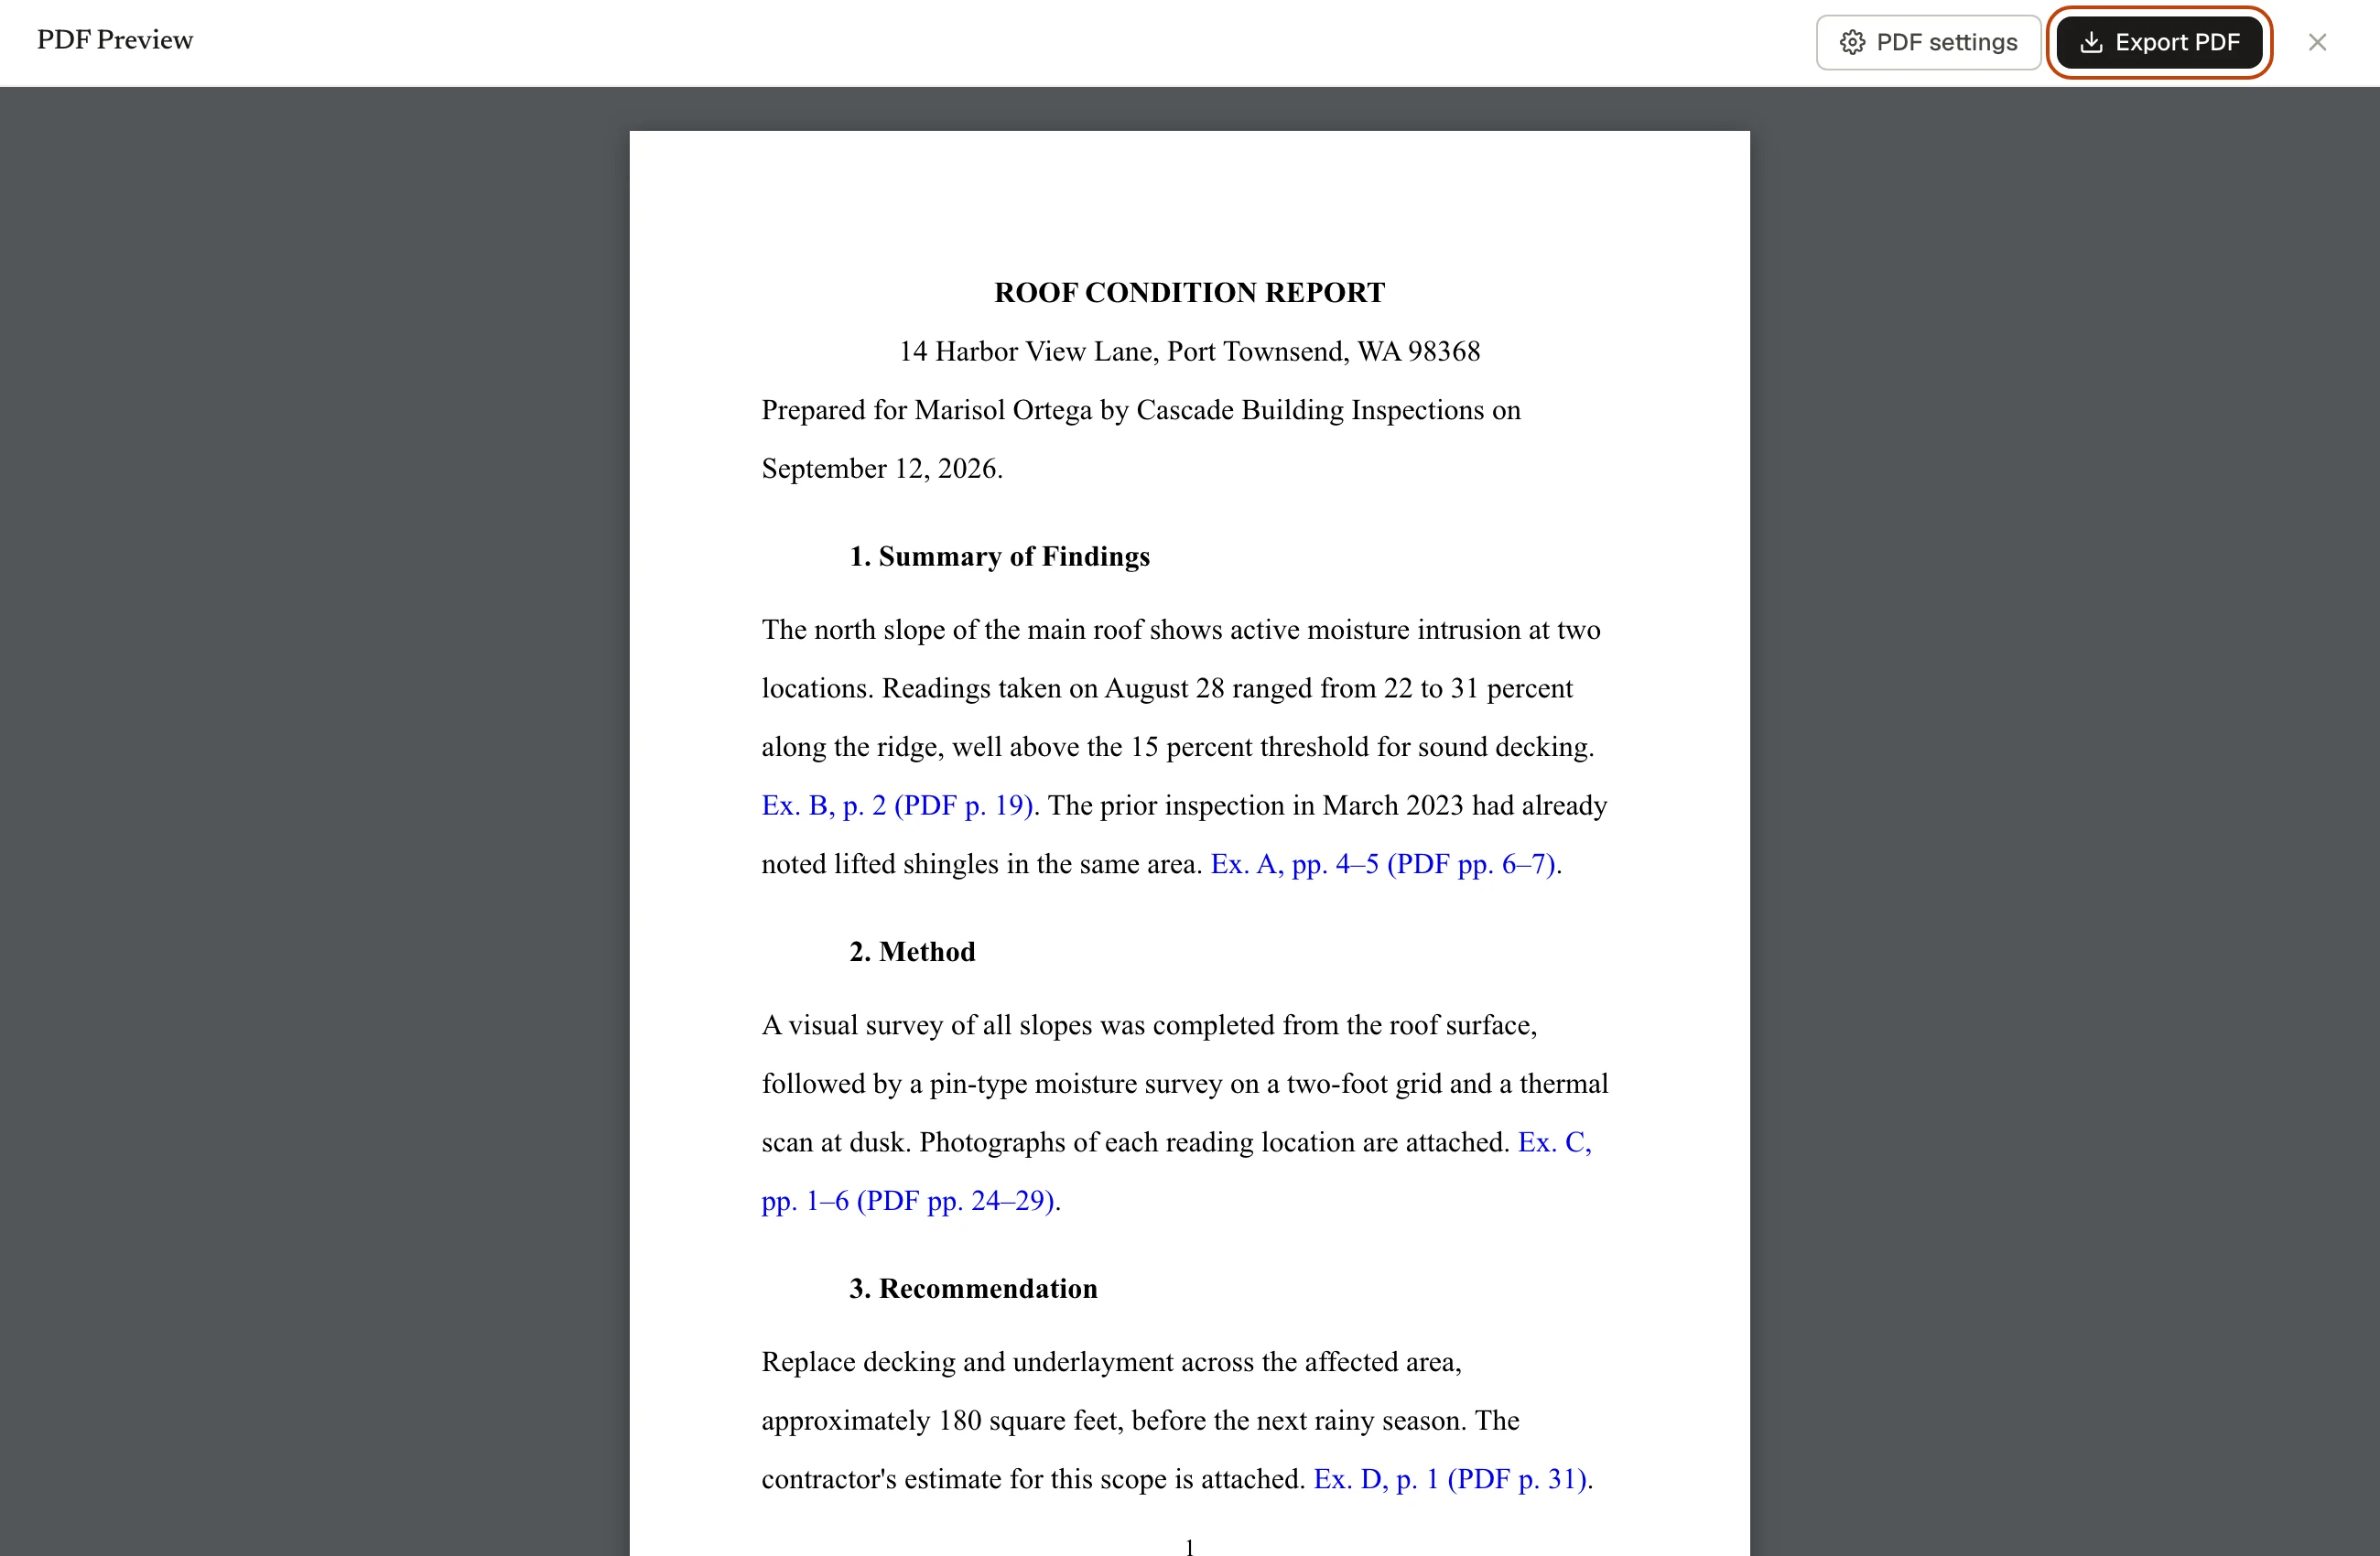
2. Click Export PDF
To reuse a document’s layout and text, open the Template menu in the toolbar and choose Save Current as Template…. The next project starts from your own drafting instead of a blank page.
Forms
Any PDF with fillable fields fills itself in from the project once you have shown Noktic where each detail goes.
Map a Form
- From the project, click Generate Forms, then Map a New Form.
- Drop in the PDF.
- Drag variables onto the fields they fill. Several pills go in one field, with typed text between them if the field wants Last, First or an address on three lines. Save.
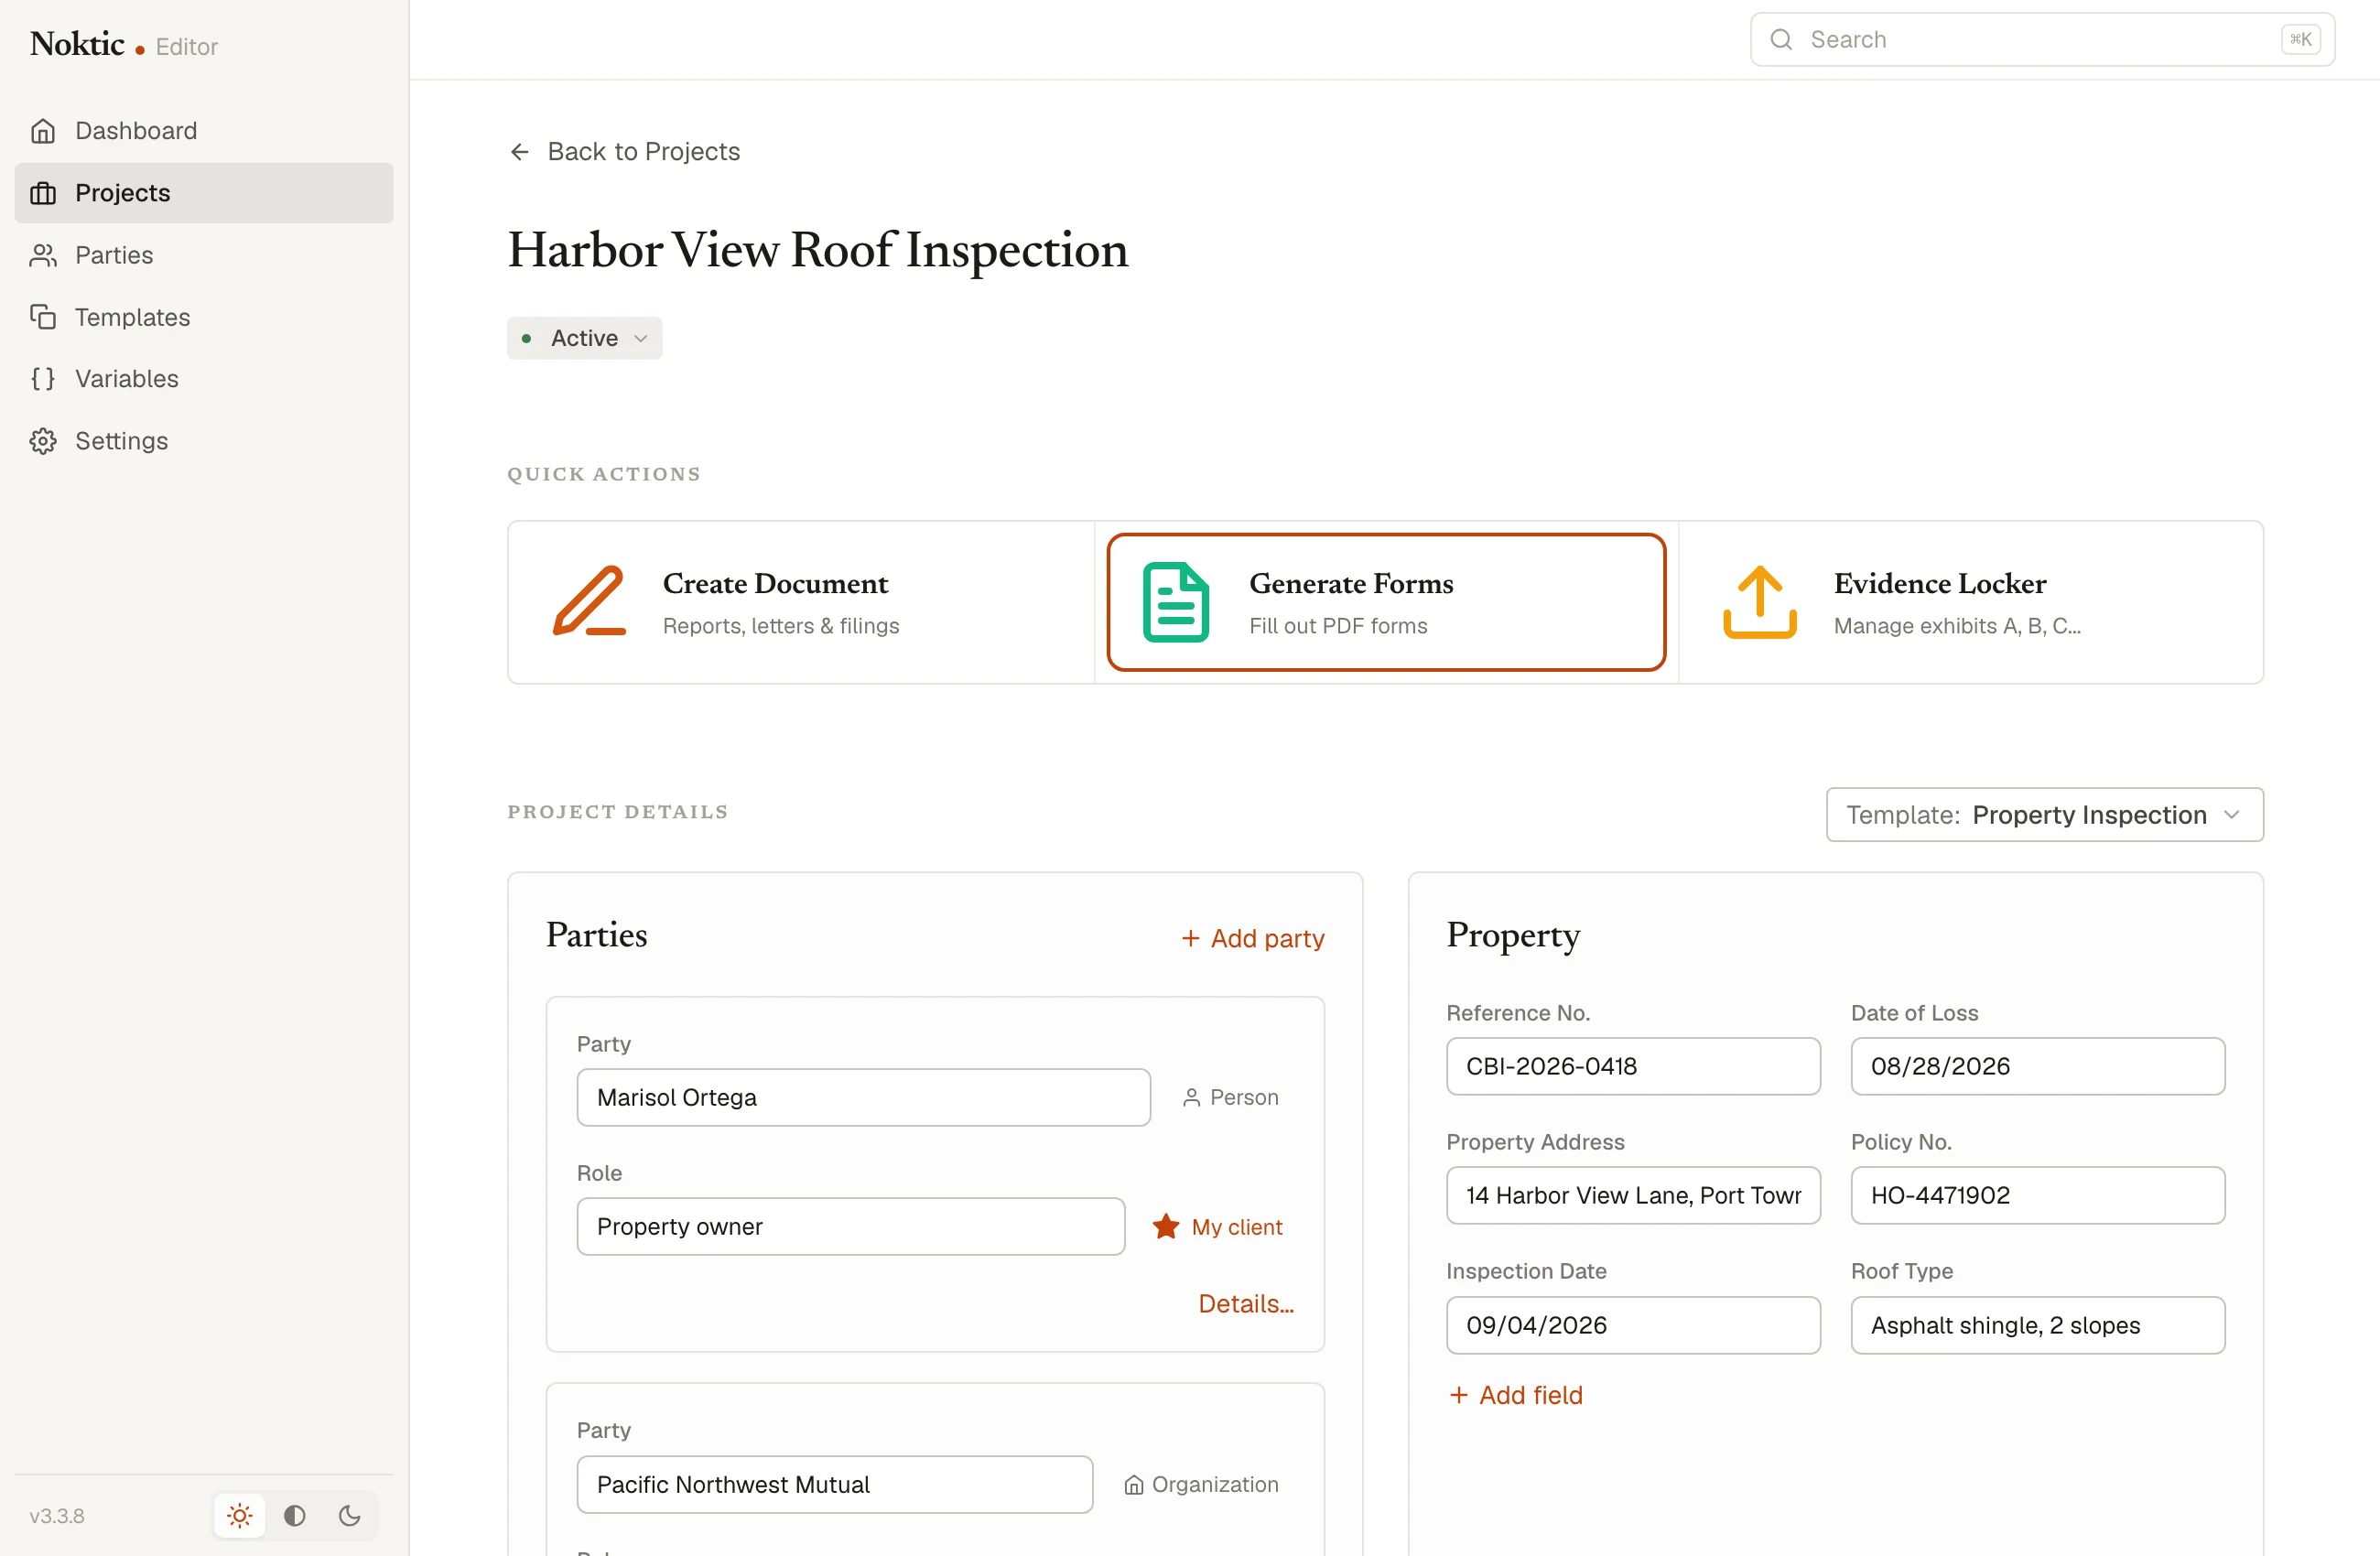
Generate Forms
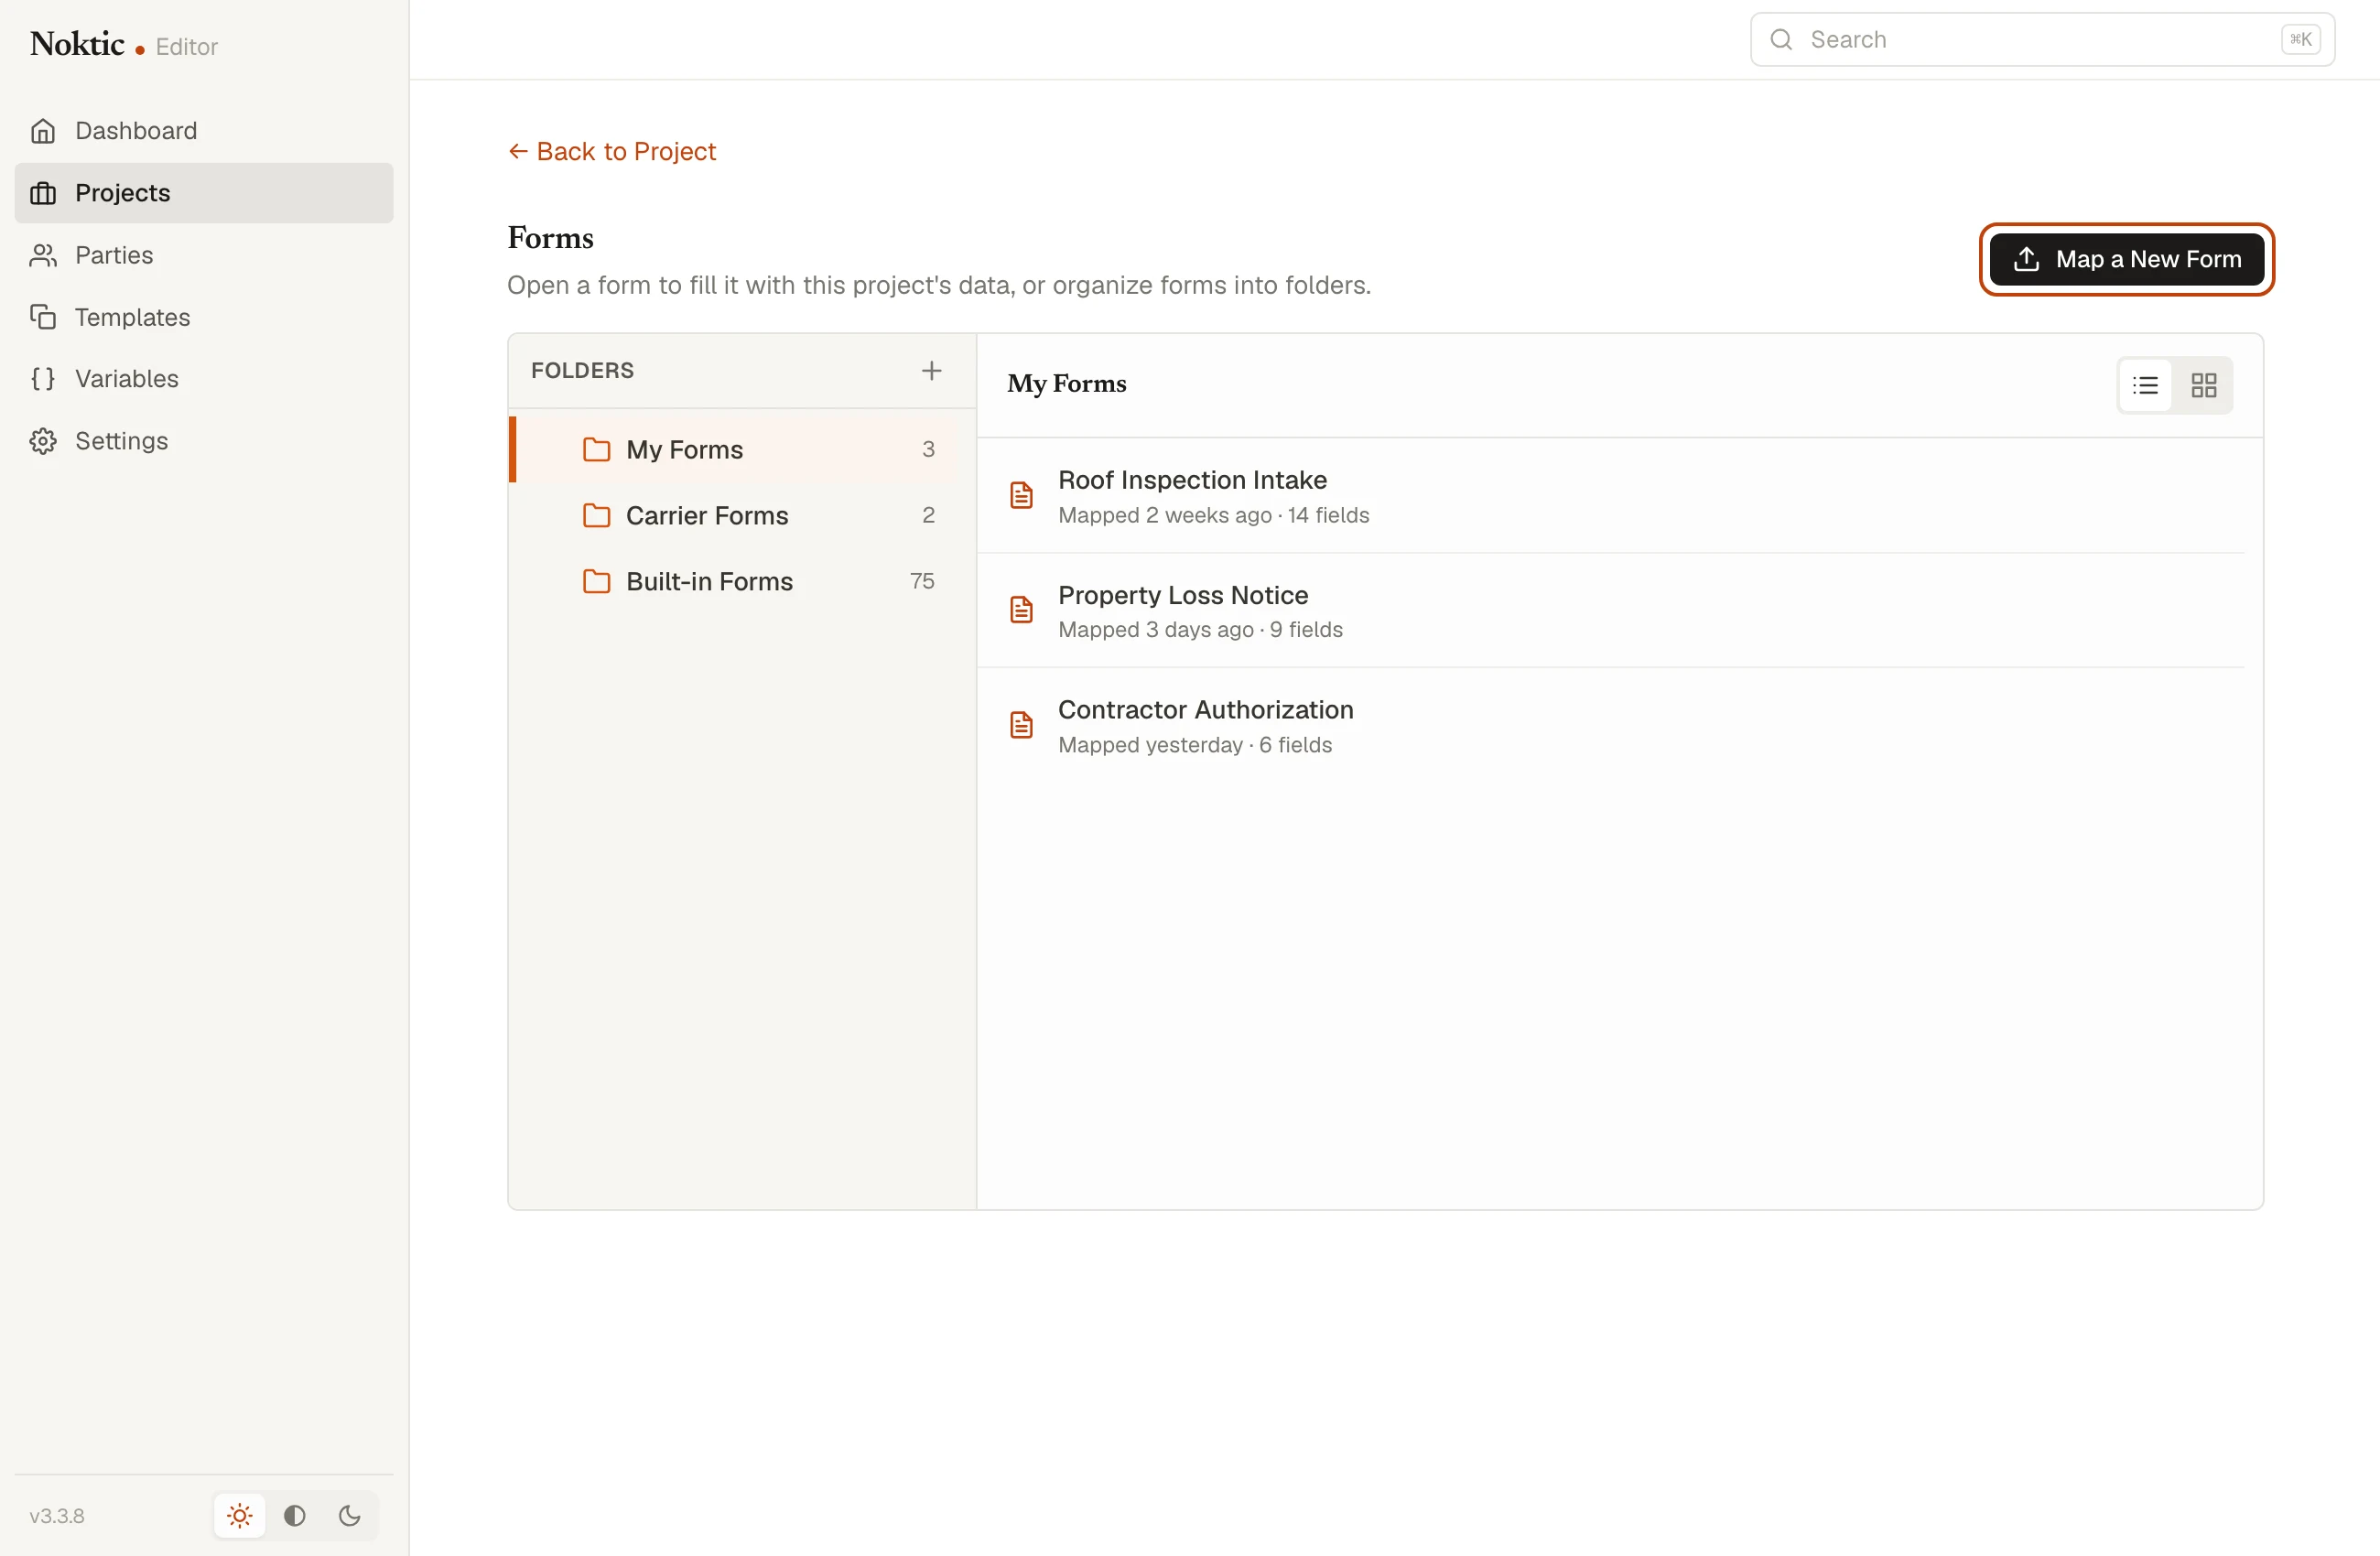
Map a New Form
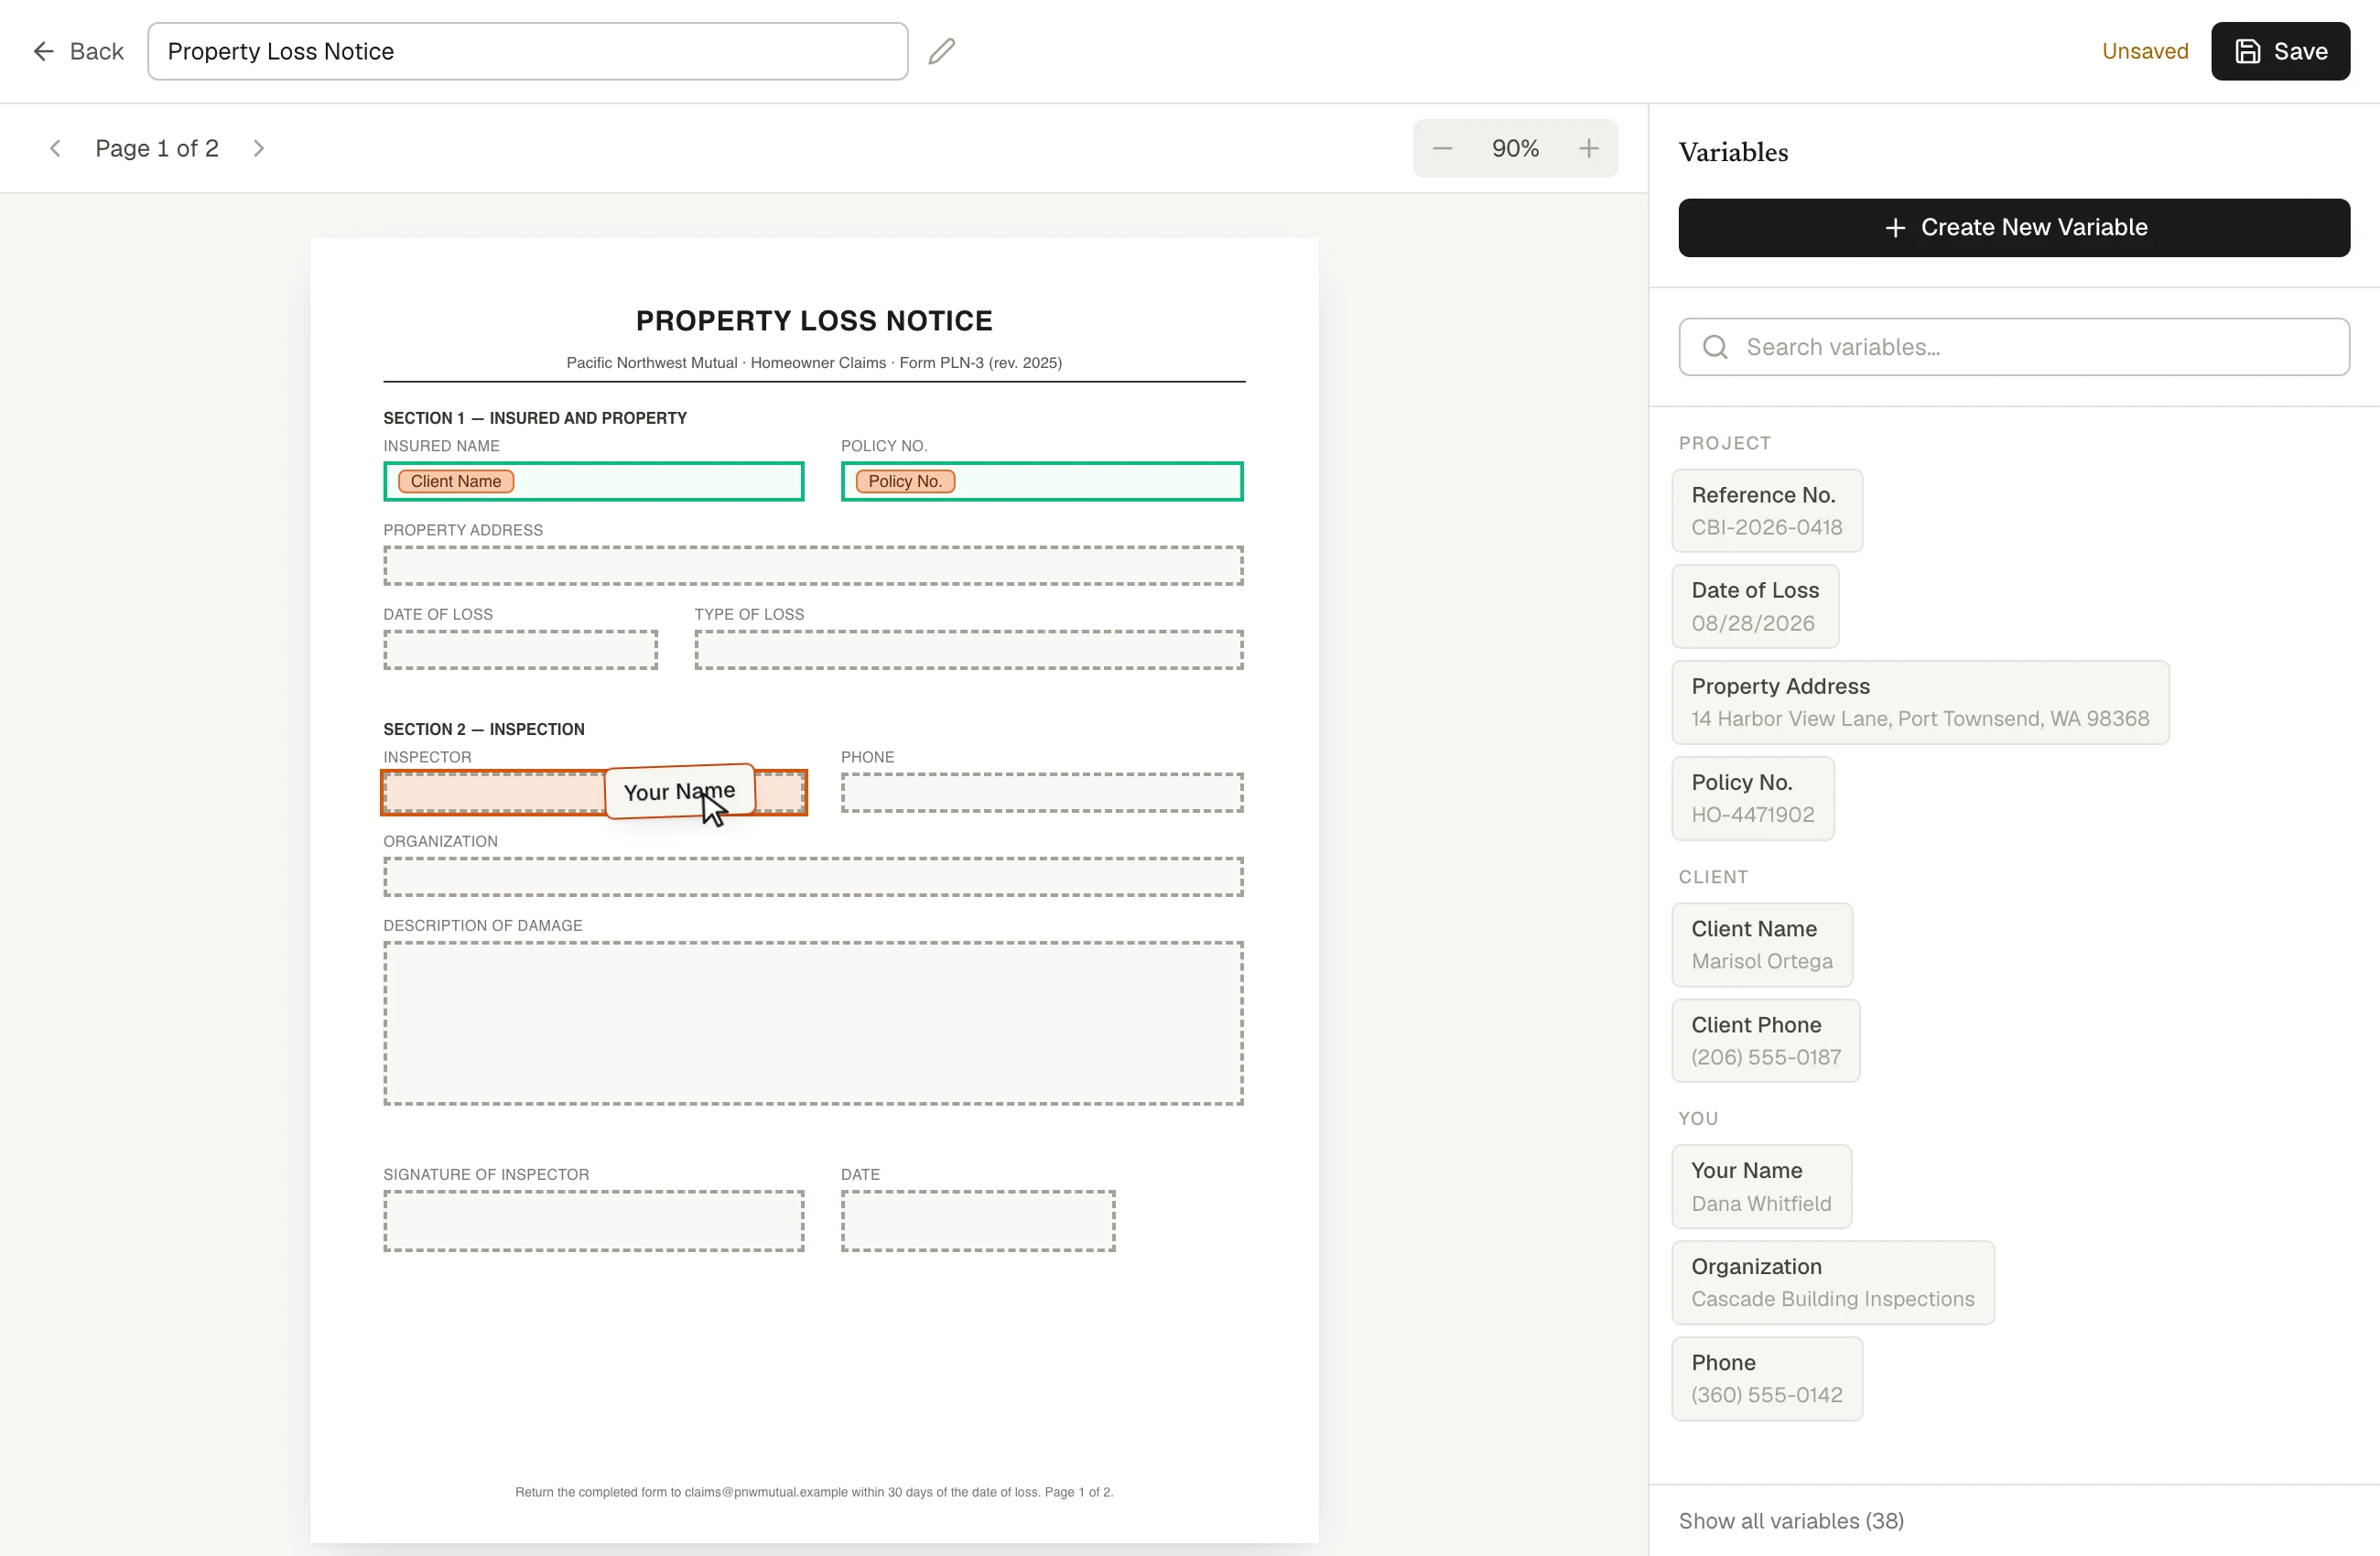
Drag variables onto fields
Mapped forms are saved under My Forms. Make your own folders to organize them. Noktic never maps a field for you, so a wrong value never quietly appears on a form you already sent.
Fill Out a Form
- From the project, click Generate Forms and choose a form you have mapped.
- It opens in the PDF Form Editor with the mapped fields already filled from the project.
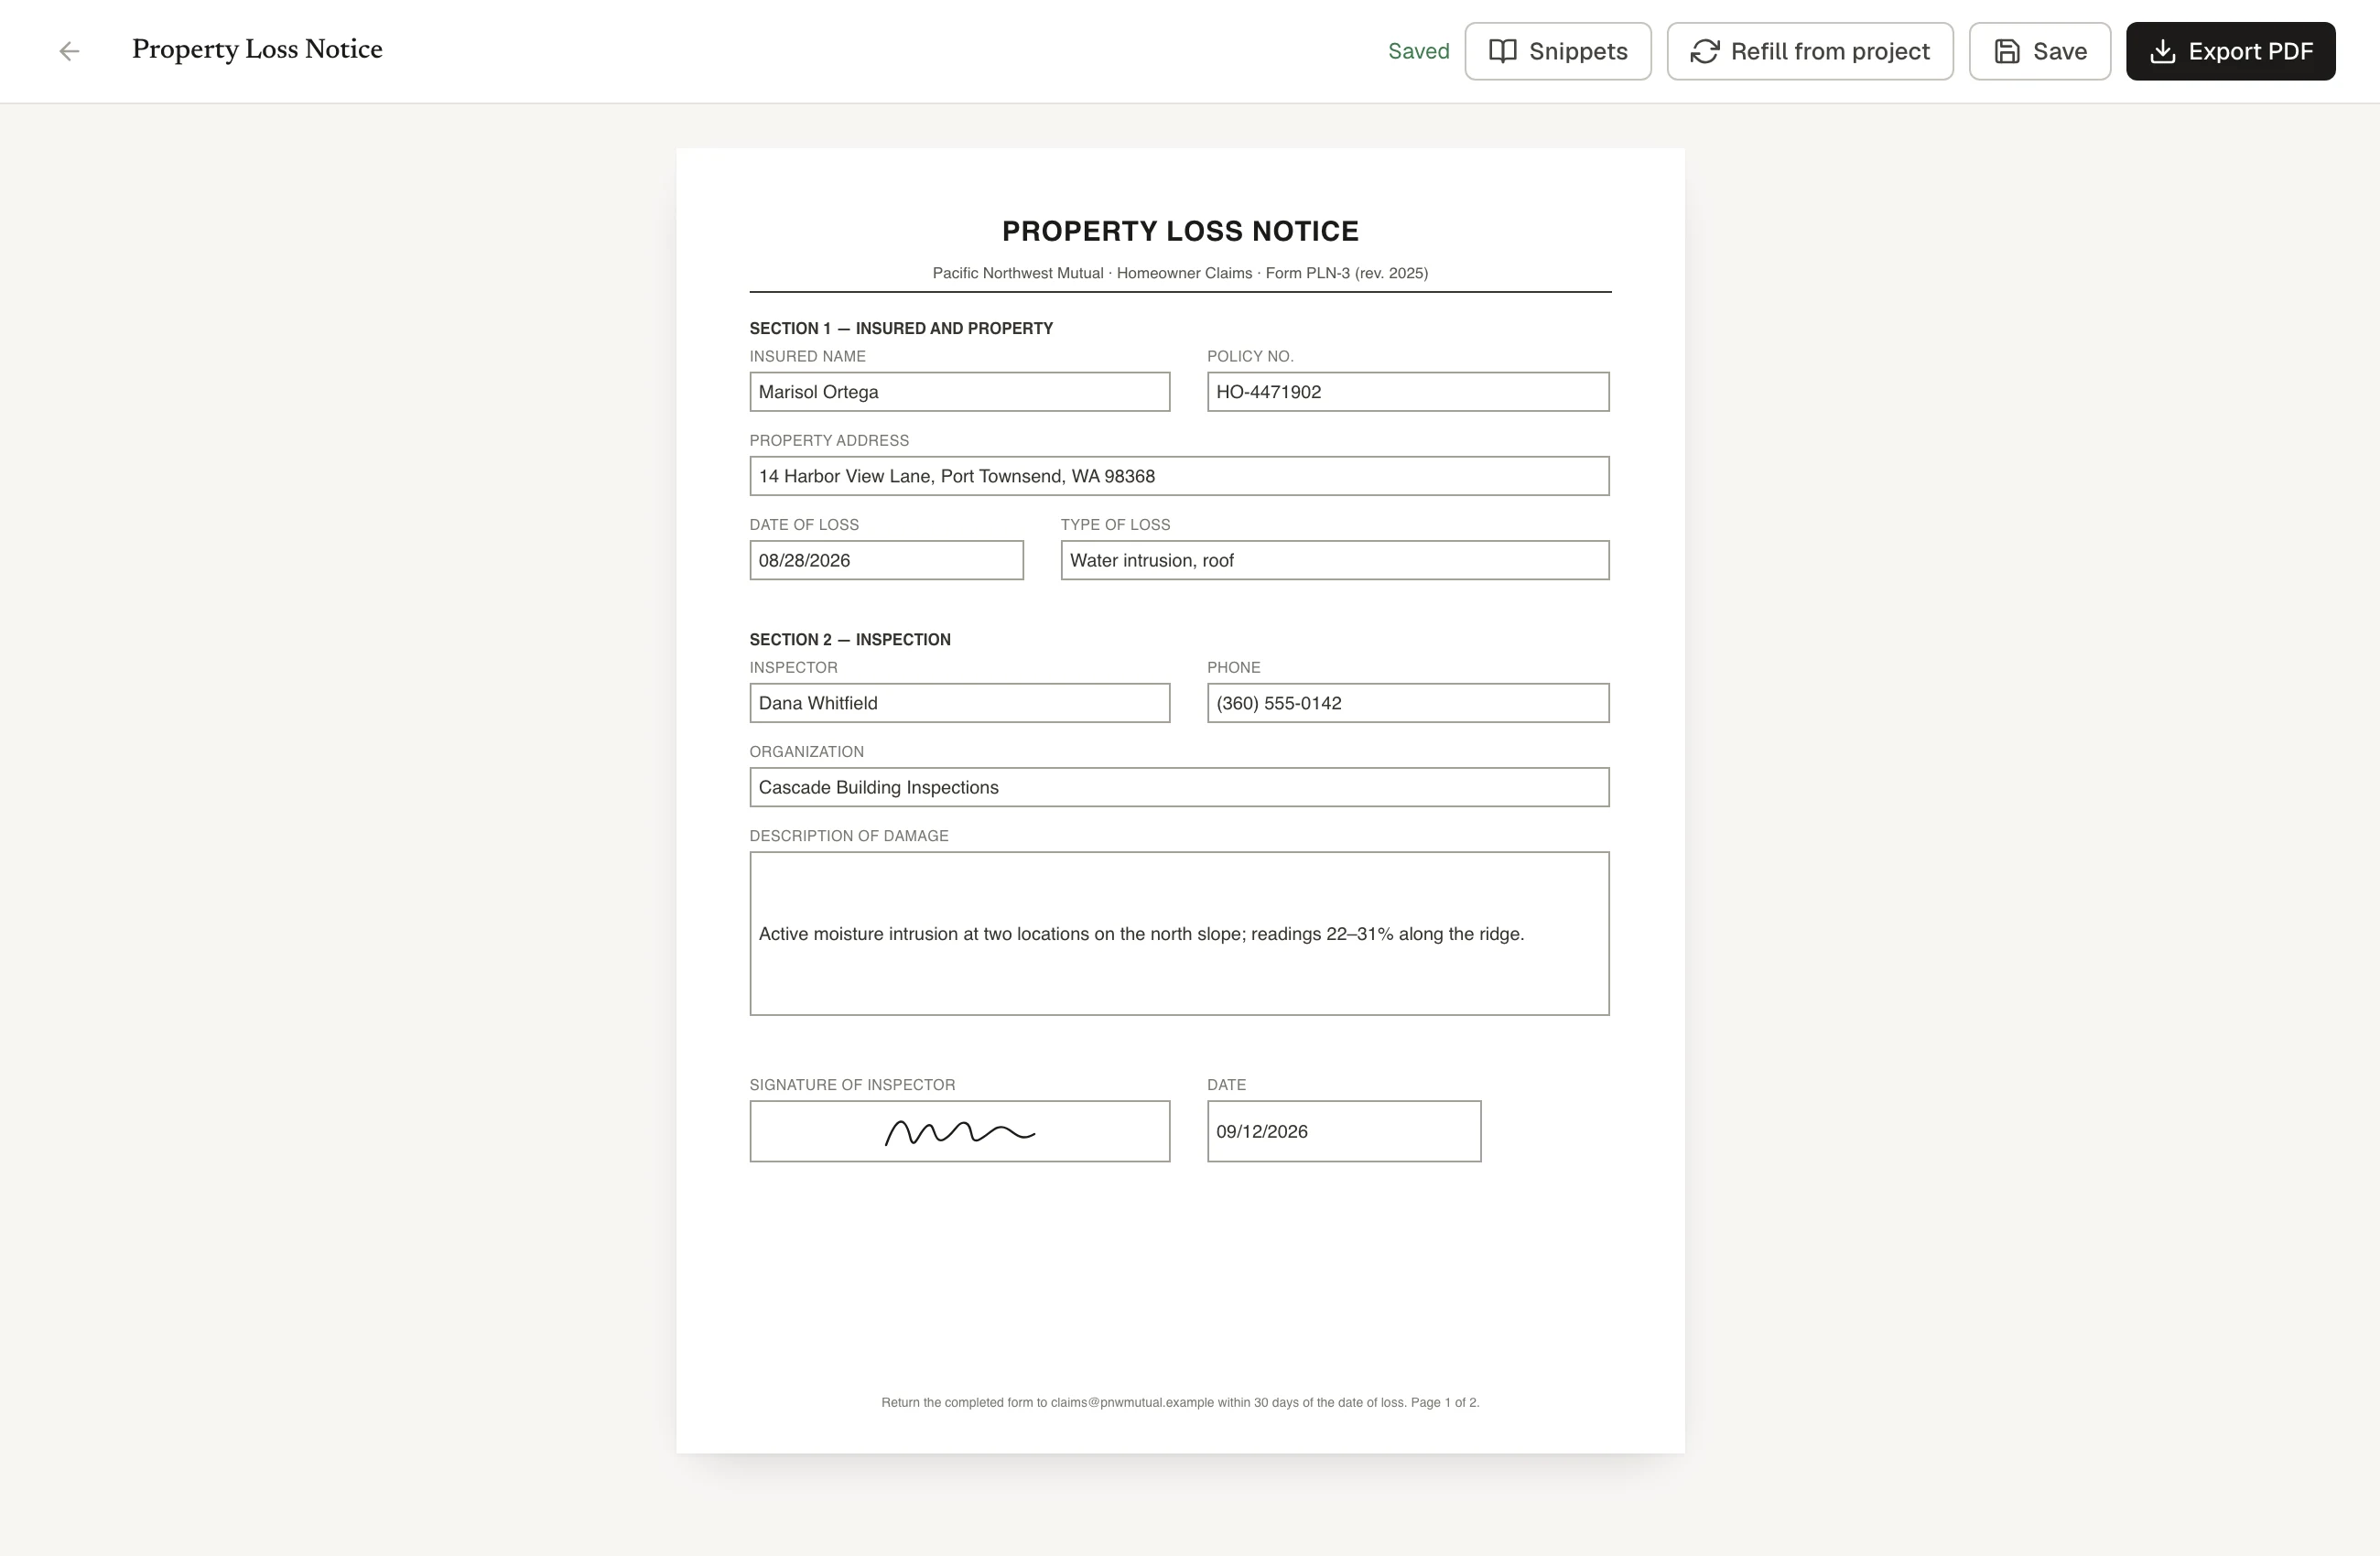
The form opens with the project's details already in its fields. - Fill in the rest, add a signature if the form takes one, and click Save. Drafts keep between sessions.
- Click Export PDF. The text goes into the PDF’s own fields, so it prints right and stays editable in any reader. The finished form is listed under Generated Forms on the project page.
Notes
- Everything stays on your computer. There is no account and no upload. Backup & Restore in Settings takes a complete copy in one step, and every backup is kept.
- Noktic exports to PDF. There is no Word export. To bring a document in from Word, paste it into the editor and set the formatting once in Page Setup.
- A license runs on one machine at a time. Move it to a new computer from inside the app.